If you’re working with Ubuntu or similar Linux distributions, you’re likely well-acquainted with the Advanced Package Tool (APT). It’s generally a fantastic system that makes installing, removing, and updating software feel like a walk in the park.
However, as developers, we often venture into using software from third-party sources, like Personal Package Archives (PPAs). This is where things can occasionally get a bit tricky, and you might find yourself staring at the frustrating “unmet dependencies” error, which effectively blocks new software installations.
This guide is my personal compilation of common strategies I use to tackle this exact issue.
Before diving into these solutions, I can’t stress this enough: it’s a smart move to back up your critical APT configuration files. If any of the fixes lead to unexpected behavior, you can easily roll back. The main files I always make sure to have copies of are:
/etc/apt/sources.list: This is the blueprint for where your system searches for software packages (your repositories)./var/lib/dpkg/status: This file keeps a detailed record of the status of every package known to your system.
This article was produced in collaboration with net2.com.

Resolving APT Dependency Issues
Read: How to Turn off error sound on Ubuntu 18.04
1. Giving Aptitude a Shot for Smarter Dependency Resolution
While apt (or its older sibling apt-get) is the default package manager on Ubuntu/Debian systems, I’ve found that aptitude is a powerful alternative. It often provides more detailed insights and has a knack for more intelligently resolving complex package conflicts.
It even offers a text-based interface that can help you visualize dependency chains and suggests various solutions to fix problems. If apt seems stuck, aptitude might just have the answer you’re looking for to resolve package conflicts on Linux.
Getting Aptitude Installed:
If aptitude isn’t already on your system, adding it is straightforward. Fire up your terminal and execute these commands:
sudo apt update
sudo apt install aptitude
You’ll likely be asked to confirm the installation; just press ‘Y’ and then Enter.
Using Aptitude to Install a Package:
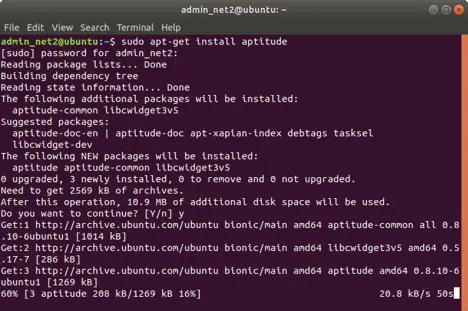
Now, let’s try installing the package that was giving you the “unmet dependencies” headache, but this time using aptitude:
sudo aptitude install PACKAGENAME
Don’t forget to replace PACKAGENAME with the actual name of the software you’re trying to install. aptitude will then analyze the dependencies. If it encounters conflicts, it will usually propose several potential fixes, such as downgrading a package, removing a conflicting one, or keeping certain packages at their current versions. Make sure to carefully review the suggested actions before you accept any solution.

Troubleshooting flowchart – (SVG) Click to enlarge
Read: How to list, start and stop services at boot time in Ubuntu
2. Tidying Up Your Local Package Cache
Sometimes, the root of an “unmet dependencies” problem isn’t a deep-seated conflict but rather a corrupted local package database or some leftover downloaded package files (.deb files) that are confusing. Cleaning APT’s cache can often resolve these kinds of situations. I typically use two main commands for this:
1. sudo apt clean:
This command completely wipes out the local cache of downloaded package files, which live in /var/cache/apt/archives/. It removes all .deb files stored there. This is great for freeing up disk space, but it means packages will need to be re-downloaded if you need to install them again later.
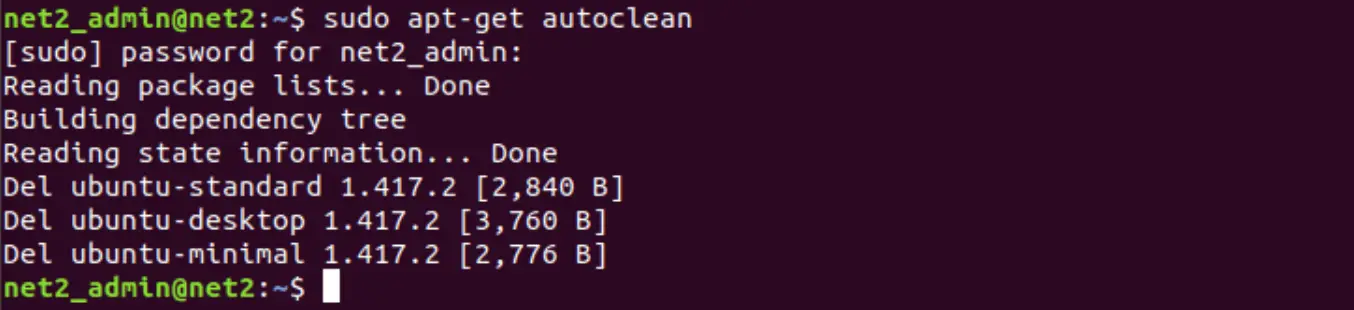
sudo apt clean2. sudo apt autoclean:
This one is a bit more conservative. It only removes downloaded package files (.deb files) from the cache that are no longer available in the repositories your system is configured to use. This usually means they’re outdated and can’t be installed anyway. It’s handy for freeing up some disk space without removing older versions that might still be available online and potentially needed.
sudo apt autocleanAfter running either clean or autoclean, I always make it a habit to refresh my package lists:
sudo apt updateThen, give installing your desired package another go using sudo apt install PACKAGENAME or sudo aptitude install PACKAGENAME. A fresh package list combined with a clean cache can often resolve those pesky dependency snags.

3. Enabling Additional Official Ubuntu Software Repositories
Occasionally, a dependency isn’t met simply because the required package is located in one of Ubuntu’s official repositories that isn’t currently enabled on your system (common culprits are ‘Universe’ or ‘Restricted’). Here’s how you can check and enable them using the graphical “Software & Updates” tool – a really useful part of Ubuntu software sources configuration:
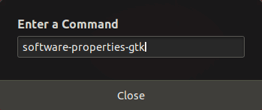
First, press Alt + F2. This will open a small “Run Command” input dialog.
Type software-properties-gtk into the box and hit Enter. This launches the “Software & Updates” application.

In the “Software & Updates” window, navigate to the “Ubuntu Software” tab.
Here, you’ll want to ensure that the checkboxes are ticked for at least these standard repositories:

Make sure ‘Universe’ is enabled, as a lot of packages depend on software found within it.
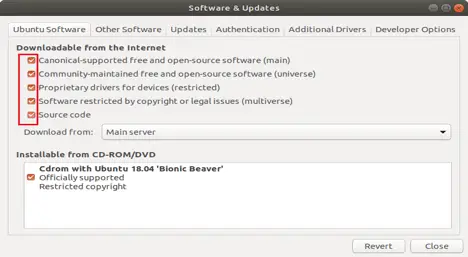
If you’ve made any changes by ticking or unticking boxes, click the “Close” button. Your system will likely prompt you to reload the package information. Go ahead and click “Reload” to update APT’s knowledge base with packages from any newly enabled sources.
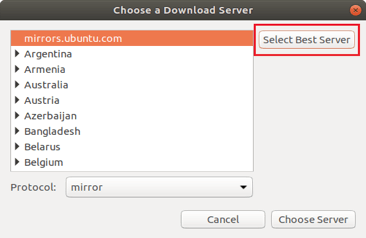
While you’re in the “Ubuntu Software” tab, here’s a pro-tip: you can also try optimizing your download server. Click the dropdown menu next to “Download from:”
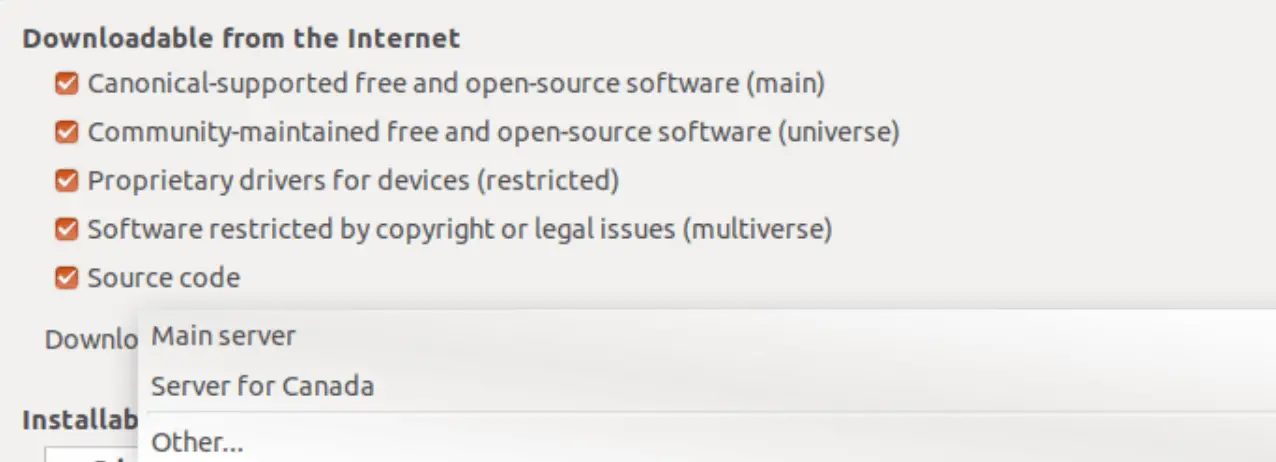
Choose “Other…” and then click the “Select Best Server” button. Ubuntu will run some quick tests to find the fastest mirror (server) for your geographical location.
Just wait for these tests to finish up.
Once a server is automatically selected, click “Choose Server” and then “Close”. You’ll likely be prompted to reload package information again if changes were made.
Finally, pop open your terminal once more and refresh the package lists:
sudo apt update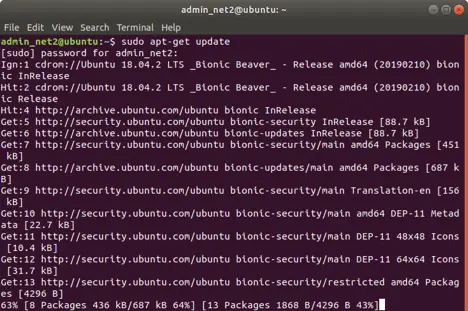
Now, try installing that problematic package again. Enabling the correct repository might have just provided the missing piece of the puzzle.
Read: Troubleshooting Audio Issues (Crackling, No Sound) on Ubuntu 24.04 with PipeWire
4. Attempting an Automatic Fix with -f (Fix Broken)
APT has a really handy option, -f (or its long-form --fix-broken), which is specifically designed to try and automatically mend broken dependency issues. This is often my first go-to for how to fix broken packages Ubuntu encounters.
Running the Command:
Instead of trying to install a specific package, you just run the install command with the -f flag, like this:
sudo apt install -f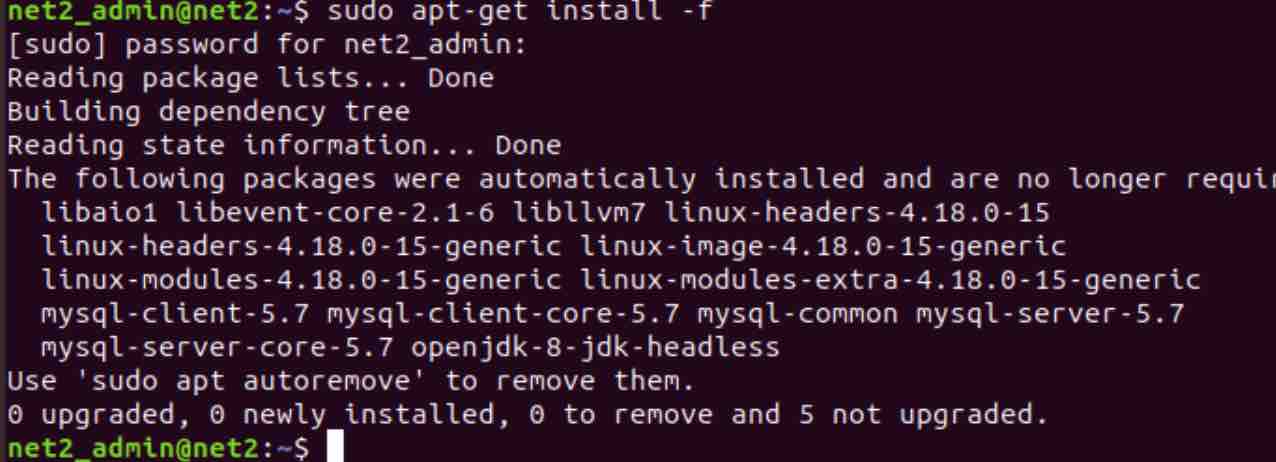
APT will then analyze your system’s current package state and figure out what actions are necessary (like installing missing packages or removing conflicting ones) to satisfy all dependencies. Always review the proposed changes carefully before confirming with ‘Y’.
After running apt install -f, I’ve found it can sometimes be beneficial to also run the following command. This attempts to configure any packages that were installed but might have been left in an unconfigured state:
sudo dpkg --configure -a
Interpreting the Output:
If, after running sudo apt install -f, the output includes a line similar to this:
0 upgraded, 0 newly installed, 0 to remove and 1 not upgraded.This often signals that while some issues might have been addressed, there’s still at least one package causing trouble that the automatic fix couldn’t resolve directly (perhaps it’s being “held back”). In such scenarios, it might be worth trying the sudo apt install -f command one more time, just in case the first pass resolved some prerequisite issues. If it still reports “X not upgraded”, you may need to investigate these held packages, which we’ll cover next.
5. Dealing with Held Packages Using dist-upgrade
Sometimes, packages are intentionally “held back” by the package manager. This can happen during complex system upgrades or when installing a new package would necessitate removing another essential one, leading to dependency conflicts that a simple apt upgrade or even apt install -f won’t resolve on its own. The dist-upgrade command is more assertive and can sometimes resolve these situations by intelligently upgrading or even removing packages to satisfy all dependencies.
Using dist-upgrade:
First, as always, make sure your package lists are current:
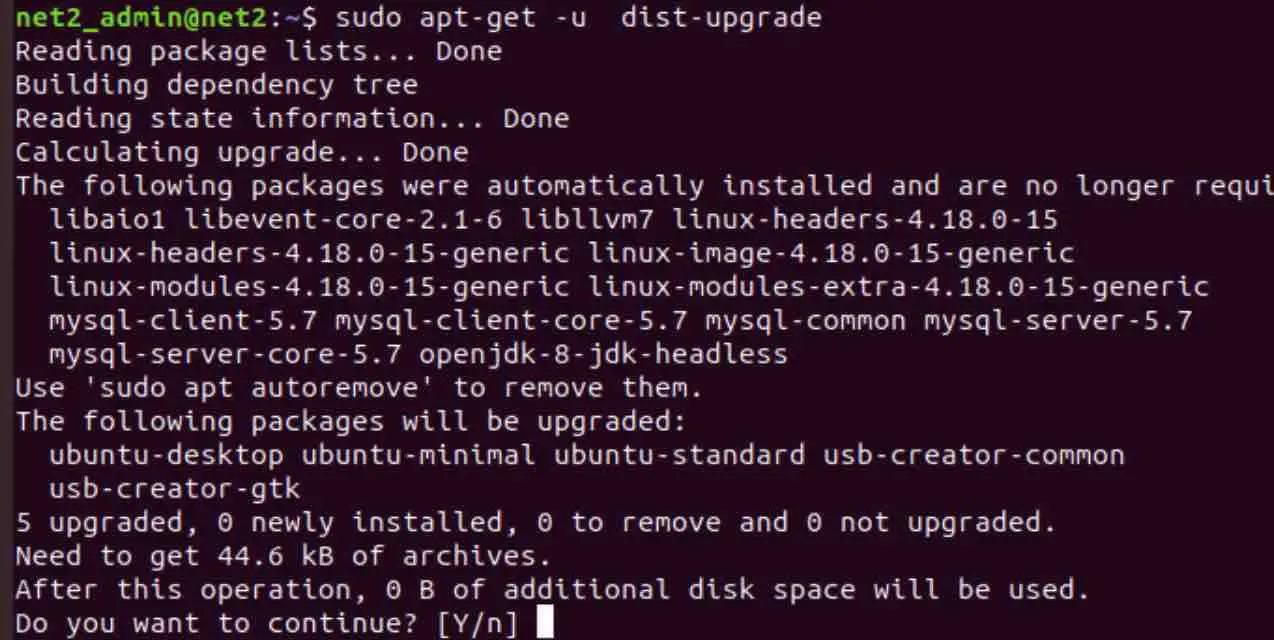
sudo apt updateThen, execute the dist-upgrade command:
sudo apt dist-upgradePay very close attention to the list of changes APT proposes. dist-upgrade might suggest removing packages that you consider important. Always review this list meticulously before proceeding with ‘Y’.
Caution: While dist-upgrade is generally safe, it has the potential to make significant changes to your system, including removing packages. Always double-check the proposed actions before confirming.
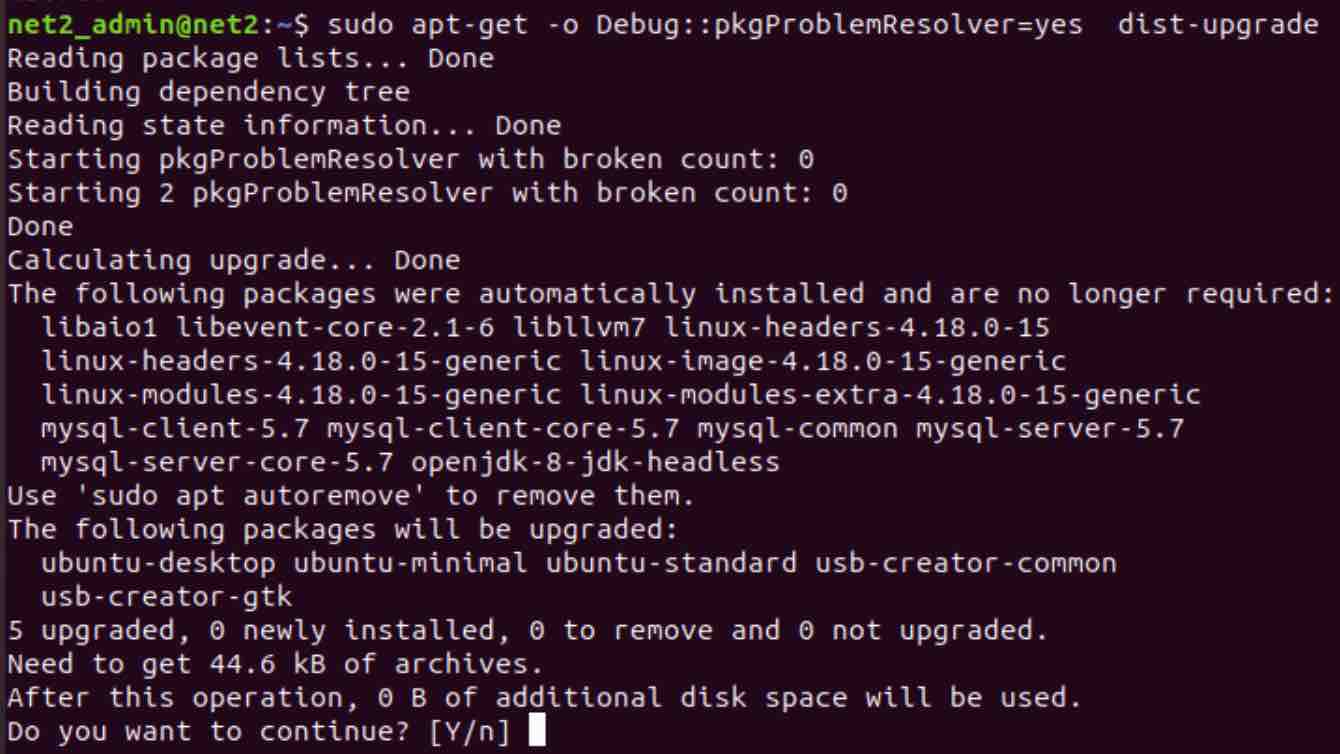
Debugging dist-upgrade:
If dist-upgrade still fails or continues to report held packages, you can try running it with a debugging flag. This can give you more insight into APT’s conflict resolution process:
sudo apt -o Debug::pkgProblemResolver=yes dist-upgradeThe output will be much more verbose, potentially showing you the internal logic APT is using while trying to resolve conflicts. This detailed information might help you pinpoint the exact package that’s causing the deadlock.
Dealing with Persistently Held Packages:
If, even after trying dist-upgrade (with or without the debug mode), you still see output like:
0 upgraded, 0 newly installed, 0 to remove and 3 not upgraded.This strongly suggests that specific packages are being held back due to unresolved conflicts. You’ll likely need to investigate these packages individually. The output of apt list --upgradable or the dist-upgrade command itself usually names the held packages. In some cases, you might need to consider manually removing one of the conflicting packages (do this very carefully!) to break the deadlock.
Before you actually remove a package you suspect is causing the hold, I highly recommend simulating the removal first. Use the --dry-run option to see the potential consequences without making any actual changes to your system:
sudo apt remove --dry-run HELD_PACKAGENAMEReplace HELD_PACKAGENAME with the actual name of the package that’s being held. If the simulation looks acceptable (i.e., it doesn’t propose removing half your essential system components!), you could then run the command without --dry-run. After removing the problematic package, try running sudo apt install -f and sudo apt dist-upgrade again.
6. Managing Troublesome PPAs (Personal Package Archives)
Personal Package Archives (PPAs), often hosted on Launchpad, are a fantastic way for developers to distribute newer software versions or applications not found in the official Ubuntu repositories. While incredibly useful, PPAs can sometimes be the source of “unmet dependencies” errors.
This is particularly true if a PPA provides a package that conflicts with one from the official repositories or another PPA. A PPA causing dependency issues is a common scenario I encounter.
Disabling PPAs:
Disabling a PPA tells your system to stop checking it for updates or new software. However, it leaves any packages you’ve already installed from that PPA on your system. This can be a quick diagnostic step to see if a specific PPA is the culprit behind your dependency woes.
To manage your PPAs graphically:
- Press
Alt + F2, typesoftware-properties-gtk, and press Enter. - Navigate to the “Other Software” tab.
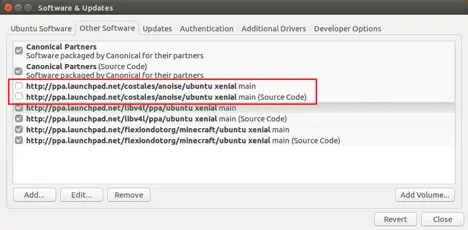
You’ll see a list of all enabled external repositories, including your PPAs. Typically, each PPA will have two entries (one for compiled packages and one for source code). To disable a PPA, simply uncheck both of its corresponding boxes.
After disabling the PPA(s) you suspect might be causing issues, close the window. You’ll be prompted to reload package information – do so. Then, try running sudo apt update followed by sudo apt install -f or your original installation command.
Purging PPAs:
Purging a PPA is a more decisive action. It not only disables the PPA but also attempts to downgrade any packages installed from that PPA back to the versions available in the official Ubuntu repositories. This is often the most effective method to resolve PPA-induced conflicts and a good way to safely remove PPA Ubuntu configurations.
For this, you’ll need the ppa-purge tool. If you don’t have it installed already, you can get it with:
sudo apt update
sudo apt install ppa-purge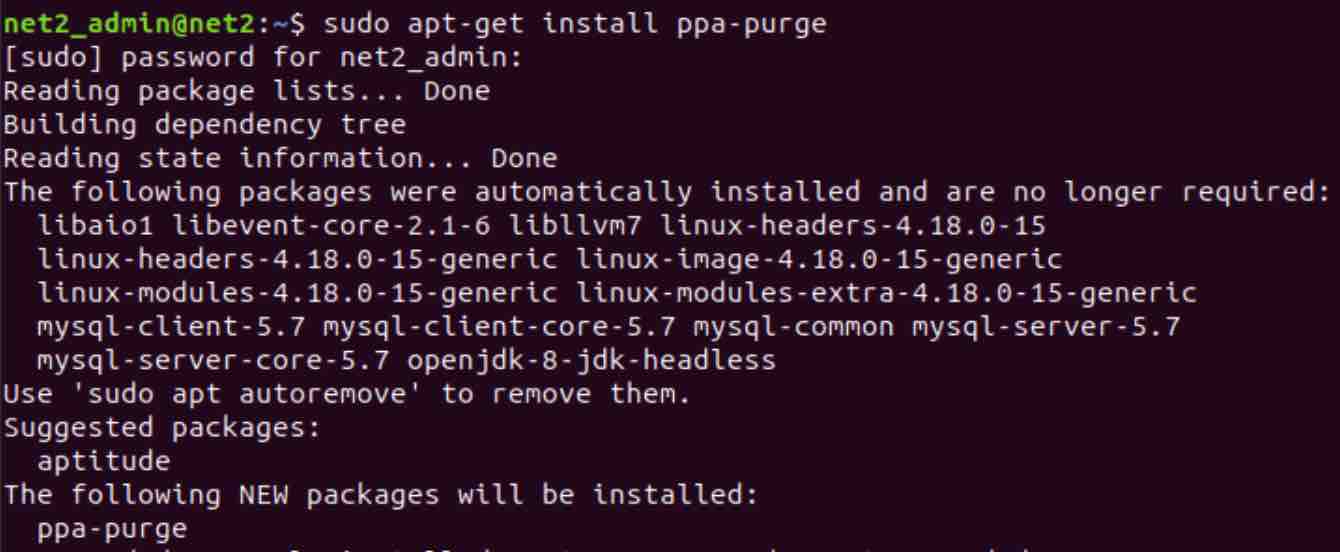
To purge a specific PPA, use the following command, making sure to replace ppa:owner/name with the actual identifier of the PPA (for example, ppa:graphics-drivers/ppa):
sudo ppa-purge ppa:owner/nameppa-purge will show you which packages are slated for downgrading or removal. Review this list carefully before confirming. After the purge is complete, run sudo apt update and then try your installation again.
Manually Purging a PPA When APT is Severely Broken
In some rare and unfortunate situations, APT itself might be so broken that you can’t even install ppa-purge. If you find yourself in this predicament, here’s a manual workaround. Use this with caution, and remember you might need to adapt the URLs if you’re on a different Ubuntu version or system architecture:

- Download necessary packages manually:First, create a temporary directory and navigate into it.
mkdir ~/ppa-purge-manual && cd ~/ppa-purge-manualThen, download
ppa-purgeand its dependencies. The example URLs below are for a specific version; you should search onpackages.ubuntu.comfor the correct versions for your system if these don’t work.# Example URLs - find appropriate ones for your system using packages.ubuntu.com wget http://archive.ubuntu.com/ubuntu/pool/universe/p/ppa-purge/ppa-purge_0.2.8+bzr63_all.deb wget http://archive.ubuntu.com/ubuntu/pool/main/a/aptitude/aptitude-common_0.8.13-3ubuntu1_all.deb # You might also need the core aptitude package depending on what's broken: # wget http://archive.ubuntu.com/ubuntu/pool/main/a/aptitude/aptitude_0.8.13-3ubuntu1_amd64.deb - Install the downloaded packages using
dpkg:sudo dpkg -i . var wpcf7 = {"apiSettings":{"root":"https:\/\/net2.com\/wp-json\/contact-form-7\/v1","namespace":"contact-form-7\/v1"},"cached":"1"};