Sometimes, when you are not sure about leaving windows but want to try out Linux with full hardware capabilities unlike a virtual machine, you may need to dual boot your machine. In this guide, you will know how to dual boot Fedora Linux with Windows 10.
Freeing Up Space for Dual Boot
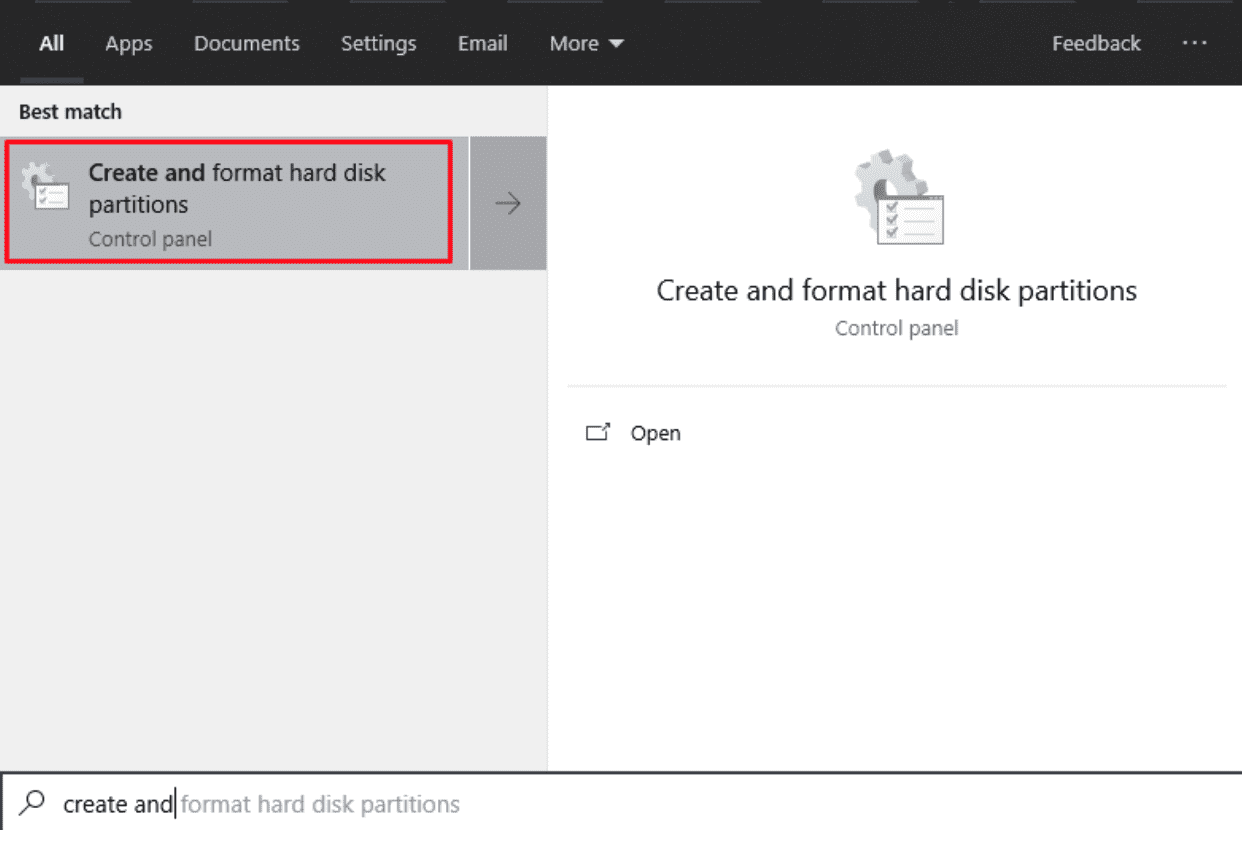
In order to install Fedora alongside Windows, we need to free up some space on which we can install it. To free up space, search for “create and format hard disk partitions” in Windows Start menu.
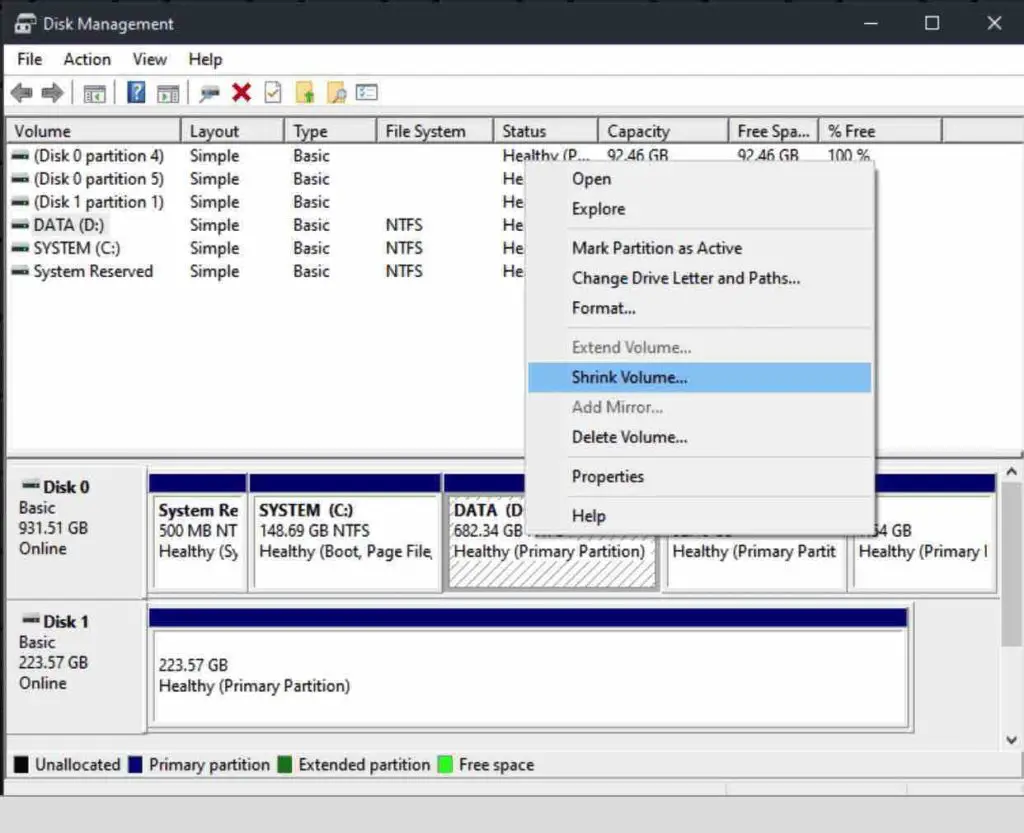
Once the program opens, select any drive that you would like to shrink. By shrinking the partition size, you will be emptying up the space required for Fedora.
To shrink the partition, right click on the partition and select “Shrink Volume…”
In the following dialog box “Enter the amount of space to shrink in MB”. Here you can free up the required space. Just make sure that you are freeing up at least 20GB to give Fedora a chance to perform well.
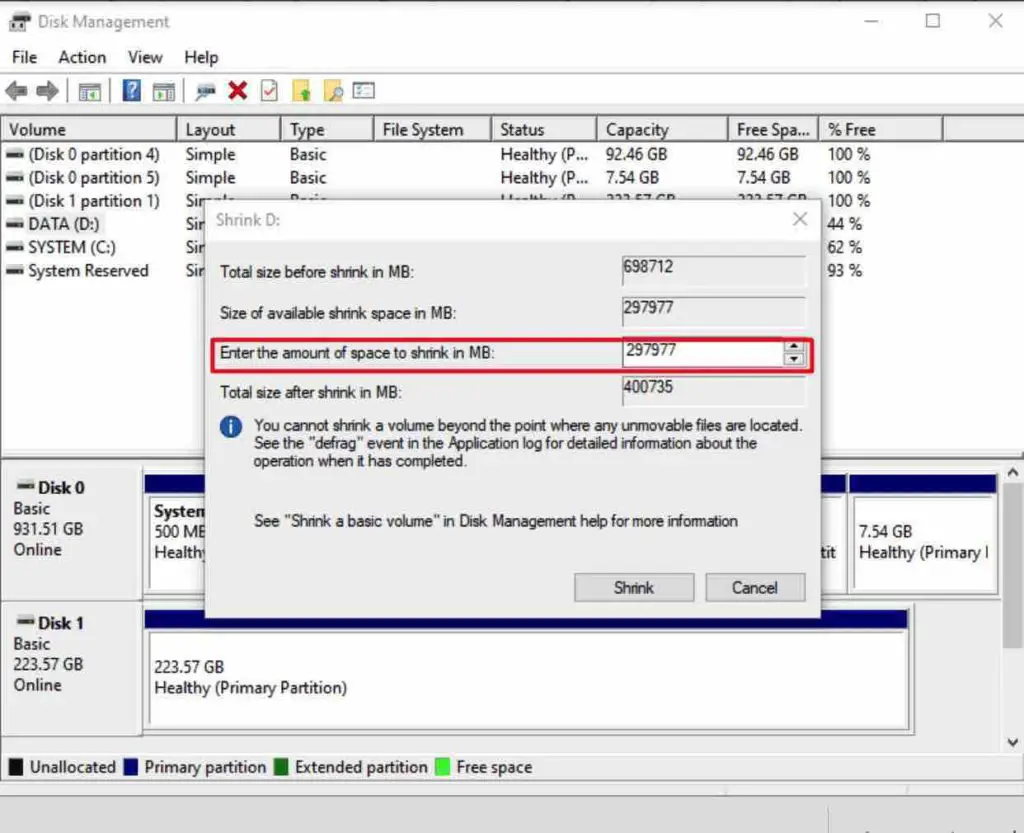
Once you are done with the configurations, click “Shrink” and Widows will shrink the volume to your desired value. When it completes the process, you are ready to install Fedora in your machine.
Installation
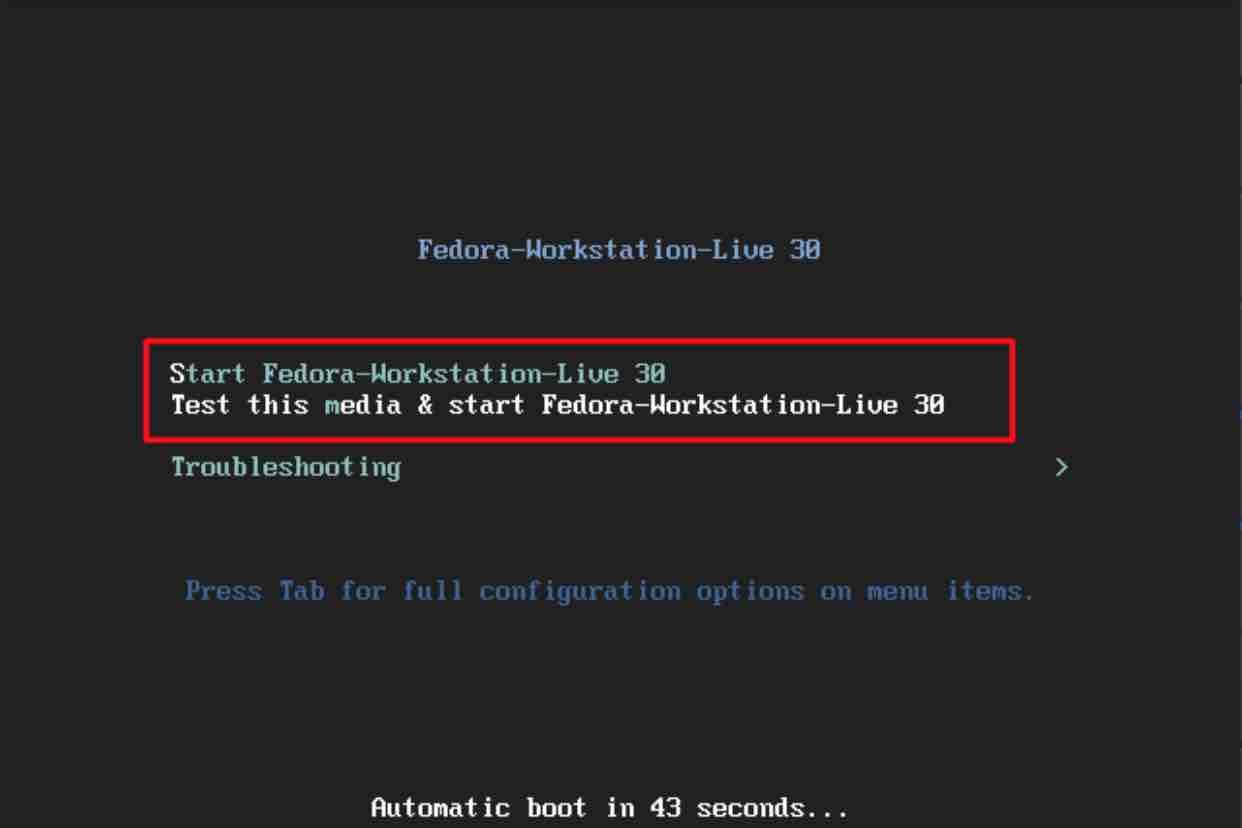
Once you are ready to install Fedora, just insert the live USB and boot into it. When you boot into the USB, you will be presented with two options, “Start Fedora” and “Test & Start Fedora”
- Start Fedora (1st Option): It will directly start the Fedora live boot without checking the image file.
- Test & Start Fedora (2nd Option): It will first check the boot media to evaluate if the image file was tampered with or not, if not then only it will boot.
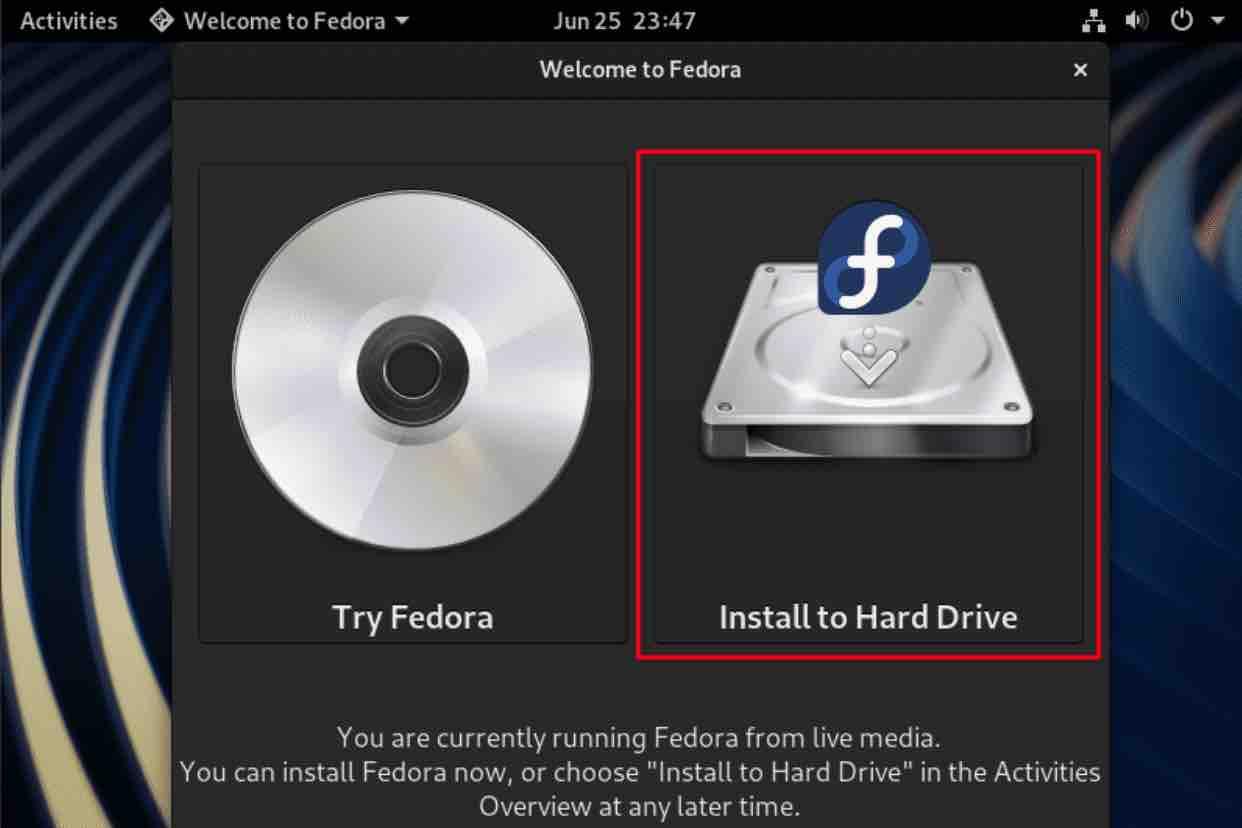
Once you get to the below screen, you can select either of the options.
- Try Fedora: If you want to just test the Fedora without installing it, go with this option
- Install to Hard Drive: As we are going to install Fedora, we will be going with this option
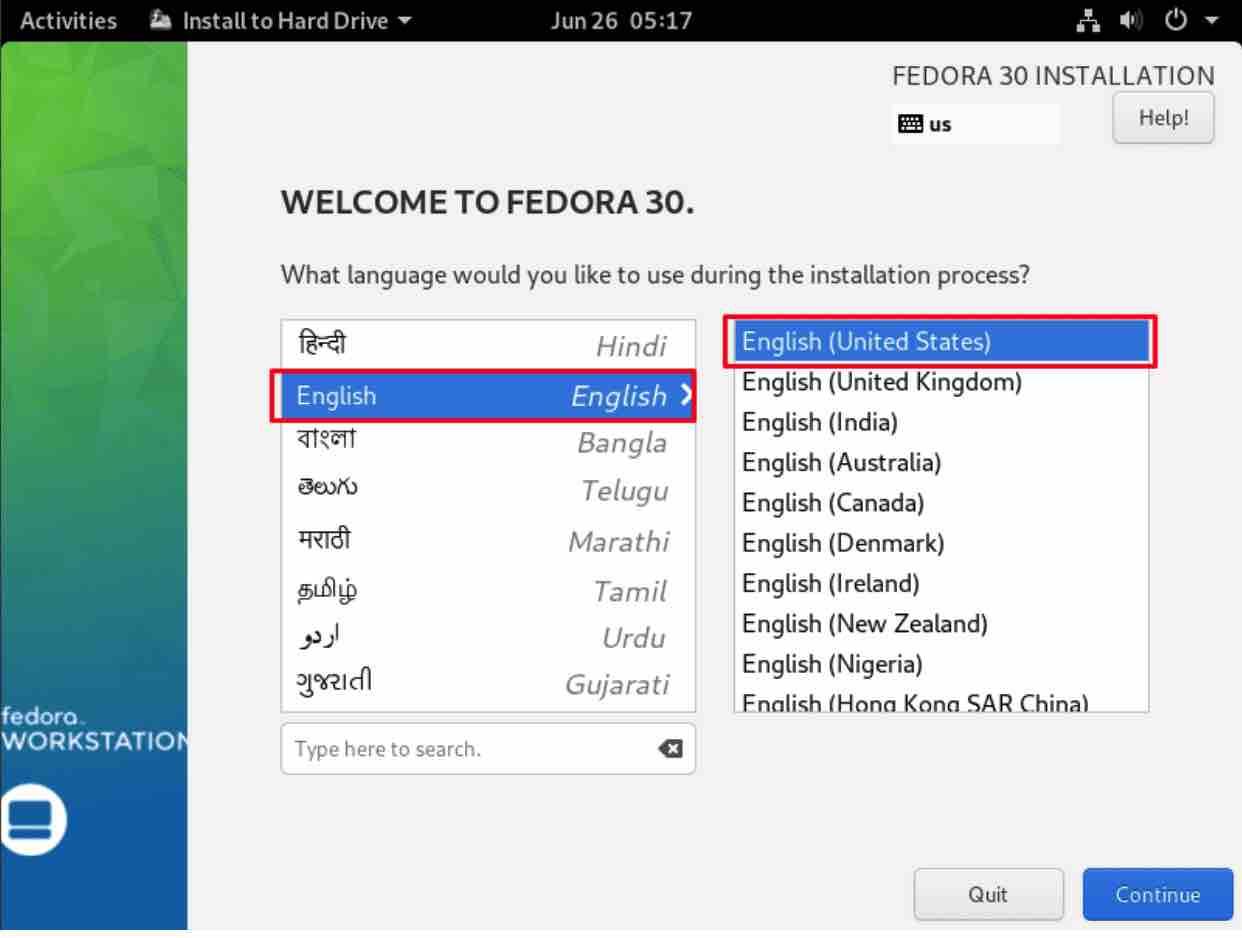
Once you are presented with an installation wizard, first you will have to select a preferred language. You can choose anything that you prefer, but here I will choose the English US version. Once done, click on continue.
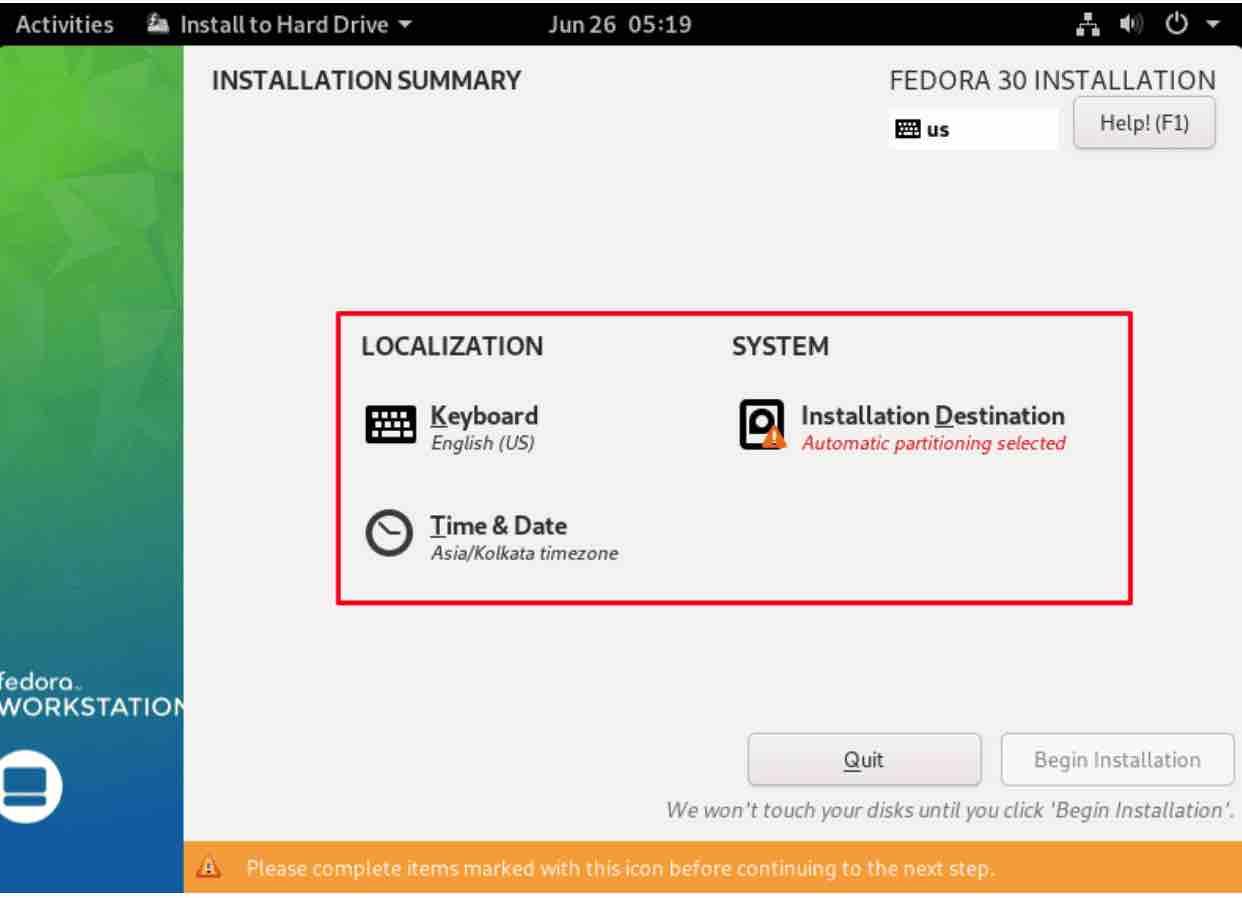
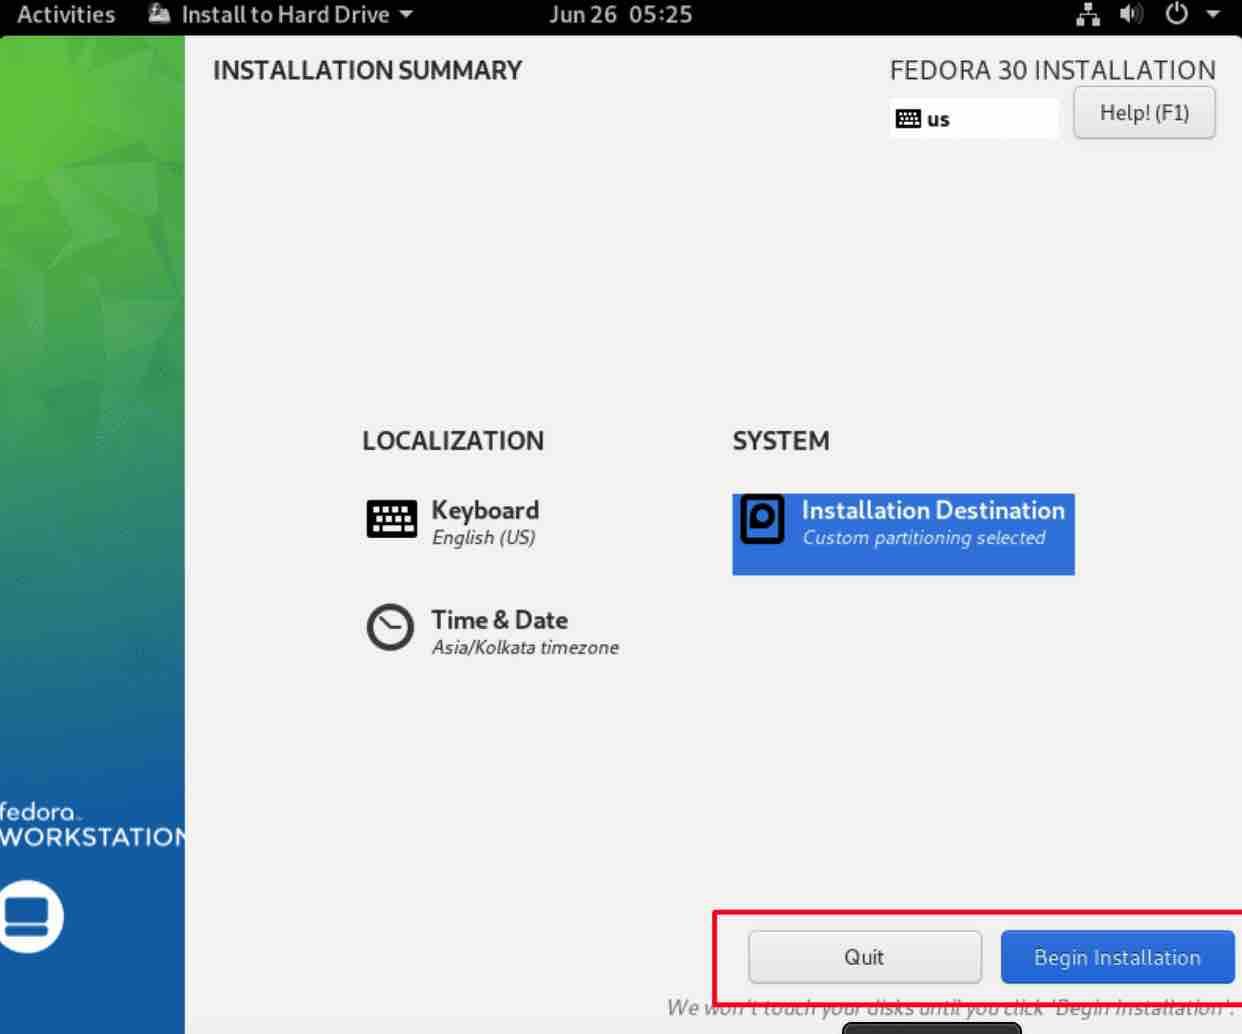
We are now at the “Installation Summary” page. Here there are three options:
- Keyboard: On this screen, there are options to change the keyboard layout
- Installation Destination: This screen is the most important one for us, as this is where you are going to configure our dual boot system
- Time & Date: In this screen, you can change the time and date, as well as put it on Auto mode.
First, we will set up the date and time. Here I was connected to a Lan network so it automatically detected the region and city. But you can select your region and city from the map as well as from the drop-down menus. If you want to select the network time, just toggle the network time switch and your time will be detected automatically.
When you complete the process, click Done.

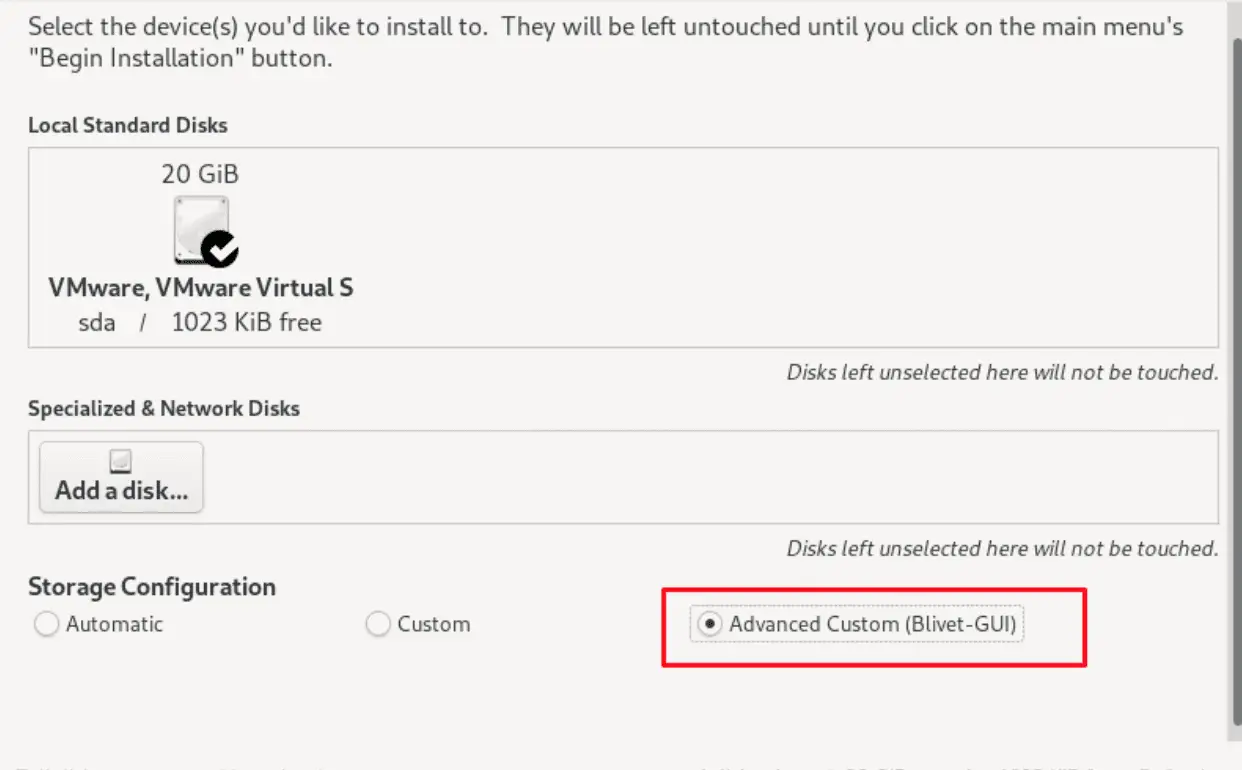
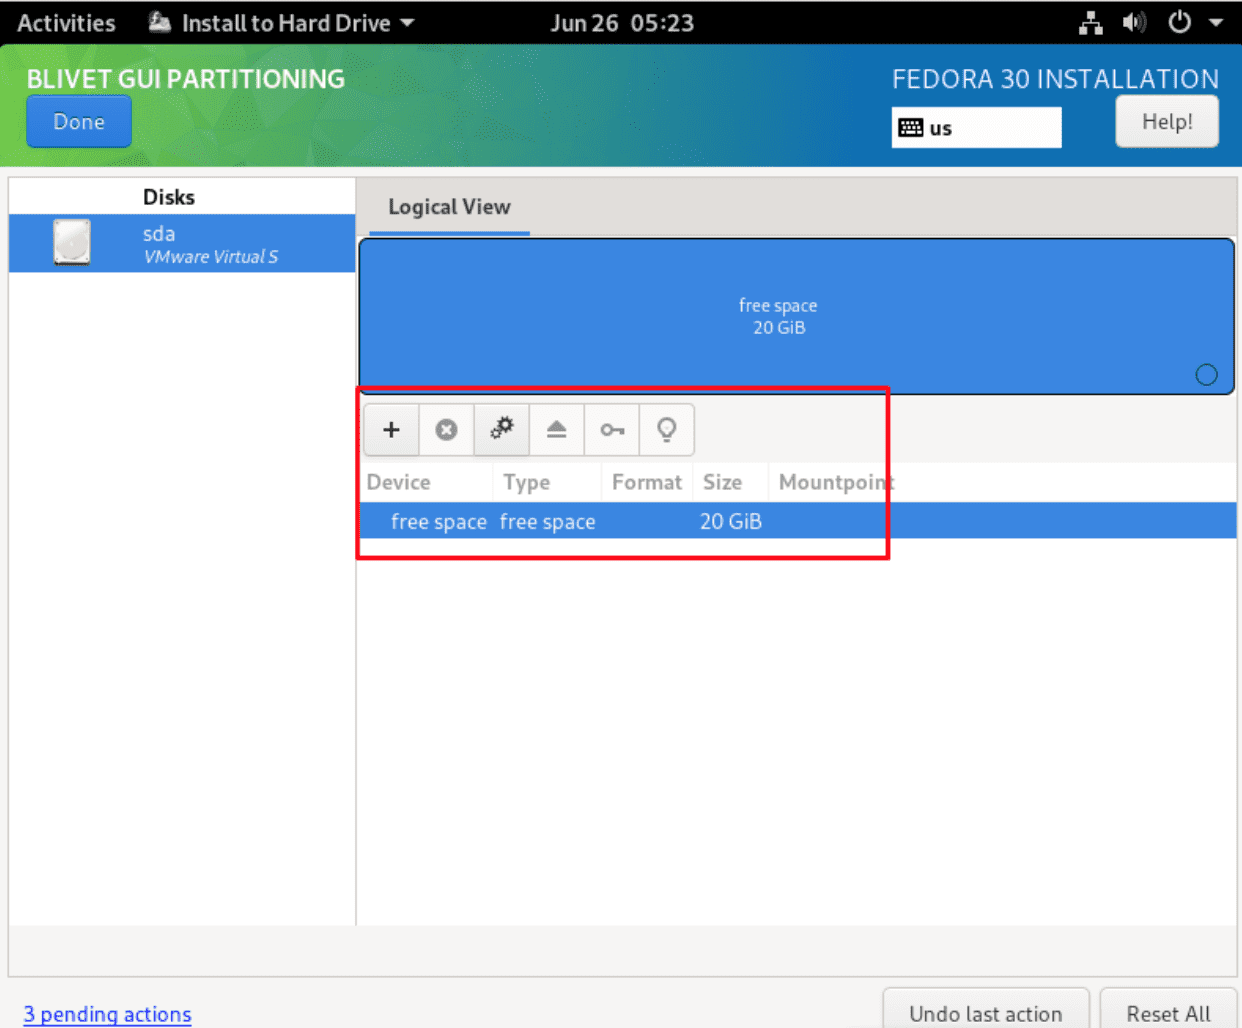
Now we will be looking into the installation destination. When you click on this option, you will be presented with the below screen. Scroll down a bit and you can see a radio box, “Advanced Custom”. This will let you configure where to install Fedora alongside Windows without relying on the installation wizard.
Here you will see the empty drive that we have created. Select the drive and click on the “+” button to add a new partition.
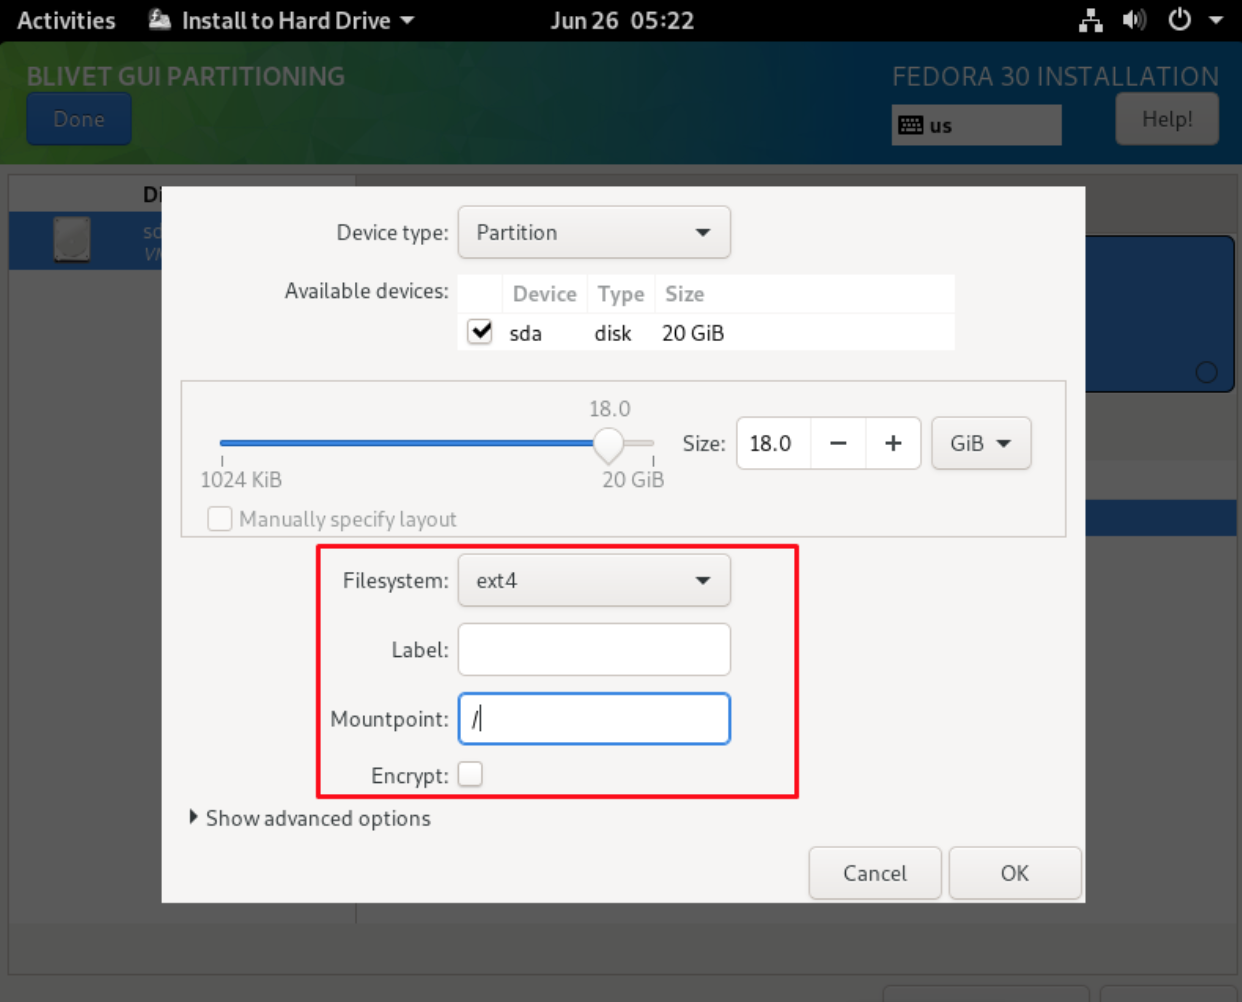
When you are presented with a dialog box, enter the below details. Just keep in mind that allocate free space to the SWAP partition. The general rule for a SWAP partition is to have a SWAP which is at least the same size as that of your RAM.
When you fill out the below details, click “OK”.
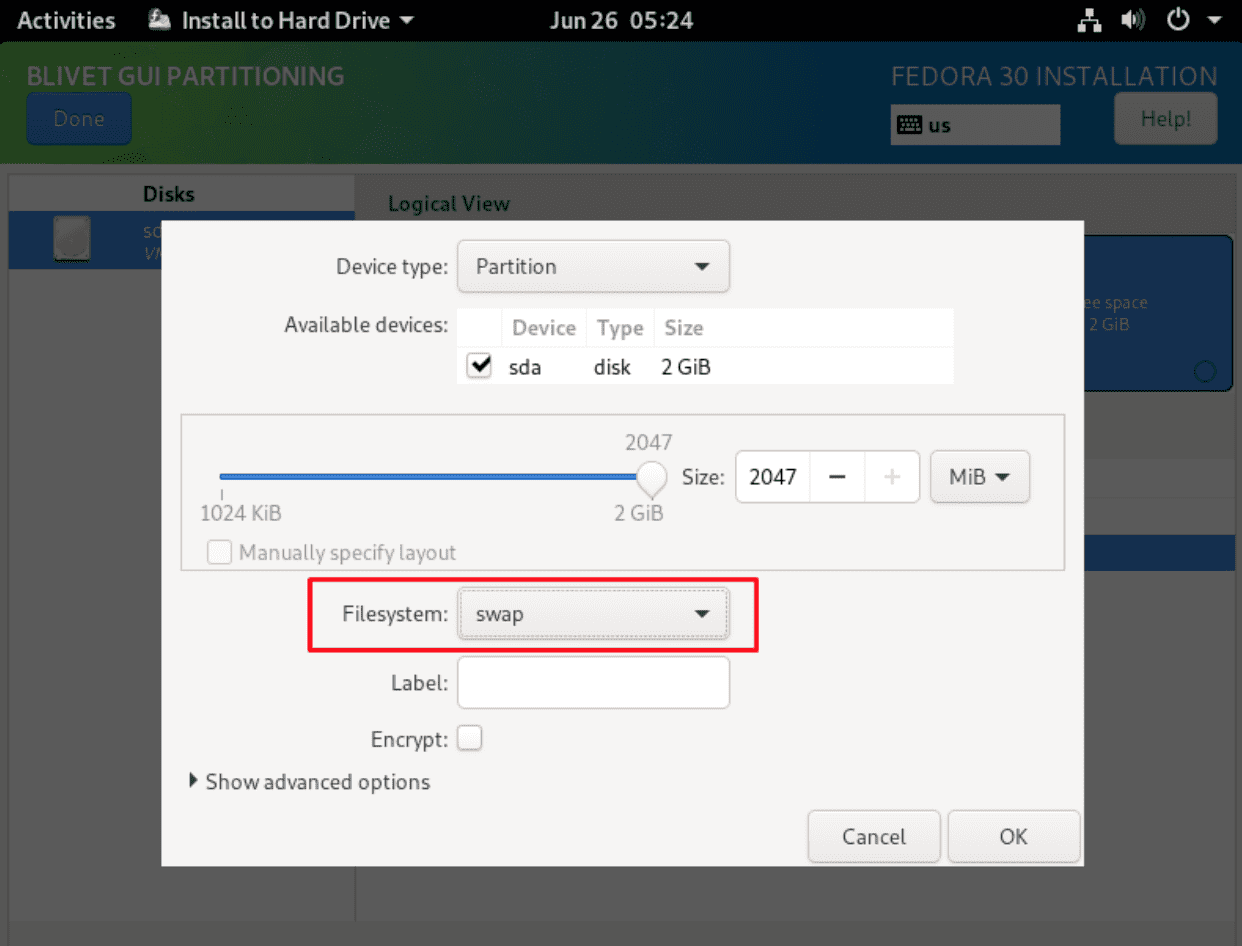
Next, you need to create a partition for the SWAP. Just repeat the previous procedure, but fill out the details according to the below screenshot.
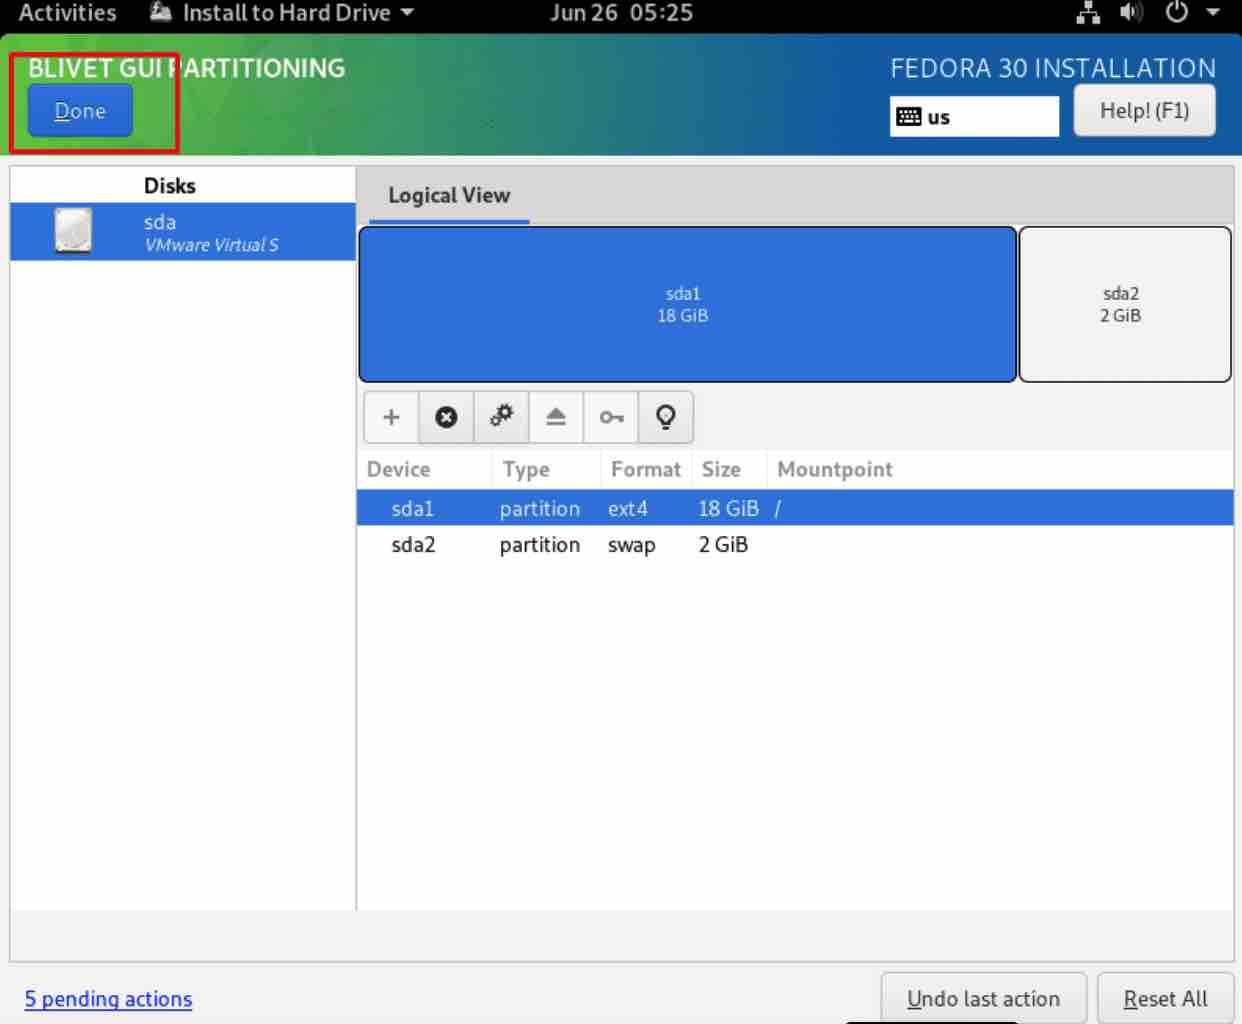
Verify that you have something like below partition system and click “Done”.
Once you click done, you will be redirected back to the initial screen. Click on “Begin Installation” and your Fedora dual boot installation will begin.
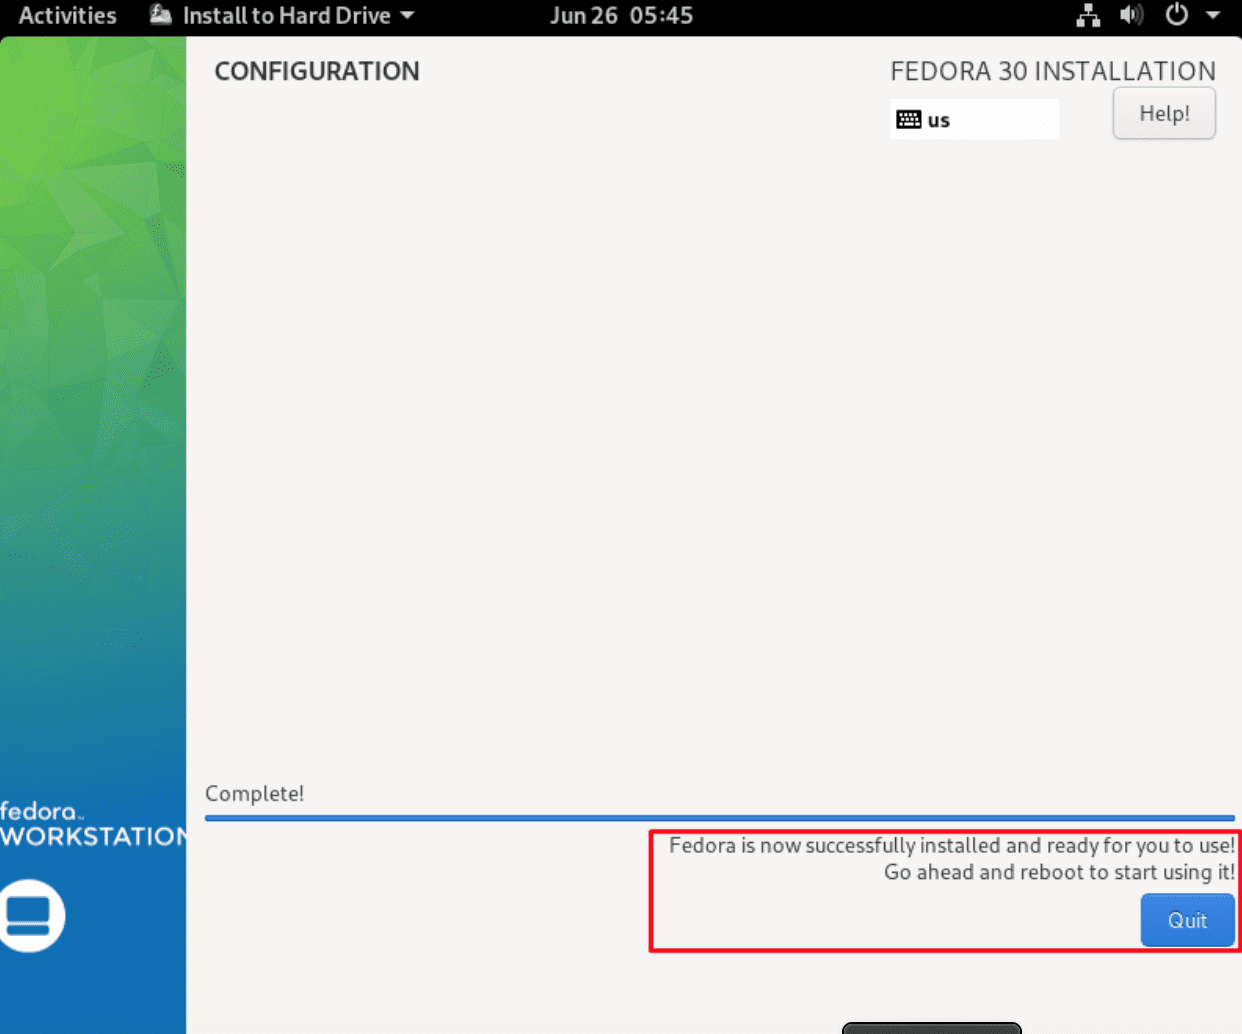
Once the installation is successful, you will be presented with the below screen. Notice the text in the fine print above the Quit button.
Click on the Quit button to exit the installation screen. On your next boot, you will be presented with the screen to choose between Fedora and your old Windows operating system.
Congratulations for moving one step forward to the Linux world by installation Fedora in your dual boot system.
If you like the content, we would appreciate your support by buying us a coffee. Thank you so much for your visit and support.
all said and good….. except fedora media writer is a big FAIL…… constant problem with windows file missing liblzma.dll which appears to not be in most new releases of windows.
appears if you can get the dll you can install it in the folder with Fed. Med. writer and it should find it…….. but it is massive problem getting that dll…… Ive been at it for 24 hours…… all failures