If you’re looking for an alternative to traditional mail servers like Gmail and want to transform your Ubuntu machine into a mail server, you’ve come to the right place.
This guide will walk you through the process of setting up a Postfix mail server on your Ubuntu and then use Thunderbird to test it out. The instructions provided here are primarily for Ubuntu 22.04, but they can also be applied to Debian or Mint.
Understanding SMTP Servers and Their Functionality
SMTP, or Simple Mail Transfer Protocol, is a technical protocol used by mail servers to send, receive, and relay outgoing emails between senders and receivers. This protocol facilitates the exchange of data between computers and servers, irrespective of the hardware or software they use. Just as standardizing envelope addressing aids the postal service, standardizing email transmission through SMTP enables efficient email delivery.
SMTP is a mail delivery protocol, not a mail retrieval one. It’s akin to the postal service delivering a letter to a mailbox; the recipient still needs to collect it. Similarly, SMTP delivers emails to the mail servers of email providers. However, different protocols are used to retrieve these emails from the mail servers for recipients to read.
Each networking protocol has a specific procedure for data exchange. SMTP outlines a method for transmitting data between an email client and an Ubuntu mail server. An email client is a computer or web application that a user employs to access and send emails. Users interact indirectly with mail servers, which are specialized computers designed to send, receive, and forward emails.
Read: How to Configure Sendmail on Ubuntu 22.04
The Importance of Using an SMTP Server in Ubuntu 22.04
When communicating via email, it’s crucial that your emails are sent securely and promptly to your recipient. Without an SMTP server, your email won’t reach its intended destination. When you click Send, your email transforms into a code string that is then sent to the SMTP server. This server interprets the code to deliver the message. Without processing by the SMTP server, the message wouldn’t be translated. The SMTP server also verifies that the email originates from an active account, protecting your mailbox from spam.
The SMTP protocol ensures that if an email fails to deliver, it will bounce back to the sender with information about why it was rejected—either due to an invalid sender email address or rejection by the recipient’s email server. Whether you’re a small, medium, or large enterprise, having your own email server is essential. Join us as we walk through all the necessary steps to install and configure an SMTP Server with Postfix on Ubuntu.
Read: Litespeed or Apache: Which One is Best for WordPress
Establishing a Fully Qualified Domain Name (FQDN)
A Fully Qualified Domain Name (FQDN) is the complete domain name for a specific computer or host connected to the internet. It consists of two parts: the hostname and the domain name. For example, an FQDN could be mail.company.com. Here’s how to set up an FQDN in Ubuntu:
- Open the terminal and type hostname –f to find your domain name.

- Type ifconfig to find your IP address. You should install the net-tools package first by typing sudo apt-get install net-tools.

- Note down your IP address.
- Enter sudo nano /etc/hosts in the terminal. This command opens the /etc/hosts file, which maps IPs to hostnames.

- Add a line in the /etc/hosts file that includes your IP address and domain as follows: IP_address host_name. Replace IP_address with the IP address you found earlier and host_name with the name of your host.
For instance, if you want to add a hostname called net2host with an IP address 180.0.2.10, you would add the following line in the /etc/hosts file:
180.0.2.10 net2host.
6. Save the file and verify the domain name with the hostname –f command.
Read: How to send one-liner emails from Linux/Ubuntu terminal
Updating Your Repositories
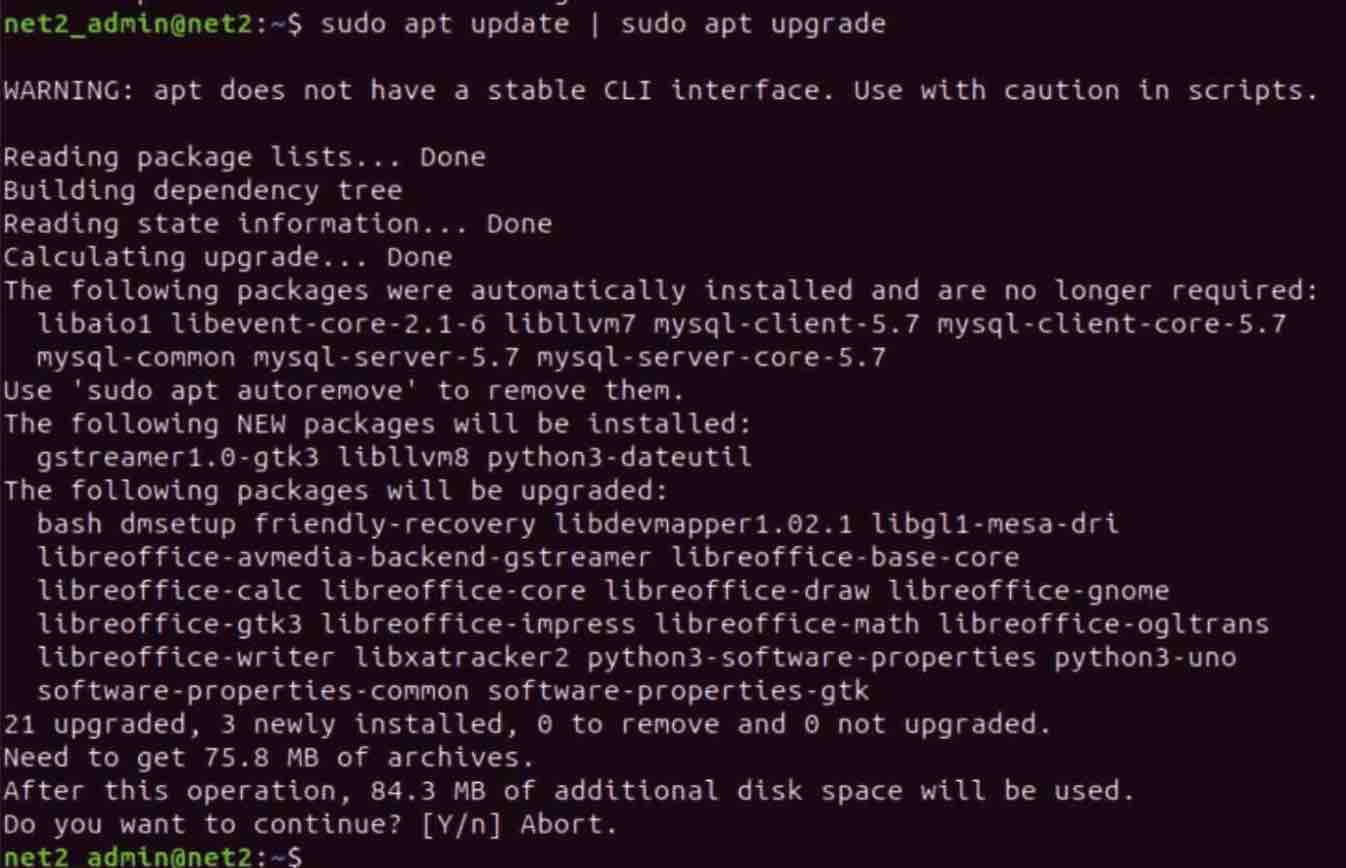
Before proceeding, ensure all APT repositories on your Ubuntu PC are up-to-date by running these commands in the terminal:
sudo apt update
sudo apt upgrade
Read: How to install and uninstall applications in Ubuntu? A Beginner’s guide
Installing Postfix Mail Server
Postfix mail server handles email transmission and reception. To install it, enter sudo apt-get install postfix in the terminal.
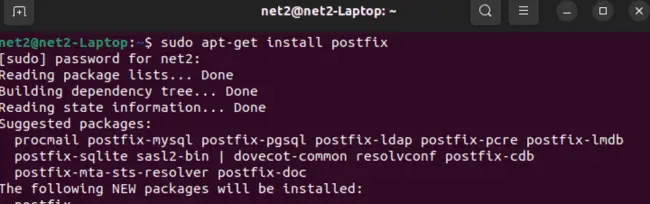
This will bring up the window below:
Read: How to install Apache web server on Ubuntu 22.04
Configure mail server in Ubuntu 22.04
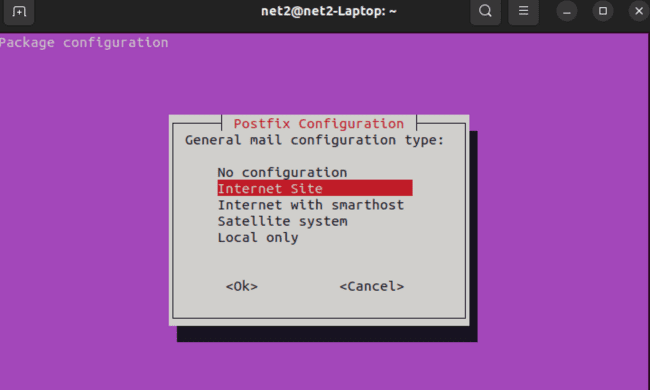
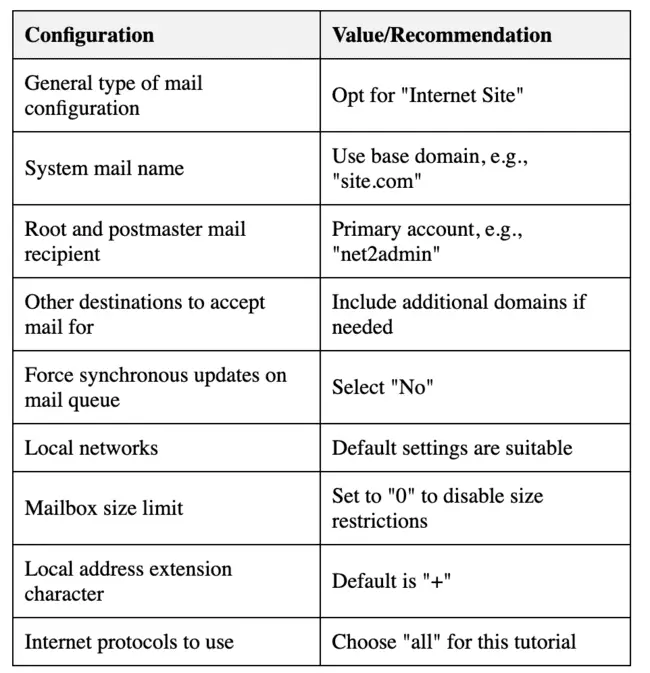
During the installation process, you will encounter a series of interactive prompts. In this tutorial, we recommend using the provided information to respond to these prompts:
- General type of mail configuration: Opt for “Internet Site” as it aligns with our infrastructure requirements.
- System mail name: This represents the base domain used to create valid email addresses when only the account part of the address is available. For example, if your server’s hostname is “mail.site.com,” it’s advisable to set the system mail name to “site.com.” This ensures that when the username is “user,” Postfix will generate the address as “user@site.com.”
- Root and postmaster mail recipient: Specify the Linux account responsible for receiving forwarded mail addressed to “root@” and “postmaster@.” In our example, we’re using the primary account, “net2admin”.
- Other destinations to accept mail for: Define the mail destinations that this Postfix instance will accept. If your server needs to receive mail for additional domains, include them here. Otherwise, the default settings should suffice.
- Force synchronous updates on mail queue: Given that you’re likely using a journaled filesystem, it’s recommended to select “No.”
- Local networks: This list specifies the networks for which your mail server is configured to relay messages. For most scenarios, the default settings will suffice. If you decide to make changes, ensure that your network range remains highly restrictive.
- Mailbox size limit: This option can be used to impose size restrictions on messages. Setting it to “0” disables any size restrictions.
- Local address extension character: This character is used to distinguish the regular part of an address from an extension, which is used to create dynamic aliases. For the purpose of this tutorial, the default character, “+,” is suitable.
- Internet protocols to use: Select whether to restrict the IP version that Postfix supports. For this tutorial, we recommend choosing “all.”
To summarize:
In case you need to revisit and modify these configurations, you can achieve this by entering the following command:
sudo dpkg-reconfigure postfix
You’ll find that the prompts already contain your earlier provided answers.
Read: How to install Apache web server on Ubuntu?
Check Postfix status
To check is your Postfix server is running or not, run the command below :
sudo systemctl status postfix
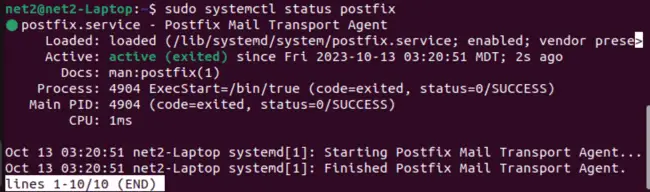
As shown above, Postfix is currently operational and functioning on our Ubuntu 22.04 system.
Firewall Configuration
To prevent potential firewall restrictions on Postfix, utilize the following commands to enable Postfix functionality:
sudo ufw allow ‘Postfix’
Testing Postfix locally – Using your Ubuntu local smtp server
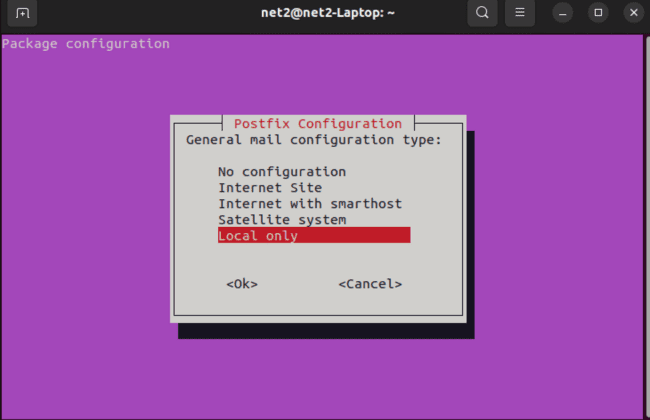
We will now test how to use Postfix to manage Emails locally. We run the command below to change the configuration to Local :
sudo dpkg-reconfigure postfix
Then we select the option below:
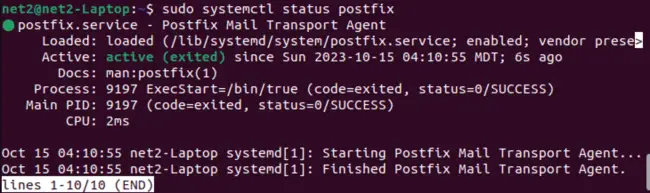
Now we make sure Postfix is active by running :
sudo systemctl status postfix
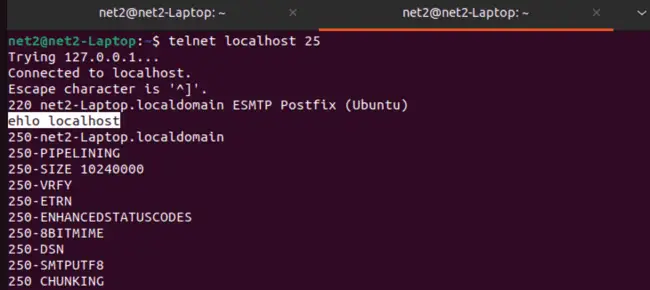
Next run the command below in a net terminal session:
telnet localhost 25

Where 25 is the post for SMTP.
Now we write the command:
ehlo localhost
Right after the prompt above .
Now we write :
mailfrom: net2test@net2.com
As shown below:

We end up getting the output below :

Next we we will mention the recipient :
rcpt to: net2@localhost
Where net2 is the name of current user.

We then write the word: DATA

Then we mention the subject of the Email:
subject: net2test
And then the body:
Hi there this is net2

Finally, you should write a dot “.” at the end to quit and not the word quit or :q like we did below.

Read: How to set up a firewall on Ubuntu 22.04
Now let us check the whereabouts of this message. In the file explorer, go to the folder:
below: computer/vr/mail

And open up the file shown above and scroll down to the very end:
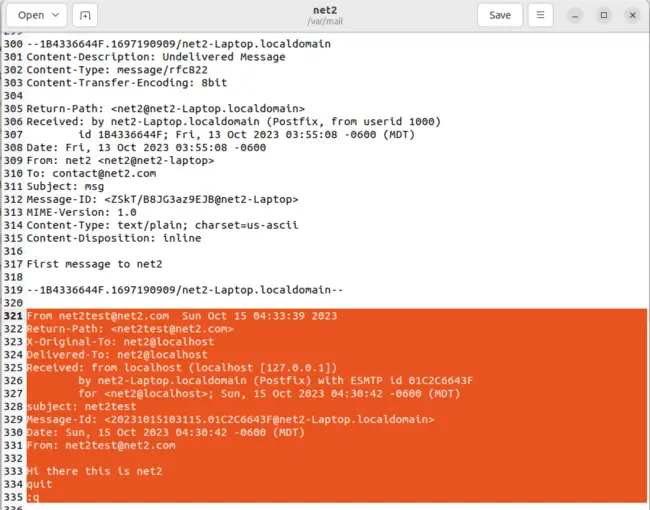
We can see the text that we have sent earlier.
Setting Up Dovecot before using Mozilla Thunderbird email client
Dovecot, a Mail Delivery Agent (MDA) that functions as a POP and IMAP server, is designed with a strong emphasis on security. Its role is to manage local mail directories, allowing users to access and retrieve their mail. It is compatible with the main mailbox formats, namely mbox and Maildir. Dovecot is responsible for receiving incoming mail from Postfix for delivery. However, before this delivery can take place, Dovecot must authenticate the virtual users connected over SMTP.
To install Dovecot MDA, use the command below:
sudo apt-get install dovecot-imapd dovecot-pop3d
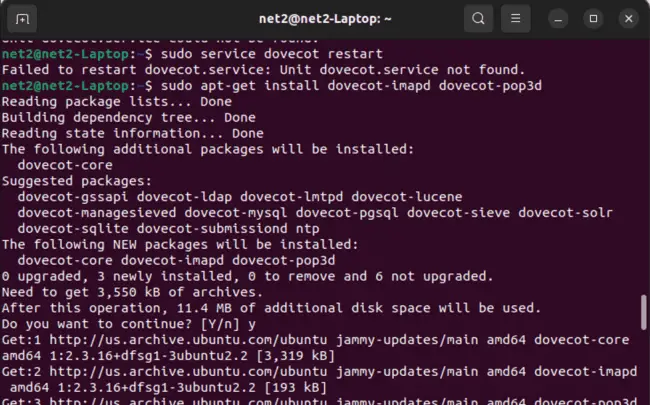
Now you should restart Dovecot by invoking the command below:
sudo service dovecot restart
Read: Best Email clients of 2023
Testing Dovecot in action
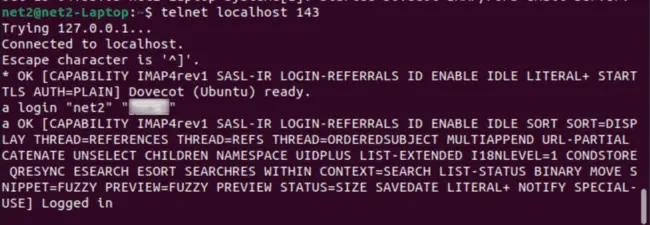
Let us now invoke the command :
telnet localhost 143
Next we write :
a login “net2” “yourpassword”
As shown below :
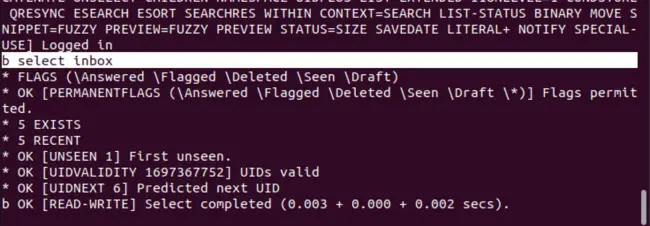
Then we write:
b select inbox
Next we write :
c list “” *
Finally, to log out, write the command:
e logout
Using ThunderBird to send and receive Emails
Now we will go ahead and run Thunderbird application on Ubuntu 22.04. Follow the steps below in order to be able to send and receive Emails on your local computer.
Step 1
On your terminal, write the command below :
telnet localhost 143
Step 2
Next write :
b select inbox
Step 3
Then type in :
c list “” *
And make sure it is double quotes.

Step 4
To log out, write :
e logout

Step 5
Now, on your Ubuntu dashboard, click on Thunderbird icon . This will bring up the window below :
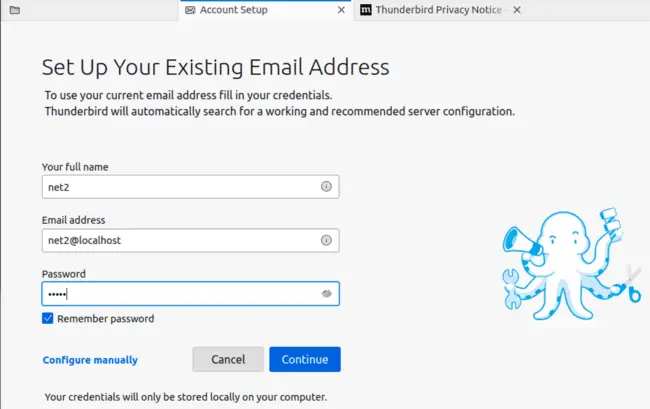
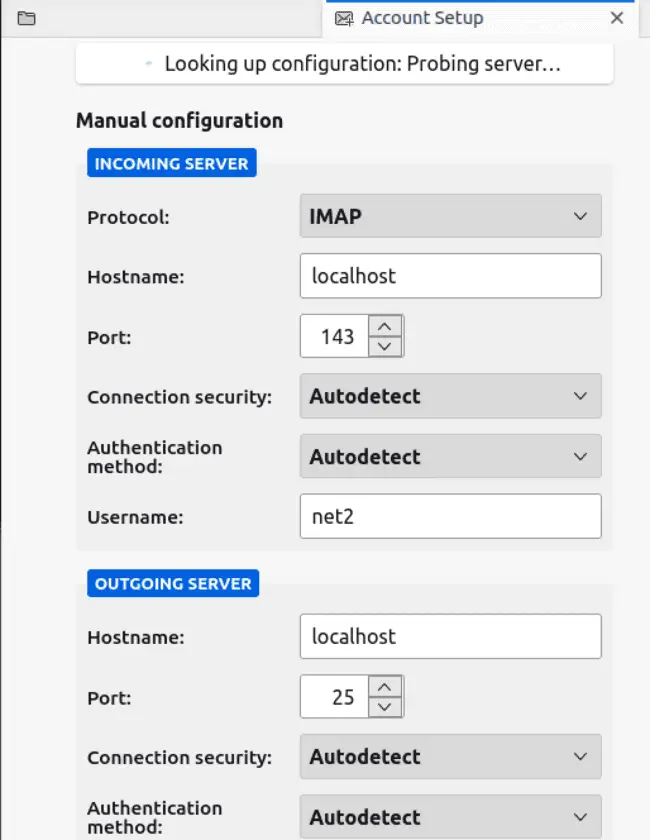
Step 6
Enter your own credentials as shown above and below :
Step 7
Finally, your account should be created and you will be able to start sending and receiving Emails on your local host.
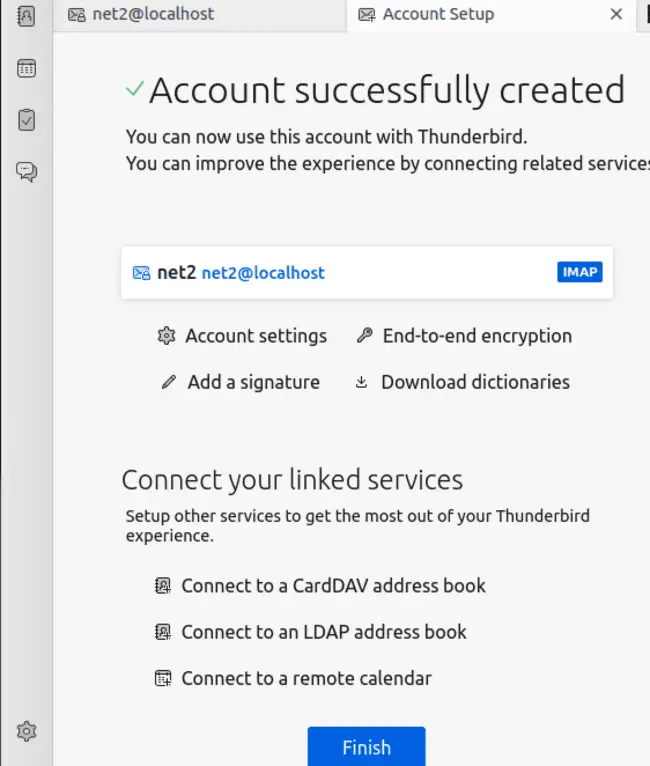
Click ok and confirm the next dialog boxes.
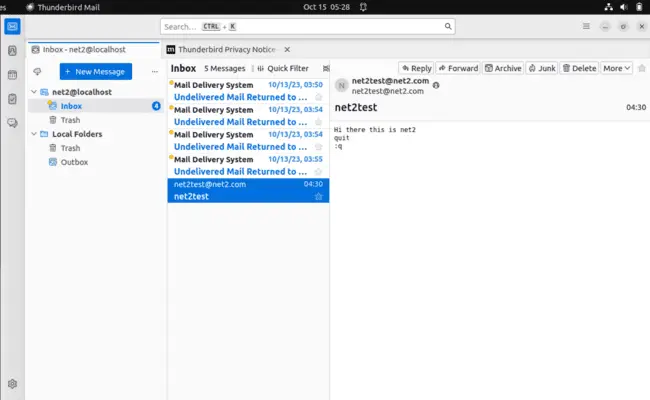
Step 8
As you can see, this is the Email that we created earlier.
Conclusion
In this comprehensive guide, we have covered the process of setting up an SMTP server on Ubuntu 22.04, enabling you to establish your own Ubuntu email server instead of relying on conventional services like Gmail. Understanding the fundamentals of SMTP servers and their role in email communication is vital to ensure secure and efficient email delivery. We’ve explored the significance of having your SMTP server, emphasizing its ability to validate email origins and handle delivery failures effectively.
We’ve also walked you through key steps, such as configuring a Fully Qualified Domain Name (FQDN), updating repositories, and installing the Postfix mail server.
Additionally, we’ve discussed how to verify the status of your Postfix server and configure your firewall to avoid any potential restrictions.
Furthermore, we’ve demonstrated how to test Postfix functionality locally, allowing you to manage emails efficiently.
We’ve also introduced Dovecot, a secure Mail Delivery Agent (MDA) responsible for managing local mail directories and enabling users to access their mail. We provided instructions for its installation and demonstrated its functionality.
Lastly, we’ve guided you through using Mozilla Thunderbird, a popular email client, to send and receive emails. By following these steps, you can create your email account and enjoy efficient email communication on your local machine.
With this guide, you are well-equipped to establish and manage your SMTP server, enhancing your control and security over email communication.
If you like the content, we would appreciate your support by buying us a coffee. Thank you so much for your visit and support.