When it comes to installing applications and programs on Linux there are several ways to do it. More advanced users can choose to download the source code
from the developer’s website and compile it directly on their computer. Something very slow and impractical actually.
More inexperienced users tend to take the easy way: find and download the binary (e.g. deb) and install it, from the package manager, by double clicking, much like in Windows. Intermediate users who are looking for convenience and ease, make use of the Linux repositories to download, install and update their programs.
What are Linux repositories?
The repositories are one of the best features of Linux. A software repository is a list of programs that allows you to easily search and download all kinds of programs and tools in your current Linux distribution.
You will be able to have a safe and reliable location from which you can download software along with their latest updates. These programs will be installed without any dependency problems.
The developers of the distros usually include their own repositories with useful programs. Furthermore, many developers maintain their own independent repositories to distribute their programs. Any user can create and maintain his own repository, very useful, for example, to distribute lists of software.
Read: Securing Ubuntu: Best Practices for Keeping Your System Safe
Different types of repositories in Ubuntu
When you install Ubuntu, the distro installs a series of repositories belonging to different channels:
- Main: the repository installed by default. It consists of free FOSS software that can be distributed freely and without restrictions.
- Universe : Includes free and open source software, but cannot guarantee regular security updates.
- Multiverse : Includes software that is from FOSS. It must be the user who analyzes the licenses and decides whether or not they can use these programs legally.
- Restricted : within this channel you can find closed source software. It is used, for example, to distribute NVIDIA drivers, among many others.
- Partner : Includes proprietary software that has been packaged by Canonical.
And in addition to these repositories, you can also add third-party repositories to your Linux distro to install other types of software safely.
The steps that we are going to see next have been done on Ubuntu, but they should be the same for any Debian-based distro.
Read: Linux directories explained
How to add new repositories to the software list
To see the list of repositories that you have in your Ubuntu distro, open up a Terminal session (Control + Alt + T) and execute the following command:
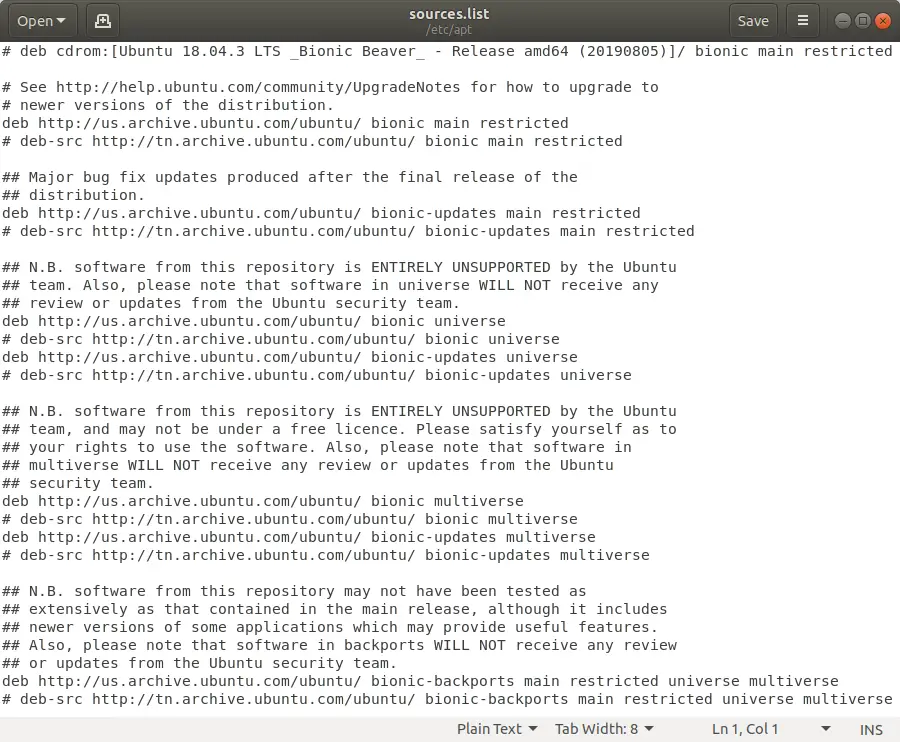
sudo gedit /etc/apt/sources.list

sources.list Ubuntu | Ubuntu repository list
In case it doesn’t work, or you don’t have gedit installed in your distro, you can invoke the «nano» editor by using :
sudo nano /etc/apt/sources.list
A list will be opened with all the repositories that you have in your distro. Repositories (for example, deb http://archive.ubuntu.com/ubuntu/ bionic-updates main restricted) that start without # are the ones in use. On the other hand, those that appear at the beginning with a # are those that you have installed, but they are disabled.
Read: Understanding the basic components of the Linux operating system architecture
Before updating the repositories and installing any program, you must install the security keys of said repository. These are usually offered together with the PPA. Below you will see an example with the official Google Chrome repo.
Example to add Google Chrome repository
To add a Linux repository, or PPA, from the terminal , you would need to proceed as follows. The first thing will be to search the Internet for the repository that you want to add. In the case of Google Chrome, you can find it on the Google website .
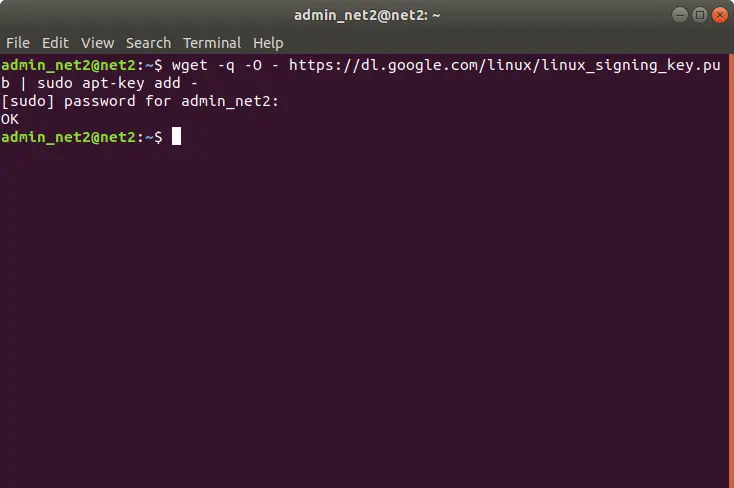
In the terminal, execute the following command to add the keys of the official Google repositories to your Linux distro. Otherwise, the software in the repositories cannot be validated and it will return an error:
wget -q -O – https://dl.google.com/linux/linux_signing_key.pub | sudo apt-key add –
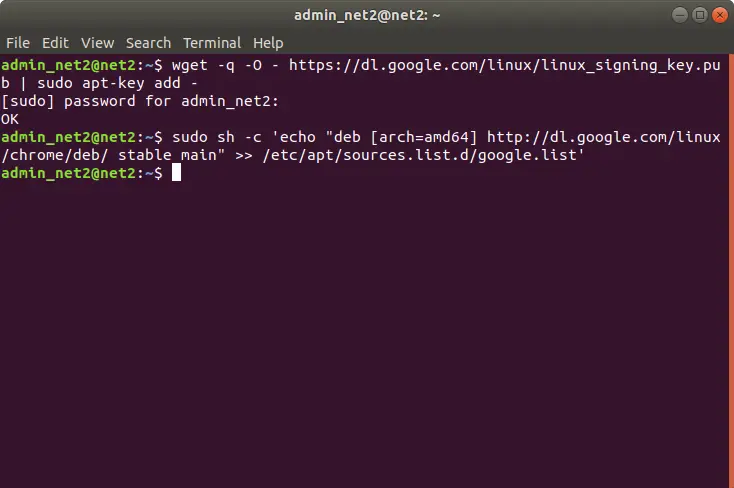
Once the previous command has been executed, you can now add the repository to the Ubuntu list of repositories. Run the following command:
sudo sh -c ‘echo “deb [arch=amd64] http://dl.google.com/linux/chrome/deb/ stable main” >> /etc/apt/sources.list.d/google.list’
Obviously, if we have added the repository from GEDIT as we have explained in the previous step, this last command will not be necessary.
Next, we will update the list of Linux repositories to register all the programs on our system to be able to download and install them with apt install.
Read: How to run Windows software on Linux
How to update the Linux repositories list
If you have already added the repositories using the previous steps or you simply want to update your software without adding new repositories, the process is much faster.
The only thing left to do is open up a Terminal session (Control + Alt + T) and execute the following two commands:
- sudo apt update (to update the repositories software lists).
- sudo apt upgrade (to download the packages that are available)
When the process is finished, all your Linux programs, which have been installed through the repositories, will have been updated to their latest version.
You can now install the programs that you want from your Linux repositories using apt install (for example: sudo apt install google-chrome).
How to delete a Linux repository
Maybe with the passage of time you no longer need a Linux repository in your distro. Either because it has become part of the official repositories or simply because you no longer use the program.
To delete the repository, open the list of software repositories with the following command:
sudo gedit /etc/apt/sources.list
The gedit text editor will open with the list of all the repositories that you have added. You simply have to locate the repository that you want to delete and remove it from the list.
Now update the list with sudo apt update so that the changes will be reflected in your distro.
Read: How to edit a text in Linux using Nano – A beginner’s guide
Remove PPA
In case you have added the repository through a PPA, removing it is a fairly simple task. All you have to do is run the following command in the terminal, adding the URL of the PPA that you want to remove at the end:
sudo add-apt-repository -r ppa:repo/repo
If the repository had a key associated with it, you can remove it using the command “sudo apt-key del” followed by the numeric key in quotes or its last 8 characters (without quotes).
Read: How to remove PPA in Ubuntu
Finally update the list of software with “sudo apt update” and that’s it.
If you like the content, we would appreciate your support by buying us a coffee. Thank you so much for your visit and support.