The usermod command modifies or alters any attributes of a previously created user account via command line.In some situations, an administrator would need to change the existing attributes of an already created user like the login name, the home folder of the user, the password expiry date.This is where usermod command comes in.
In order to execute usermod command, we need to have an existing user account . Note that only the root(super user) can invoke the usermod command.
You need to make sure also that the user to be changed is not currently executing any process when the usermod command is being invoked to change the name, the UID or the home folder of the user.
The most basic syntax of the command usermod is the following :
usermod [options] LOGIN
usermod linux
Read: How to create a Sudo user on Ubuntu
When the ‘usermod‘ command is executed, the files below will be used and also affected.
- /etc/passwd – information about the user account.
- /etc/shadow – information about the secure account.
- /etc/group – information about the group account.
- /etc/gshadow – information about the secure group account.
- /etc/login.defs – configuration of the Shadow password suite..
Options of usermod
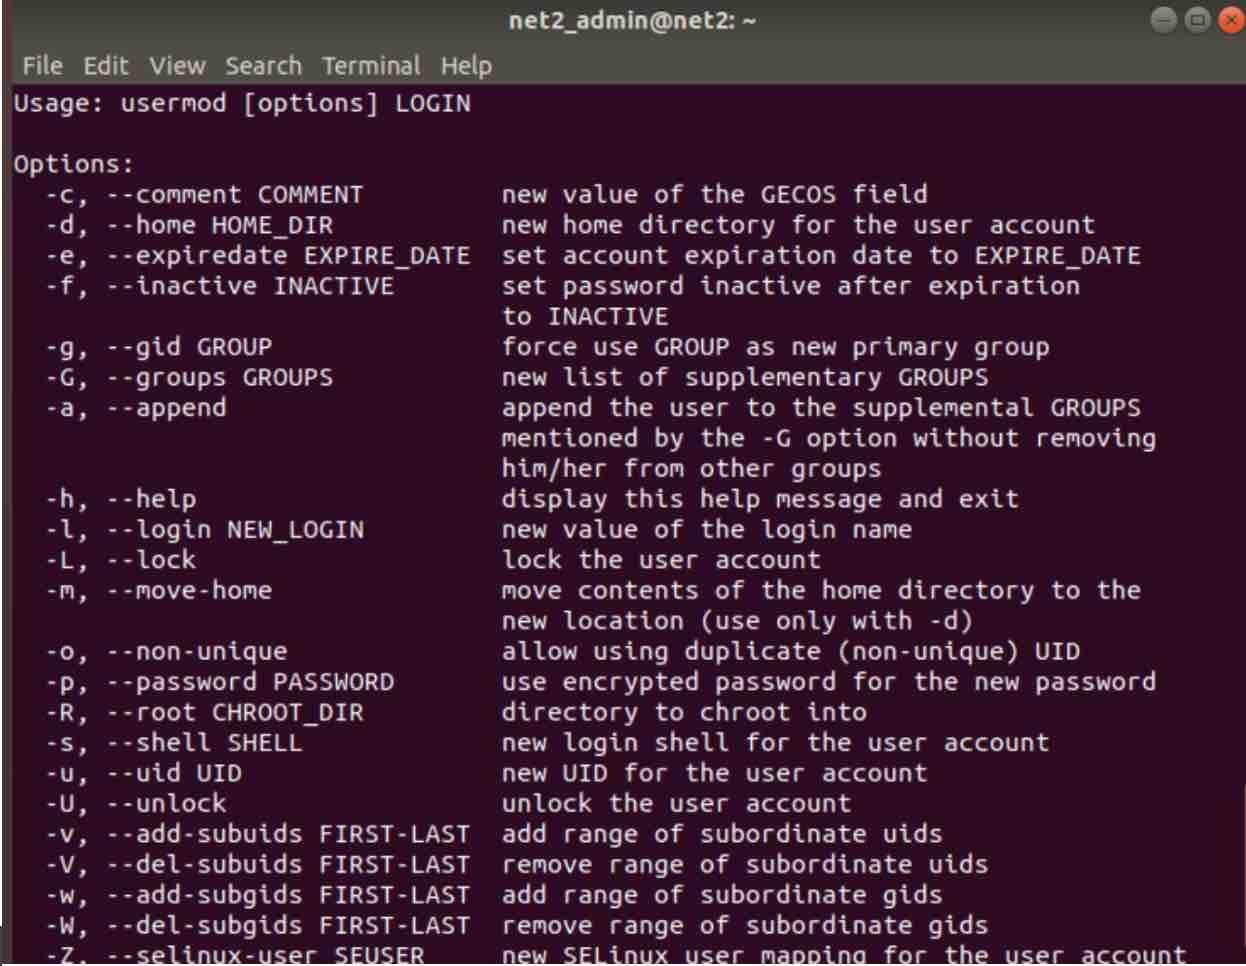
As shown in the snapshot above (usermod man), here are the options to use with the usermod command :
- -c = allows us to provide a comment field for the user account.

- -d = allows us to alter the home folder of a user account.

- -e = enables us to set the account expiry date

- -g = used to modify the primary group for a user.
![]()
- -G = allows us to add a new list of supplementary groups.
![]()
Read: How to use sudo without having to enter a password in Ubuntu
- -a = appends the user to already defined supplemental groups

- -l = We will use it to change the login name from net2_admin to net2_adm.
![]()
- -L = This would lock the user account.
![]()
- -m = allows to have the contents of the home directory moved to the new directory.

- -p = allows everyone to see the new password in /etc/shadow (not recommended).
![]()
- -s = will yield a new login shell for the new user account.
![]()
- -u = allows to assign new UID for the user account ( between 0 and 999).
![]()
- -U = unlocks the user accounts.
![]()
Unlock user account linux
Read: The Sudoers File in Ubuntu
A- Adding extra information to user account : -c option
As mentioned above, this option adds an information text about the user account. We can for instance add an information message to user ‘net2guy’ as follows :
sudo usermod -c “information for net2guy” net2guy

In order to check that this has worked, you can view the file /etc/passwd :
vi /etc/passwd (or you can use your preferred editor)

B- Changing user home folder : -d option
In the snapshot above, you can clearly see the home directory of the user net2guy , namely /home/net2guy/.

In order to modify this and set it to a new directory, say /home/net2_admin, we have to use the -d option as follows:

Now we can check that it has indeed been modified :
vi /etc/passwd (or you can use your preferred editor)

Read:
C – User account expiry date setting : -e option
In order to set an expiry date for a user account, this option can be used. The date format should be YYYY-MM-DD.
The current user account expiry date can be checked using chage command applied to our test user :
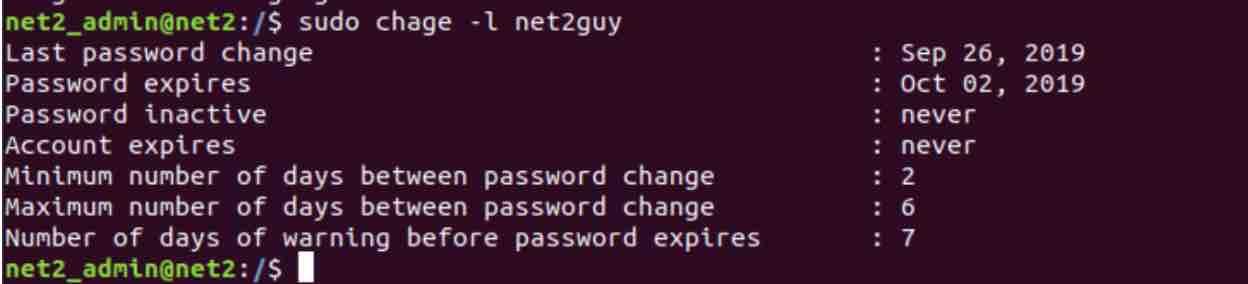
The expiry status of our test user ‘net2guy is Oct 2 2019. Using the -e option, we change this value as follows:

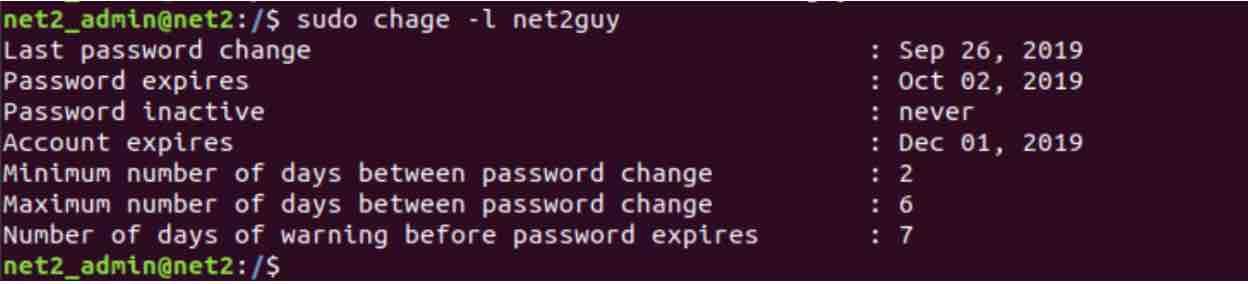
We can now check that this has indeed changed :
D – User primary group modification : -g option
This option allows to change a user account primary group. The current primary group for the test user net2guy can be checked as follows:

Now let us change this to nogroup :

In order to check this was accounted for, run the command below :

Where you can see that the original group has been modified.
You may be interested to read: How to disable user accounts and enhance password authentication in Ubuntu ?
D – Extending the group set of a User: -G option
The test user we have been playing with can have other groups. This can be done using the -G option as follows : adding a new group named ‘net2_admin’ to user net2guy :

To verify this, run the following command as usual :

E – User login name modification : -l option
This option allows to modify the user login name. Let us change the login name net2_admin to net2_adm for example:

change user in linux
This will make the test user net2guy disappear since we changed it :

Now a simple check of the changed name will yield the same attributes as the old one (same groups, same UID) :

Remark :
You may get the following message if you try to change the login name of a currently active user, for instance:

This means that all processes owned by user admin_net2 should be killed. To kill the above process, 3900, owned by user admin_net2 run the command :
pkill -u admin_net2 3900

You also need to kill all user owned processes using :
pkill -9 -u username
Read: How to manage permissions in Linux – guide for beginners
F- User account locking : -L option
This option allows to lock any already created user account. Let us do an experiment with our test user :

Once the account is locked, it is no longer possible to login. This can be checked in the /etc/shadow file:

Notice the exclamation sign in front of the user name and before the password eepwd.
G – User account unlocking : -U option
This option will unlock already locked users. Let us unlocked our test user :

As you can see the exclamation mark is gone.
H- Moving the user home folder to a new directory : -d -m options
We will now use the -d and -m options to move the test user’s files from its current home directory to a new one . The current home folder of our test users is the following :

Now to move the files to another folder , proceed as follows :

usermod change home directory
I – password creation : -p option
In order to create an un-encrypted password for a user, just use the -p option as follows :

To check this, you can open up the /etc/shadow file to see the hardcoded visibler password :

In production systems, this option is not recommended as it is clearly unsecure.
J – User shell modification : -s option
If you want to change a user shell, you have to use the -s option.
usermod -s /bin/sh net2guy_adm
K – Changing User ID (UID) : -u option
The UID of our test user can be found by issuing the command below :

Now we want to change this to 910 say:

Where you can clearly see that the new UID has become active.
L – Changing User Group D (GID) : -g option
The GID of our test user is visible below : 65534

In order to modify it, just use the -g option as follows :

Where we have changed the GID to 1 :

Which actually belongs to daemons…this is just for illustration purposes.
If you like the content, we would appreciate your support by buying us a coffee. Thank you so much for your visit and support.