Managing software packages on Ubuntu or similar Linux distributions using the Advanced Package Tool (APT) is typically a smooth experience. It makes installing, removing, and updating software quite straightforward.
However, things can get a bit tangled sometimes, especially when dealing with software from third-party sources (like PPAs). You might run into the frustrating “unmet dependencies” error, which stops installations. This guide walks you through several common ways to tackle this issue.
Before you start trying out these solutions, it’s a good safety measure to back up your core APT configuration files. This way, if a change causes unexpected problems, you can quickly revert. The main files to consider backing up are:
/etc/apt/sources.list: This file defines where your system looks for software (your repositories)./var/lib/dpkg/status: This file tracks the status of all packages known to your system.
1. Trying Aptitude for Dependency Resolution
While `apt` (or the older `apt-get`) is the standard tool for package management on Ubuntu/Debian systems, `aptitude` is another powerful alternative that often provides more detailed information and smarter conflict resolution. It offers a text-based interface that can help visualize dependency chains and suggest multiple ways to fix problems. If `apt` is struggling, `aptitude` might offer a solution.
Installing Aptitude:
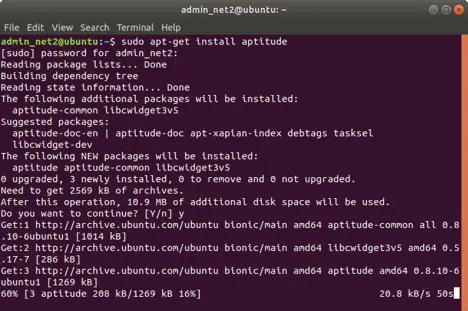
If you don’t have `aptitude` installed, you can add it easily. Open your terminal and run:
sudo apt update
sudo apt install aptitude
Press ‘Y’ and Enter if prompted to confirm the installation.
Using Aptitude to Install a Package:
Now, try installing the package that was causing the “unmet dependencies” error using `aptitude`:
sudo aptitude install PACKAGENAME
Remember to replace `PACKAGENAME` with the name of the actual package you’re trying to install. `aptitude` will analyze the dependencies. If it finds conflicts, it will often present several possible solutions (like downgrading one package, removing another, or keeping packages at their current versions). Review the suggested actions carefully before accepting one.
Read: How to keep Ubuntu clean
2. Cleaning Up the Local Package Cache
Sometimes, the issue isn’t a fundamental conflict but rather stems from a corrupted local package database or leftover downloaded package files (`.deb` files) causing confusion. Cleaning APT’s cache can resolve these situations. There are two primary commands for this:
1. `sudo apt clean`:
This command completely clears out the local cache of downloaded package files, located in `/var/cache/apt/archives/`. It removes all `.deb` files stored there, freeing up disk space but requiring packages to be re-downloaded if needed later.
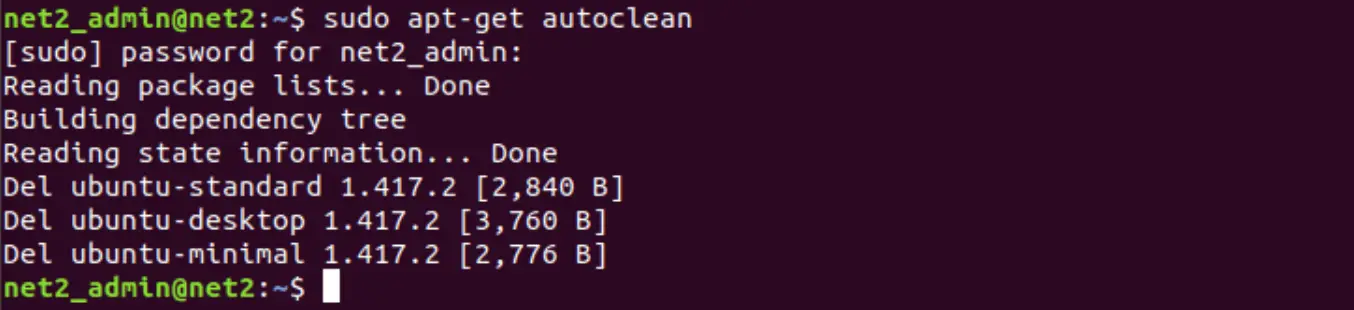
sudo apt clean2. `sudo apt autoclean`:
This command is more conservative. It only removes downloaded package files (`.deb` files) from the cache that are no longer available in the repositories your system is configured to use (meaning they are likely outdated and cannot be installed anyway). It’s useful for freeing up some space without removing potentially needed older versions still available online.
sudo apt autocleanAfter running either `clean` or `autoclean`, it’s always a good idea to update your package lists again:
sudo apt updateThen, try installing your desired package once more using `sudo apt install PACKAGENAME` or `sudo aptitude install PACKAGENAME`. Having a fresh package list and a clean cache might have resolved the dependency snag.
3. Enabling Additional Official Software Repositories
Occasionally, a dependency isn’t met because the required package resides in one of Ubuntu’s official repositories that isn’t currently enabled on your system (like ‘Universe’ or ‘Restricted’). Here’s how to check and enable them using the graphical tool:
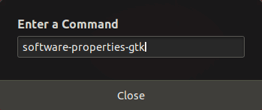
Press `Alt + F2` together. This brings up a small “Run Command” input box.
Type `software-properties-gtk` into the box and press Enter. This launches the “Software & Updates” application.

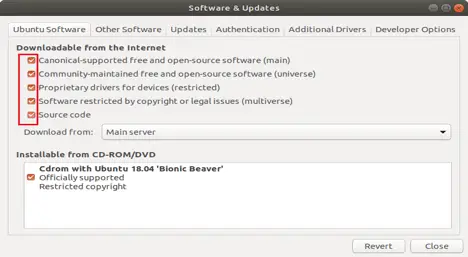
In the “Software & Updates” window, click on the “Ubuntu Software” tab.
Ensure that checkboxes are ticked for at least the following standard repositories:
- **Main:** Core, officially supported, free and open-source software.
- **Universe:** Community-maintained free and open-source software. (Often needed for dependencies).
- **Restricted:** Proprietary drivers necessary for some hardware.
- **Multiverse:** Software with copyright or legal restrictions (use with awareness).
Make sure ‘Universe’ is enabled, as many packages depend on software within it.
If you made any changes by ticking boxes, click the “Close” button. The system will likely prompt you to reload the package information. Click “Reload” to update APT’s knowledge of available packages from the newly enabled sources.
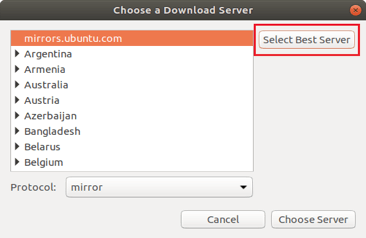
While you’re in the “Ubuntu Software” tab, you can also try optimizing your download server. Click the dropdown menu next to “Download from:”
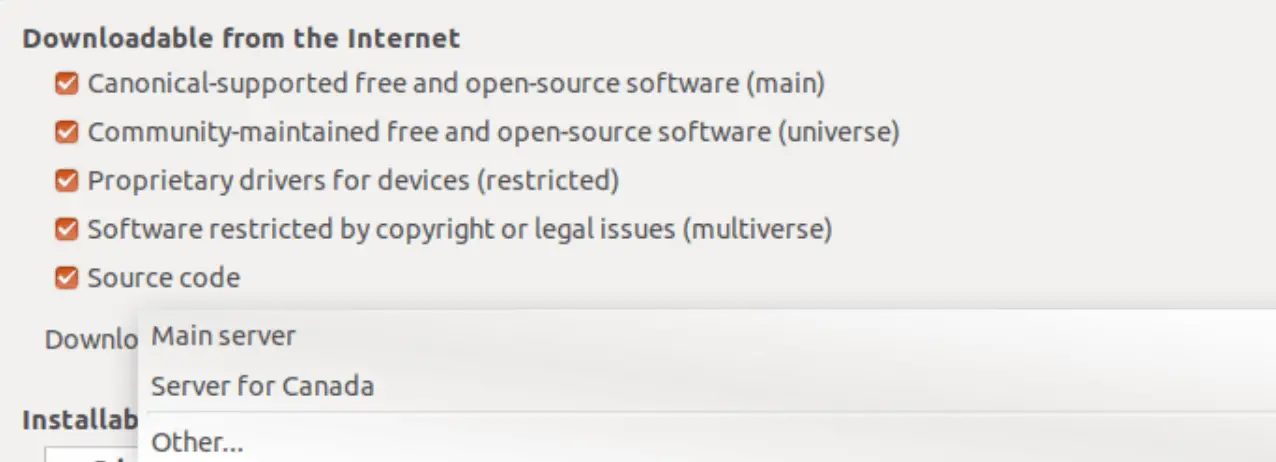
Choose “Other…” and then click the “Select Best Server” button. Ubuntu will perform quick tests to find the fastest mirror (server) for your location.
Wait for the tests to complete.
Once a server is automatically selected, click “Choose Server” and then “Close”. Reload package information if prompted.
Finally, open your terminal again and refresh the package lists:
sudo apt update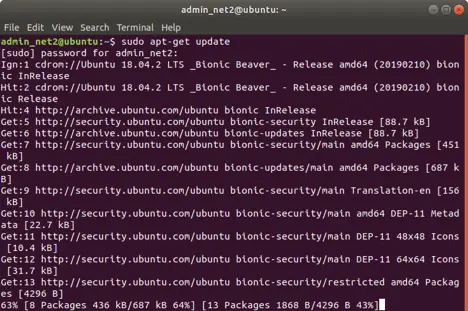
Now, retry the installation of the problematic package. Enabling the correct repository might have provided the missing dependency.
4. Attempting an Automatic Fix with `-f`
APT includes a helpful option specifically designed to try and fix broken dependency issues automatically. The `-f` (or `–fix-broken`) flag tells APT to attempt to correct any dependency problems it finds in your package system.
Running the Command:
Instead of trying to install a specific package, just run the `install` command with the `-f` flag:
sudo apt install -f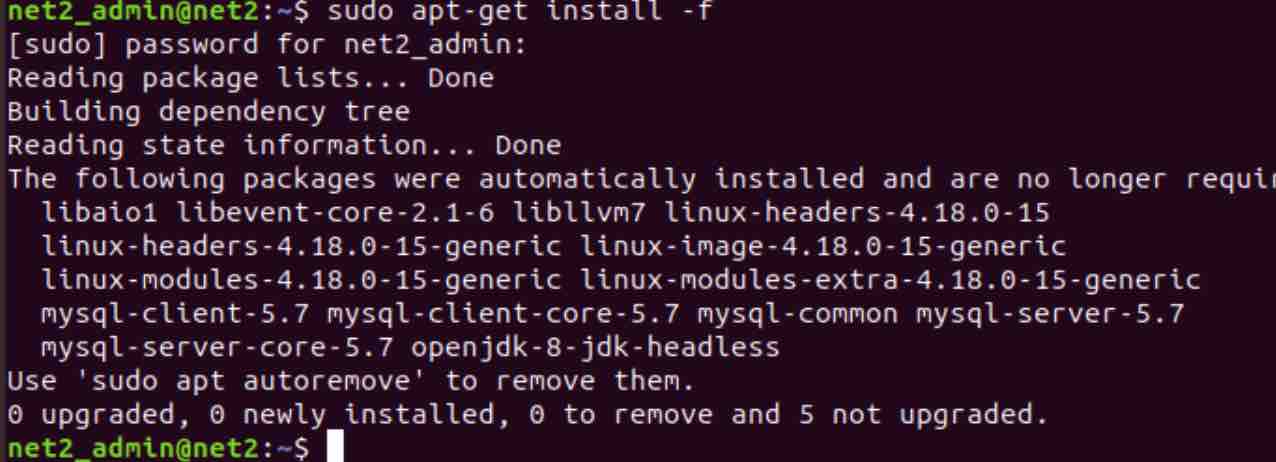
APT will analyze your system’s package state and figure out what actions (installing missing packages, removing conflicting ones) are needed to satisfy all dependencies. Review the proposed changes before confirming with ‘Y’.
After running `apt install -f`, it can sometimes be beneficial to run the following command, which attempts to configure any packages that were installed but left in an unconfigured state:
sudo dpkg --configure -a
Interpreting the Output:
If, after running `sudo apt install -f`, the output includes a line like:
0 upgraded, 0 newly installed, 0 to remove and 1 not upgraded.This often means that while some issues might have been addressed, there’s still at least one package causing problems that the automatic fix couldn’t resolve directly (perhaps it’s being held back). In such cases, it might be worth trying the `sudo apt install -f` command one more time, just in case the first pass resolved prerequisite issues. If it still reports “X not upgraded”, you may need to investigate held packages (see next section).
Read: How to speed up Linux
5. Handling Held Packages with `dist-upgrade`
Sometimes, packages are intentionally “held back” by the package manager. This can happen during complex upgrades or when installing a package would require removing another essential one, leading to dependency conflicts that `apt upgrade` or `apt install -f` won’t resolve automatically. The `dist-upgrade` command is more aggressive and can sometimes resolve these situations by intelligently upgrading or even removing packages to satisfy dependencies.
Using `dist-upgrade`:
First, ensure your package lists are up-to-date:
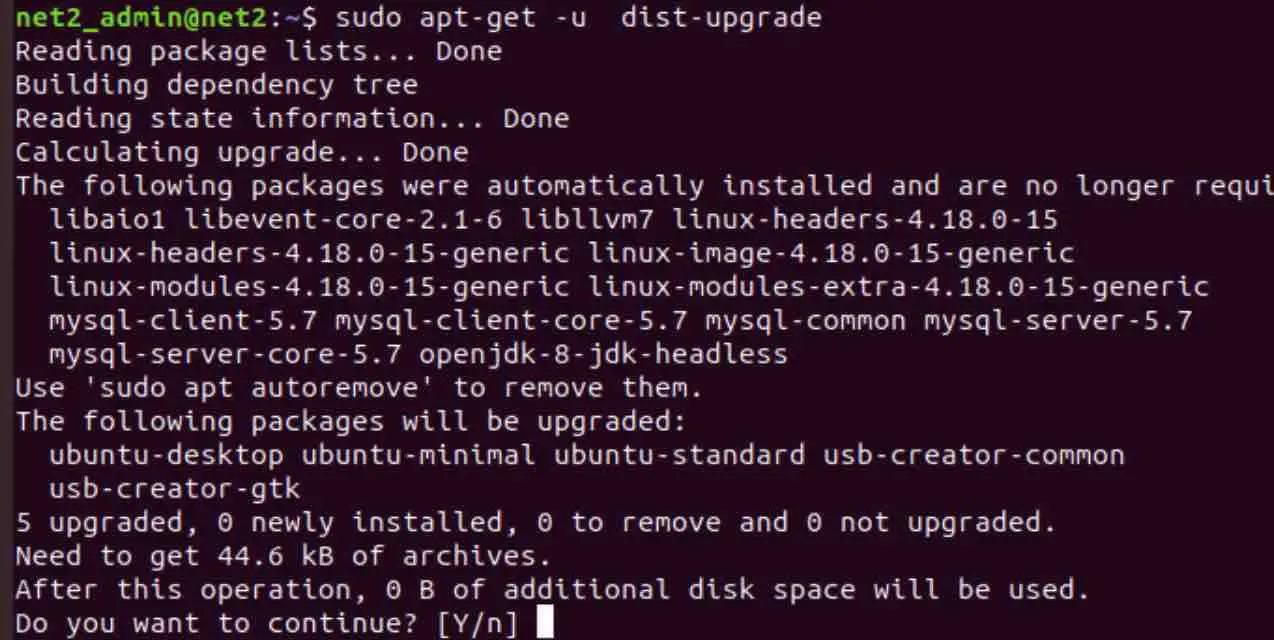
sudo apt updateThen, run the `dist-upgrade` command:
sudo apt dist-upgradePay close attention to the list of changes APT proposes. `dist-upgrade` might suggest removing packages you consider important. Review the list carefully before proceeding with ‘Y’.
Caution: While generally safe, `dist-upgrade` can make significant changes, including removing packages. Always review the proposed actions before confirming.
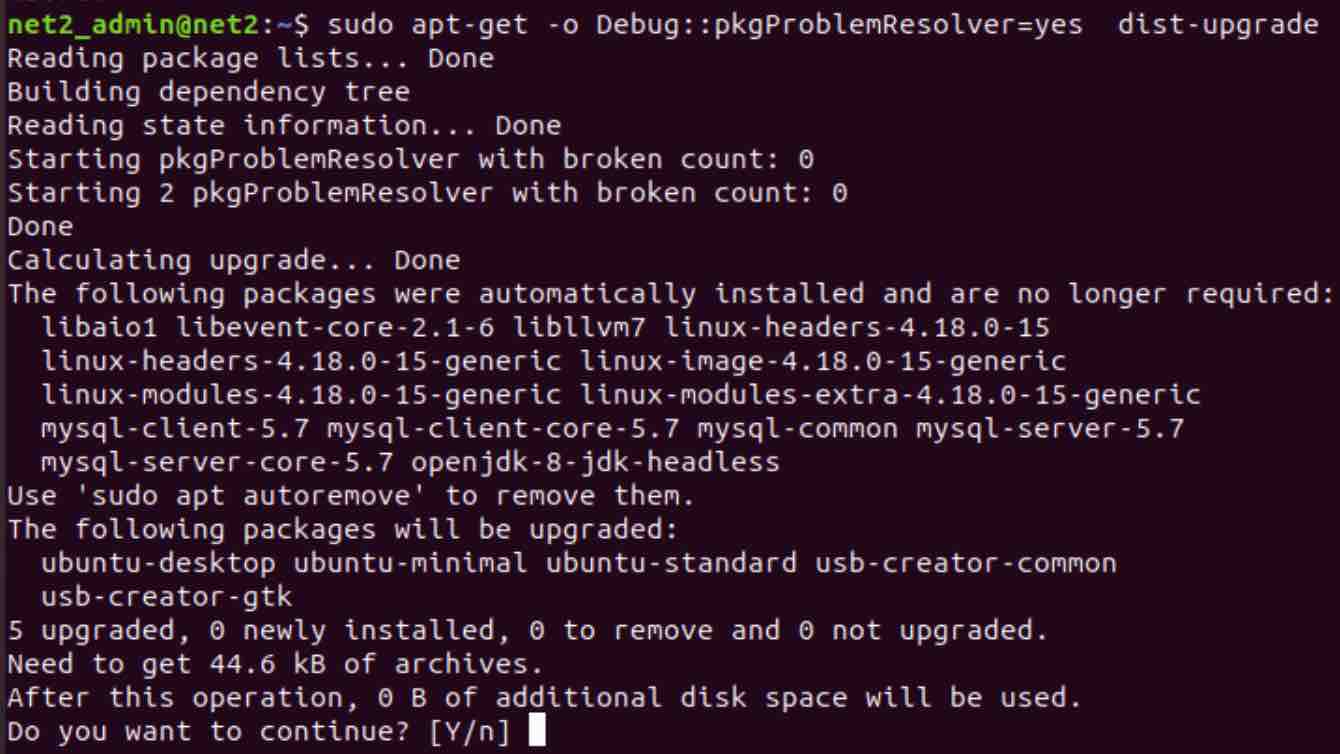
Debugging `dist-upgrade`:
If `dist-upgrade` still fails or reports held packages, you can try running it with a debugging flag to get more insight into the conflict resolution process:
sudo apt -o Debug::pkgProblemResolver=yes dist-upgradeThe output will be much more verbose, potentially showing the internal logic APT uses when trying to resolve conflicts. This might help pinpoint the exact package causing the deadlock.
Dealing with Persistently Held Packages:
If, even after trying `dist-upgrade` (with or without debug mode), you still see output like:
0 upgraded, 0 newly installed, 0 to remove and 3 not upgraded.It strongly suggests specific packages are being held back due to unresolved conflicts. You might need to investigate these specific packages. The output of `apt list –upgradable` or the `dist-upgrade` command itself usually names the held packages. You may need to consider manually removing one of the conflicting packages (carefully!) to break the deadlock.
Before removing a package you suspect is causing the hold, simulate the removal first using the `–dry-run` option to see the potential consequences without actually changing anything:
sudo apt remove --dry-run Replace “ with the actual name of the held package. If the simulation looks acceptable (doesn’t propose removing half your system!), you could then run the command without `–dry-run`. After removing the problematic package, try running `sudo apt install -f` and `sudo apt dist-upgrade` again.
6. Managing Problematic PPAs (Personal Package Archives)
Personal Package Archives (PPAs) hosted on Launchpad allow developers to easily distribute newer versions of software or software not included in the official Ubuntu repositories. While very useful, PPAs can sometimes be the source of “unmet dependencies” errors, particularly if a PPA provides a package that conflicts with one from the official repositories or another PPA.
Disabling PPAs:
Disabling a PPA stops your system from checking it for updates or new software, but it leaves any packages you already installed from that PPA on your system. This can be a quick way to see if a specific PPA is causing the conflict.
To manage PPAs graphically:
- Press `Alt + F2`, type `software-properties-gtk`, and press Enter.
- Go to the “Other Software” tab.
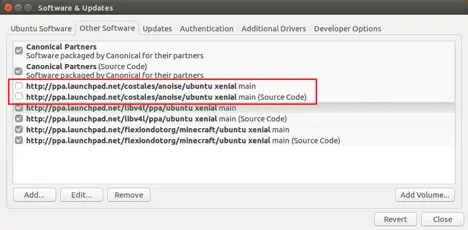
You’ll see a list of enabled external repositories, including your PPAs. Each PPA typically has two entries (one for compiled packages, one for source code). To disable a PPA, uncheck both corresponding boxes.
After disabling the suspect PPA(s), close the window, reload package information when prompted, and try running `sudo apt update` followed by `sudo apt install -f` or your original installation command.
Read: How to remove PPA in Ubuntu
Purging PPAs:
Purging a PPA is a more thorough action. It not only disables the PPA but also attempts to downgrade any packages installed from that PPA back to the versions available in the official Ubuntu repositories. This is often the most effective way to resolve PPA-induced conflicts.
You’ll need the `ppa-purge` tool for this. Install it if you haven’t already:
sudo apt update
sudo apt install ppa-purge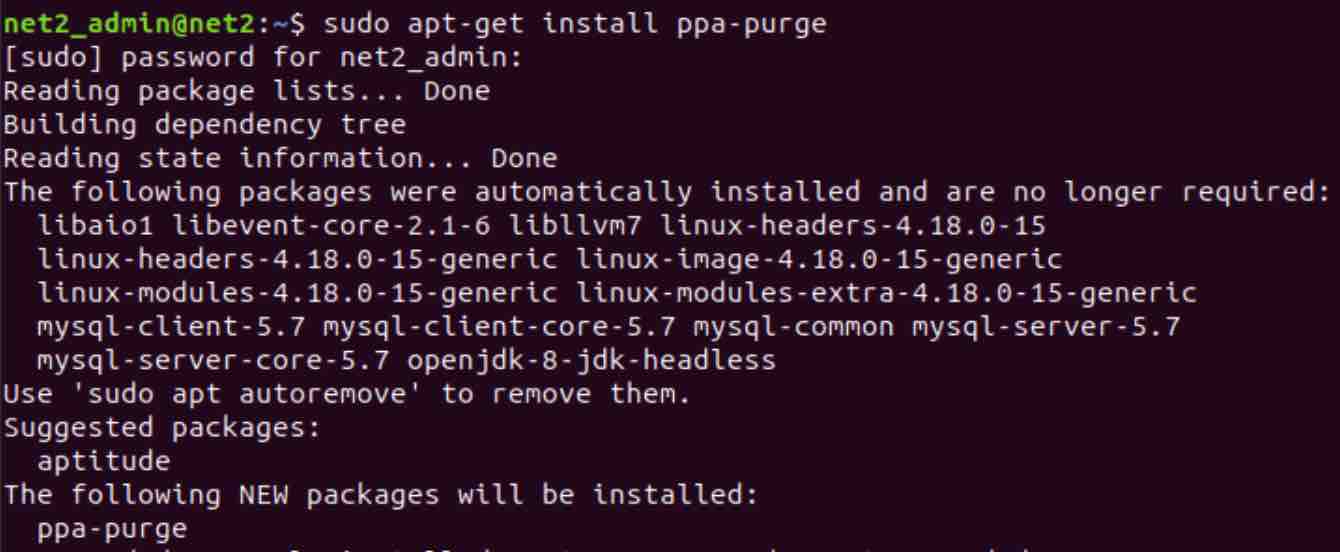
To purge a specific PPA, use the following command, replacing `ppa:owner/name` with the actual PPA identifier (e.g., `ppa:graphics-drivers/ppa`):
sudo ppa-purge ppa:owner/name`ppa-purge` will show you which packages will be downgraded or removed. Review this carefully before confirming. After purging, run `sudo apt update` and try your installation again.
Manually Purging a PPA When APT is Broken
In rare cases, APT itself might be so broken that you can’t even install `ppa-purge`. Here’s a manual workaround (use with caution and adapt URLs if necessary for your Ubuntu version/architecture):
- Download necessary packages manually:
mkdir ~/ppa-purge-manual && cd ~/ppa-purge-manual # Example URLs - find appropriate ones for your system using packages.ubuntu.com wget http://archive.ubuntu.com/ubuntu/pool/universe/p/ppa-purge/ppa-purge_0.2.8+bzr63_all.deb wget http://archive.ubuntu.com/ubuntu/pool/main/a/aptitude/aptitude-common_0.8.13-3ubuntu1_all.deb # You might need aptitude core package too depending on what's broken # wget http://archive.ubuntu.com/ubuntu/pool/main/a/aptitude/aptitude_0.8.13-3ubuntu1_amd64.deb - Install downloaded packages using `dpkg`:
sudo dpkg -i . var wpcf7 = {"apiSettings":{"root":"https:\/\/net2.com\/wp-json\/contact-form-7\/v1","namespace":"contact-form-7\/v1"},"cached":"1"};