Updated on 5/5/2022 – Using the APT package management utility in Ubuntu or some other Linux distros is straightforward for most users. It helps to install, remove and update packages. Sometimes however, when third party dependencies are involved, the apt-get command might fail with the error The following packages have unmet dependencies and the package installation suddenly comes to a halt.
In this article, we will provide some solutions to this issue, so let’s get started.
We advise beforehand to back up your configuration files like /etc/apt/sources.list and /var/lib/dpkg/status, so that you can revert all changes if needed.
![]()
1 Use Aptitude
Aptitude is an invaluable and an alternative tool to apt-get command which can be used as a higher-level package manager that helps visualize dependencies such as suggested and recommended packages. It also provides a conflict resolution mechanism which shows all possible combinations of installed/upgraded/removed.. packages in order to solve conflicts.
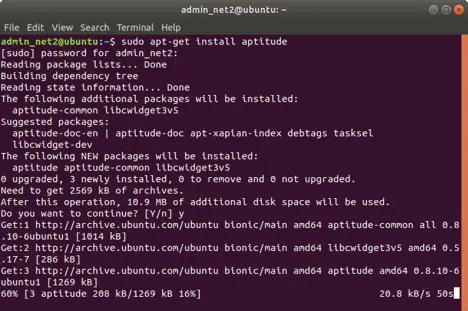
In order to install aptitude, open up a terminal and issue the sudo commands below :
sudo apt-get install aptitude
and hit Enter.
sudo aptitude install PACKAGENAME

where PACKAGENAME refers to the package you want to install. This will install the package using aptitude. This should fix the unmet dependencies issue.
You may be interested to read: How to keep Ubuntu clean?
2 – Package database cleanup
Unmet Dependencies Ubuntu error can also be caused by a corrupted package database or packages that were not installed properly. By cleaning the package database this issue can be fixed. This can be achieved with two commands :
sudo apt-get clean
Which cleans up the local repository of retrieved package related files (.deb). It will keep however the lock files /var/cache/apt/archives and /var/cache/apt/archives/partial/ and removes everything else.
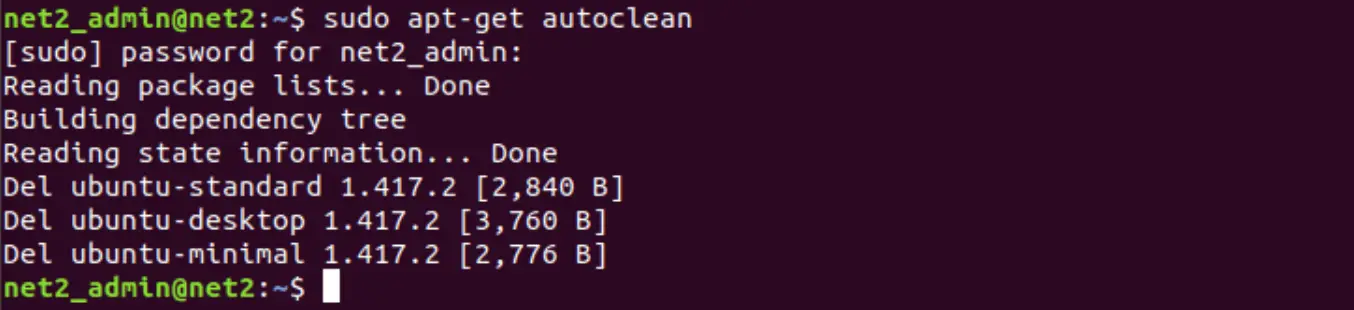
sudo apt-get autoclean
Removes only obsolete, i.e. absolutely not necessary packages that no longer exist in the repositories.
3 Enabling the restricted and universe repositories
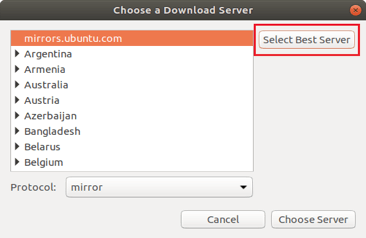
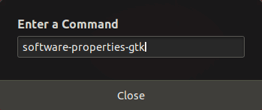
Press Alt and F2 simultaneously and type in software-properties-gtk and press enter.

Now in the Ubuntu Software tab, enable all the repositories (main, restricted, universe and multiverse) are enabled.
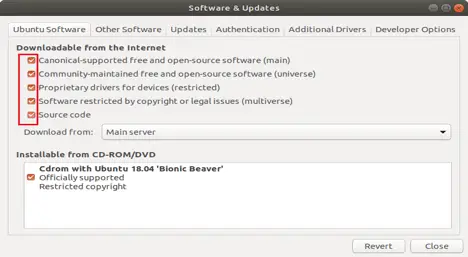
Next to Download from, click the dropdown box Main server
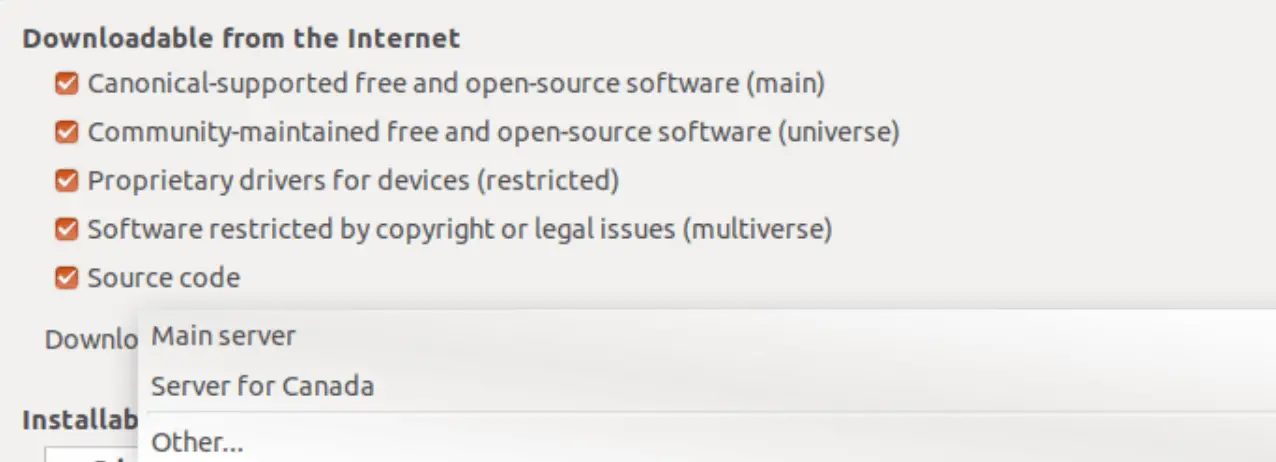
and then Click on Select Best Server.
Open up the Terminal and type in :
sudo apt-get update
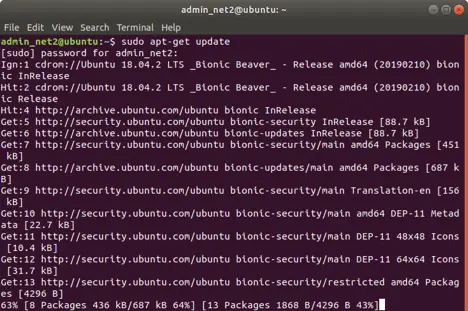
Once it has finished, try to re-install the package again.
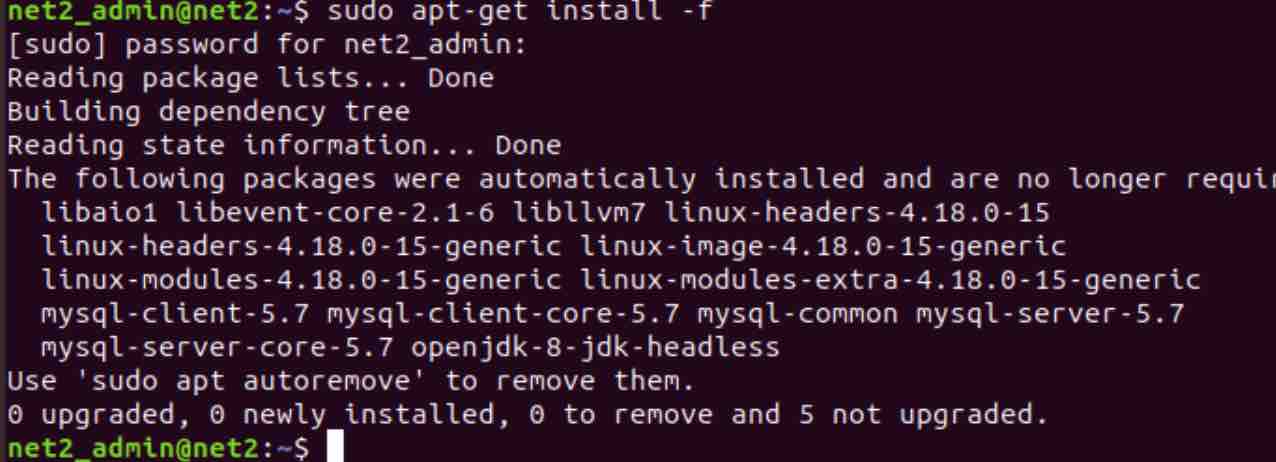
4 Use the -f parameter
This will only involve adding two letters to the apt-get command. Instead of typing
sudo apt-get install PACKAGENAME
Run
sudo apt-get install -f
The newly added -f parameter will allow the command to correct the broken Ubuntu Unmet Dependencies issue. You will then be able to install your specific package.
Then type in
sudo dpkg –-configure -a

If the output is:
0 upgraded, 0 newly installed, 0 to remove and 1 not upgraded.
That means it failed.
Finally issue the command again:
sudo apt-get install -f
You may be interested to read: How to speed up Linux ?
5 On-hold packages removal
Dependency problems and conflicts that apt can’t solve will keep some packages in an ‘on-hold’ state (not completely installed). Eliminating these packages might fix the conflicts and thus may help solve the original issue.
Open up a terminal and type in :
sudo apt-get -u dist-upgrade
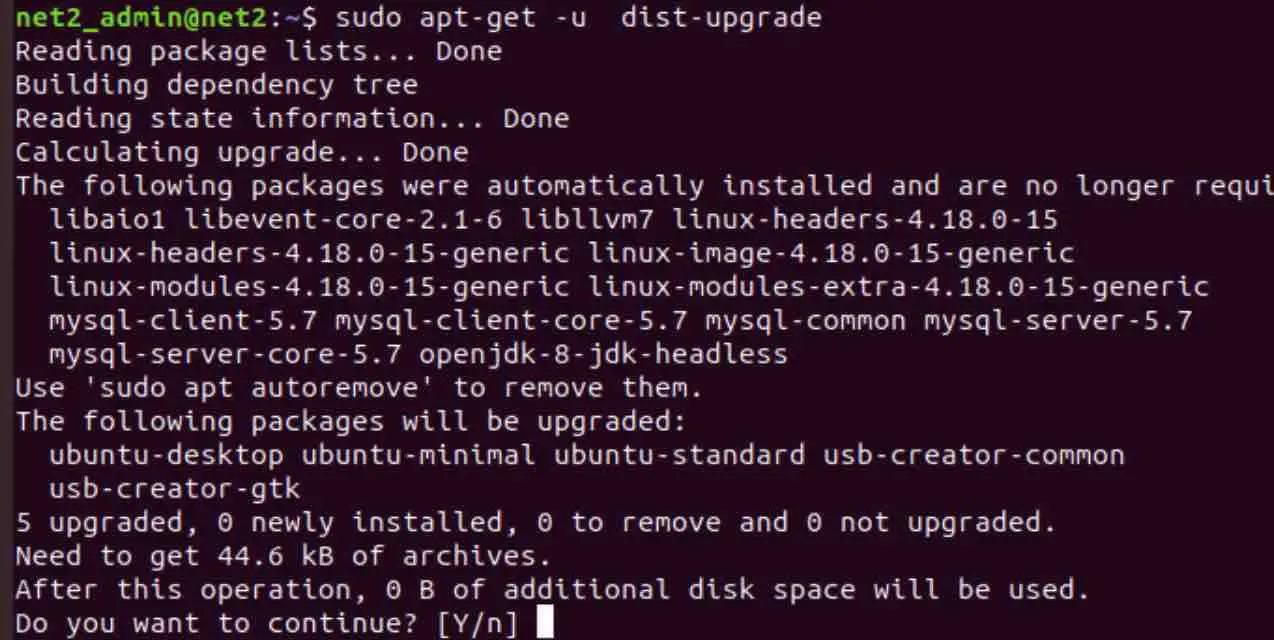
If this shows any held packages, it would be best to remove them.
Now run the command below in order to find and repair the conflicts:
sudo apt-get -o Debug::pkgProblemResolver=yes dist-upgrade
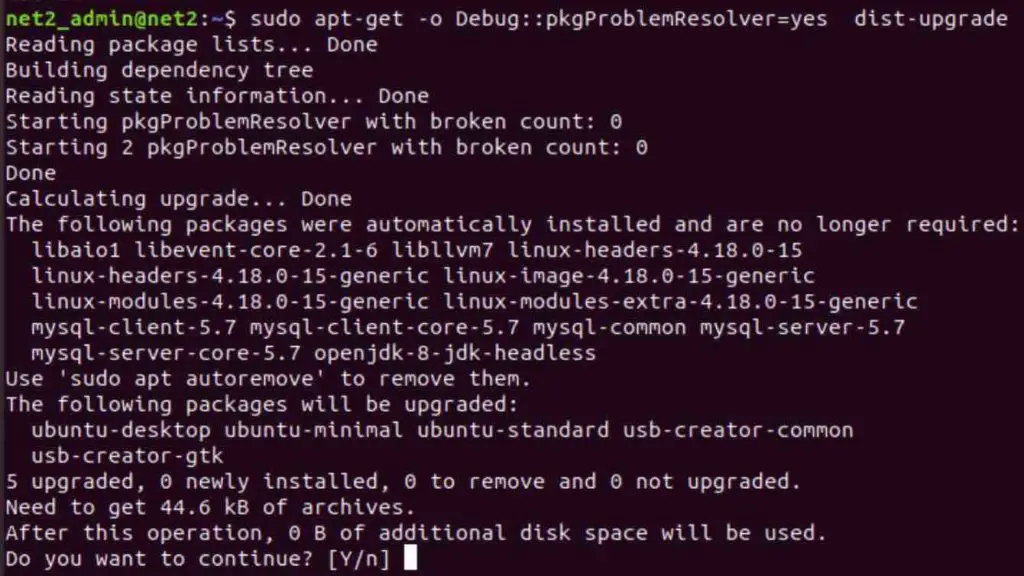
If it cannot fix the conflicts, it will exit with an output similar to :
0 upgraded, 0 newly installed, 0 to remove and 3 not upgraded.
Now remove the held packages one at a time by executing dist-upgrade each time, until there are no more held packages . Afterwards try to re-install your package. Make sure to implement the –dry-run option, in order to stay informed of the consequences:
sudo apt-get remove –dry-run package-name
6 Purge/Remove/Disable PPAs
Personal Package Archives (PPA) are repositories that are used to install or upgrade packages that are missing in the Ubuntu official repositories. PPAs are usually hosted on the launchpad. Most of the time, unmet dependencies are caused by these repositories mainly when they’re used in order to upgrade an Ubuntu repository package which was available. You can either remove, disable or simply purge them.
Disable the PPAs would mean that the packages which were installed from that specific PPA will not get updates any longer.
Press Alt and F2 simultaneously and execute software-properties-gtk.
From the Other Software tab shown below :
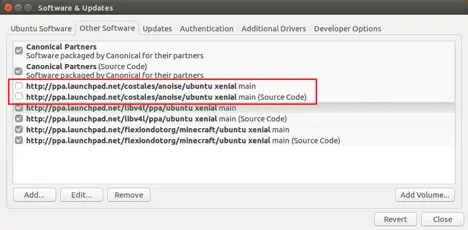
You will find, as depicted above, two lines for every PPA: one is related to the source and the other for the compiled package. Uncheck both lines in order to disable a PPA.
You may want to read: How to remove PPA in Ubuntu?
The Purge option enables all selected PPA packages to be downgraded to the official repositories version and will also disable the PPA. In order to install PPA Purge, you would need to run :
sudo apt-get install ppa-purge
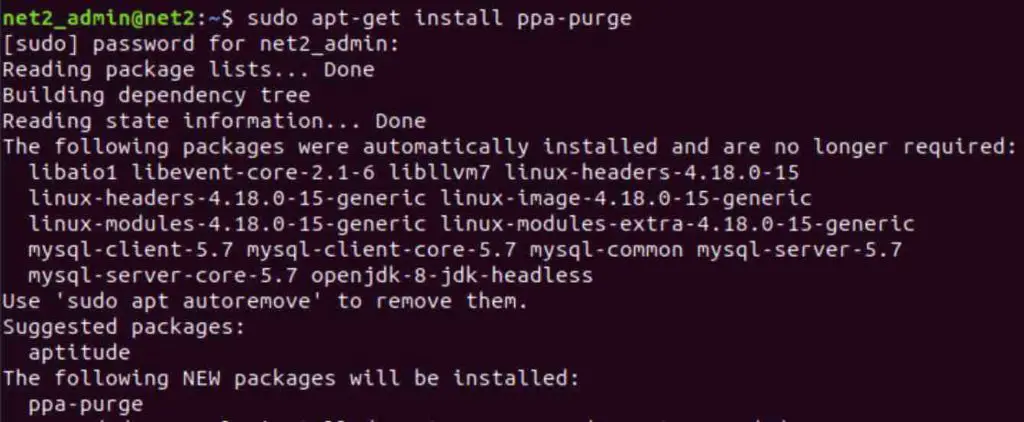
The above command will fail considering that apt is broken in your case. Instead use the following command :
mkdir ppa-purge && cd ppa-purge && wget http://mirror.pnl.gov/ubuntu/pool/universe/p/ppa-purge/ppa-purge_0.2.8+bzr56_all.deb && wget http://mirror.pnl.gov/ubuntu//pool/main/a/aptitude/aptitude_0.6.6-1ubuntu1_i386.deb && sudo dpkg -i . var wpcf7 = {"apiSettings":{"root":"https:\/\/net2.com\/wp-json\/contact-form-7\/v1","namespace":"contact-form-7\/v1"},"cached":"1"};