By default, Ubuntu automatically gets an IP address for your network using DHCP (Dynamic Host Configuration Protocol).
This means your Ubuntu system will receive a dynamic IP address, which can change periodically, unless you configure it to use a static IP address. Since Ubuntu 18.04, network configuration is managed by Netplan, which uses YAML files. This guide will walk you through setting up both static and dynamic IP addresses on your Ubuntu system, using Ubuntu 18.04 LTS as an example.
Understanding the Netplan Configuration File
Netplan configuration files are located in /etc/netplan/file*.yaml, where “file*” represents your specific configuration file name. Typically, Ubuntu Server uses 01-netcfg.yaml, while the desktop version uses 01-network-manager-all.yaml. If you have multiple network interfaces, Netplan creates files like 02-netcfg.yaml for subsequent interfaces, following a numerical order for applying configurations. Before making changes, note these points:
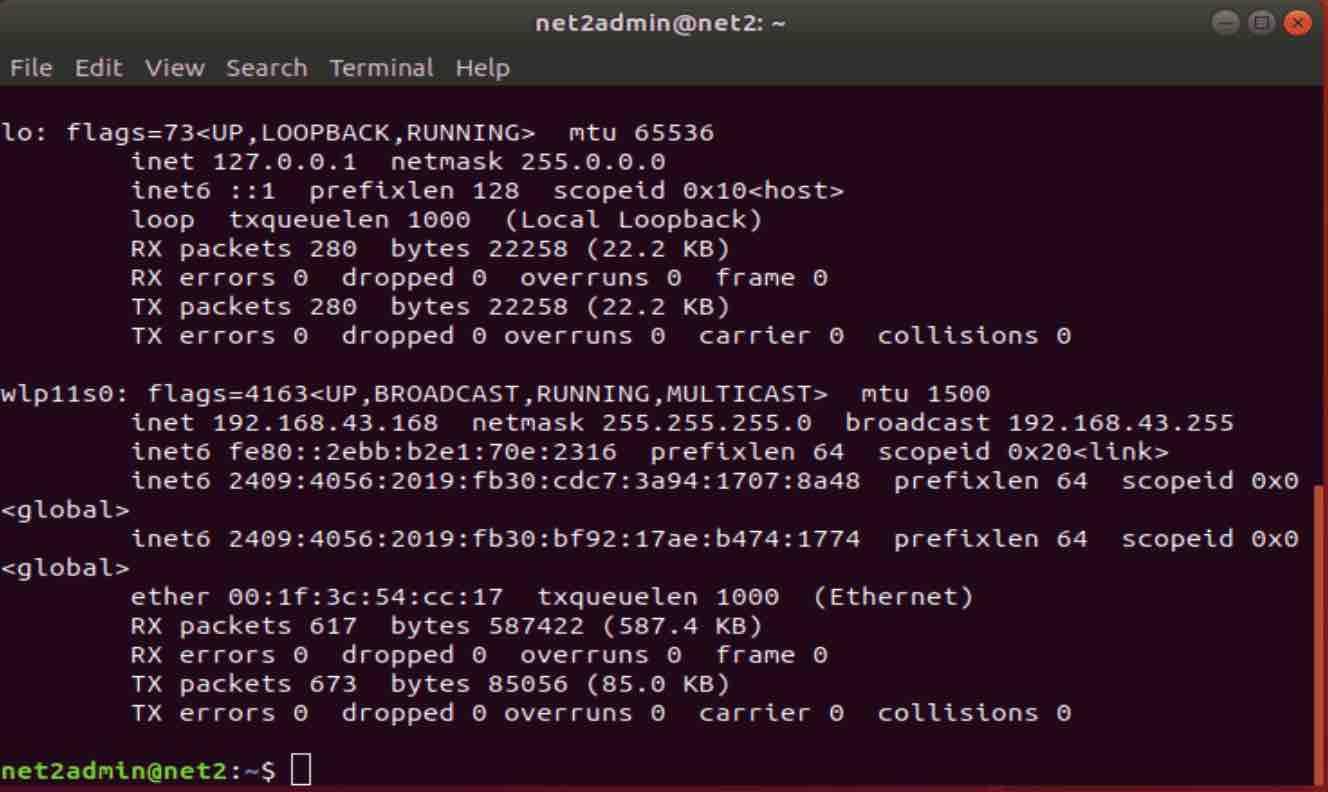
To see a list of all available network interfaces, use the command:
ifconfig -a
Identify and note the name of the network interface you wish to configure.
Read: Troubleshooting Ethernet and DNS Issues in Ubuntu 24.04
Recording your current IP address or taking a screenshot for reference is helpful.
Now, open the Netplan configuration file for editing using the nano text editor:
sudo nano /etc/netplan/01-network-manager-all.yaml
Before editing, you can view the file content using the cat command.
If the configuration file is missing, you can generate a default one with:
sudo netplan generate
This is the file you will modify to set either a static or dynamic IP address.
Setting up a Static IP Address
A static IP address is a fixed, unchanging IP address. Configuring a static IP on Ubuntu is useful for remote access to your system or for maintaining a consistent network connection, especially for devices like IP cameras, home file servers, or game servers. Static IPs are generally recommended for servers rather than personal computers. If you need a static IP, follow these steps:
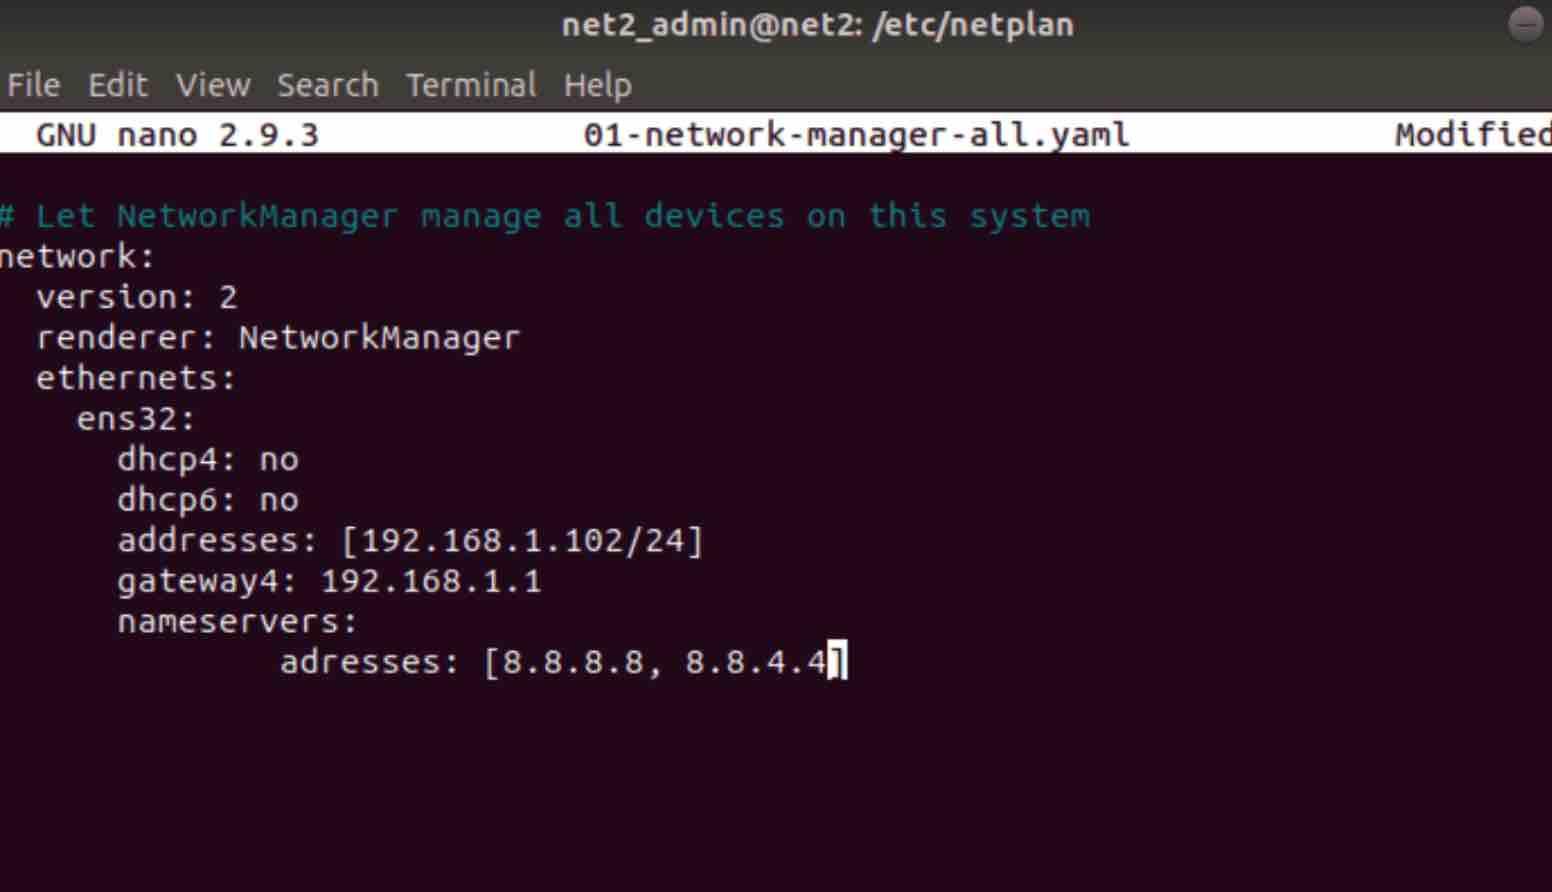
In the Netplan configuration file (e.g., 01-network-manager-all.yaml), locate the section for the network interface you want to configure.
Underneath the interface name (like ens32 in this example), add the following lines, replacing the placeholder values with your specific network details:
ens32:  # The name of Your network interface

dhcp4: no  # Disable DHCP for IPv4

dhcp6: no  # Disable DHCP for IPv6

addresses: [your-static-ip/subnet_mask] # Static IP address and subnet mask

gateway4: your-gateway-ip # Your gateway IPv4 address

nameservers:

addresses: [dns-server-ip-1, dns-server-ip-2] # DNS server IP addresses
WARNING:
YAML file formatting is indentation-sensitive. Ensure correct spacing for each line, as incorrect indentation can lead to errors like: Invalid YAML at //etc/netplan/01-netcfg.yaml line 5 column 4: did not find expected key.
Read: How to set up a UFW on Ubuntu 22.04
The addresses field expects a sequence of static IP addresses. Refer to the Netplan documentation (netplan man) for more details.
Save the modified file and exit the editor. Your configuration should resemble the following:
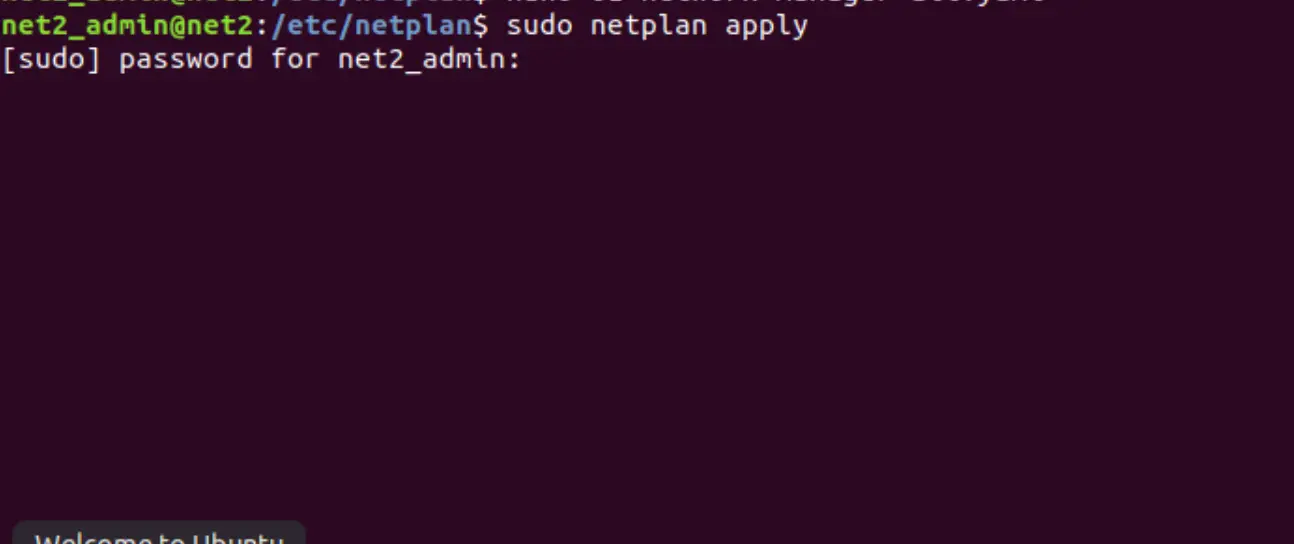
Apply the new network configuration using:
sudo netplan apply
Or
sudo netplan --debug apply for debugging if errors occur.
Verify the changes to your network interface by running:
Ubuntu Netplan Static IP Configuration Verification
ifconfig -a
If the new settings are not applied, reboot your system and check again.
You have now successfully configured a static IP address on your Ubuntu system.
Read: How to Configure Network Settings in Ubuntu 22.04
Setting up a Dynamic IP Address
A dynamic IP address is a temporary IP assigned by a DHCP server each time you connect to a network. Dynamic IPs are commonly used due to the limited availability of IPv4 addresses, allowing a single IP to be shared among multiple devices over time. To configure a dynamic IP address on your Ubuntu PC, follow these steps:
Open the Netplan configuration file again using:
sudo nano /etc/netplan/01-network-manager-all.yaml
Locate the section for your network interface and add or modify the following lines to enable dynamic IP configuration:
dhcp4: yesdhcp6: yes
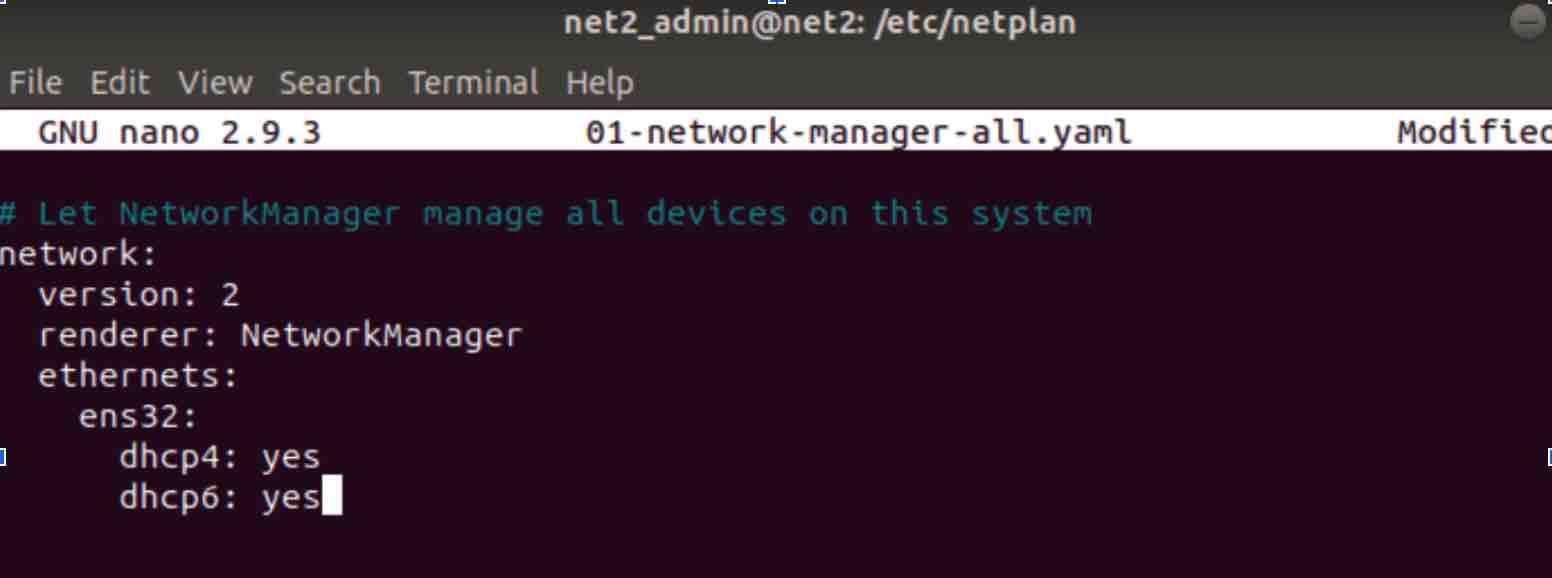
Save the file and close the editor.
Apply the changes by running the command: sudo netplan apply.
Your network device should now be configured to obtain a dynamic IP address automatically.
If you like the content, we would appreciate your support by buying us a coffee. Thank you so much for your visit and support.