In the world of Linux, the gzip utility is a fundamental tool for shrinking files to save disk space or reduce network transfer times.
When you use gzip to compress a file, it creates a new file with a .gz extension by default. It’s good to know that if the original filename is very long, gzip might shorten it during compression.
This guide will walk you through how to use the gzip command effectively, covering its most useful options with practical examples. Let’s get started!
Your First Gzip Compression: The Basics
Let’s start by seeing what files are in our current working directory. We can do this with the familiar ls command.
ls
Now, let’s compress the file named examples.desktop using the most basic gzip command:
gzip examples.desktopAs you can see in the screenshot below, the command successfully compressed the file, and its name has been changed to examples.desktop.gz.
You’ve just performed the standard gzip operation:
gzip filenameAn important detail to notice is that the original file, examples.desktop, has been removed. This is the default behavior. Later, I’ll show you how to keep the original file if you need it.
The effectiveness of gzip compression depends heavily on the file’s content. Text-based files, such as documents and logs, or certain media formats like WAV audio, compress very well. However, other formats like JPEG images and MP3 audio files are already compressed, so running gzip on them won’t save much space and can sometimes even slightly increase the file size by adding its own overhead.
Read: How to Zip all files in a directory in Linux
How to Force Gzip to Overwrite Files with the -f Option
Sometimes, gzip might not work as expected. For instance, if a compressed file with the same name (like examples.desktop.gz) already exists, gzip will stop to prevent accidental overwriting. To tell gzip that you want to proceed anyway, you can use the -f (force) option.
gzip -f examples.desktop
Forcing gzip to overwrite an existing compressed file.
Decompressing a Gzip File
To get your original file back, you can decompress it using the -d (decompress) option.
gzip -d examples.desktop.gz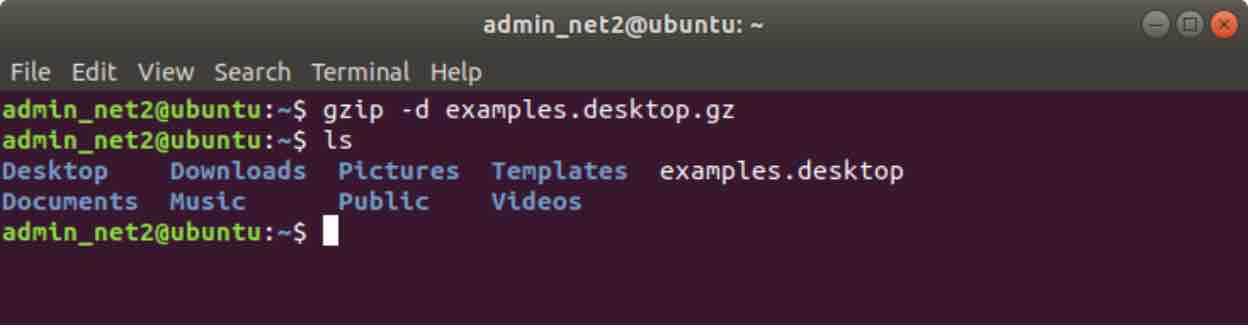
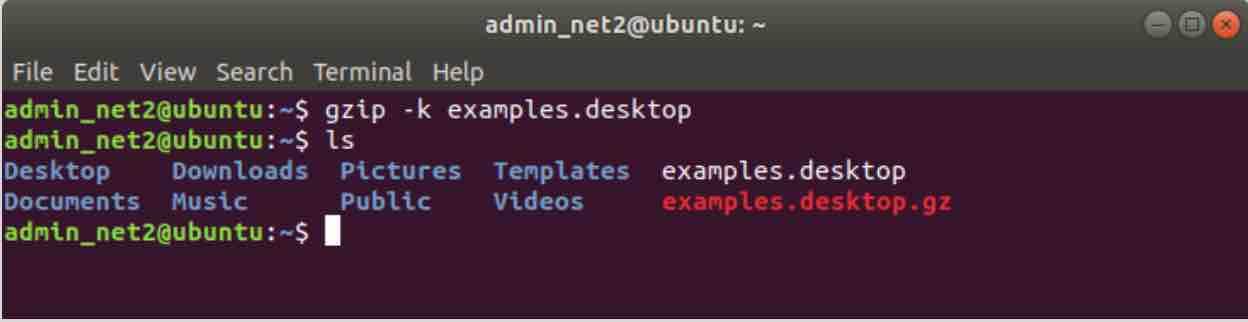
Keeping the Original File: The -k (Keep) Option
As we saw earlier, gzip deletes the original file after compression. If you want to keep the original source file untouched, the -k (keep) option is what you need.
gzip -k examples.desktopAfter running this command, you will have both the original examples.desktop and the new examples.desktop.gz in your directory.
Analyzing Compression Results: The -l (List) Option
Are you curious about how much space you’ve saved? The -l (list) option provides detailed statistics about your compressed file without decompressing it.
gzip -l examples.desktop.gz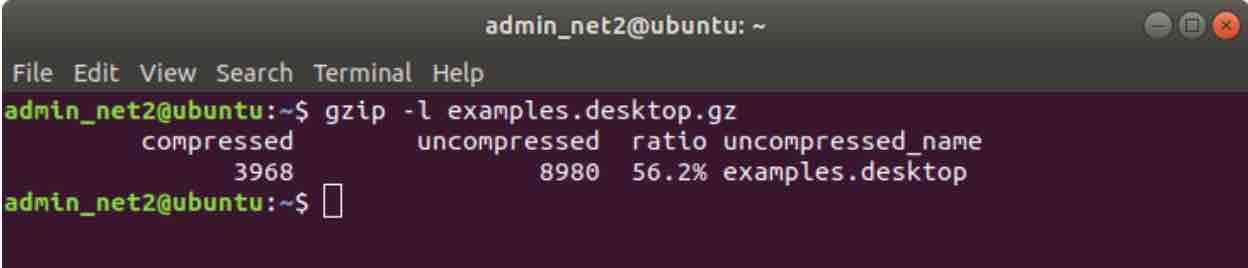
Displaying compression statistics for a .gz file.
The command returns the following information, which I’ve broken down in this table for clarity:
| Column Header | Description |
|---|---|
| compressed | The size of the compressed file. |
| uncompressed | The size of the original, uncompressed file. |
| ratio | The compression ratio shown as a percentage. |
| uncompressed_name | The name of the original file. |
Read: How to use the Tar command in Linux to compress and extract files
Getting Real-Time Feedback with the -v (Verbose) Option
If you want to see what’s happening during the compression process, the -v (verbose) option is very helpful. It displays the file name and the percentage of size reduction in real-time.
gzip -v examples.desktop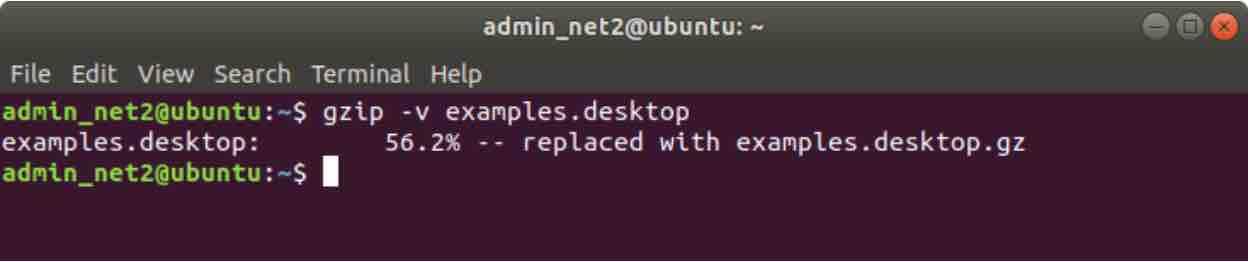
How to Gzip a Whole Directory Recursively with the -r Option
To compress every single file within a directory and all of its subdirectories, you can use the -r (recursive) option. Gzip will navigate the entire folder structure and compress each file it encounters along the way.
gzip -r home/examplesThe image below shows the result of running a recursive compression on the ‘examples’ directory. As you can see, every file inside has been compressed.
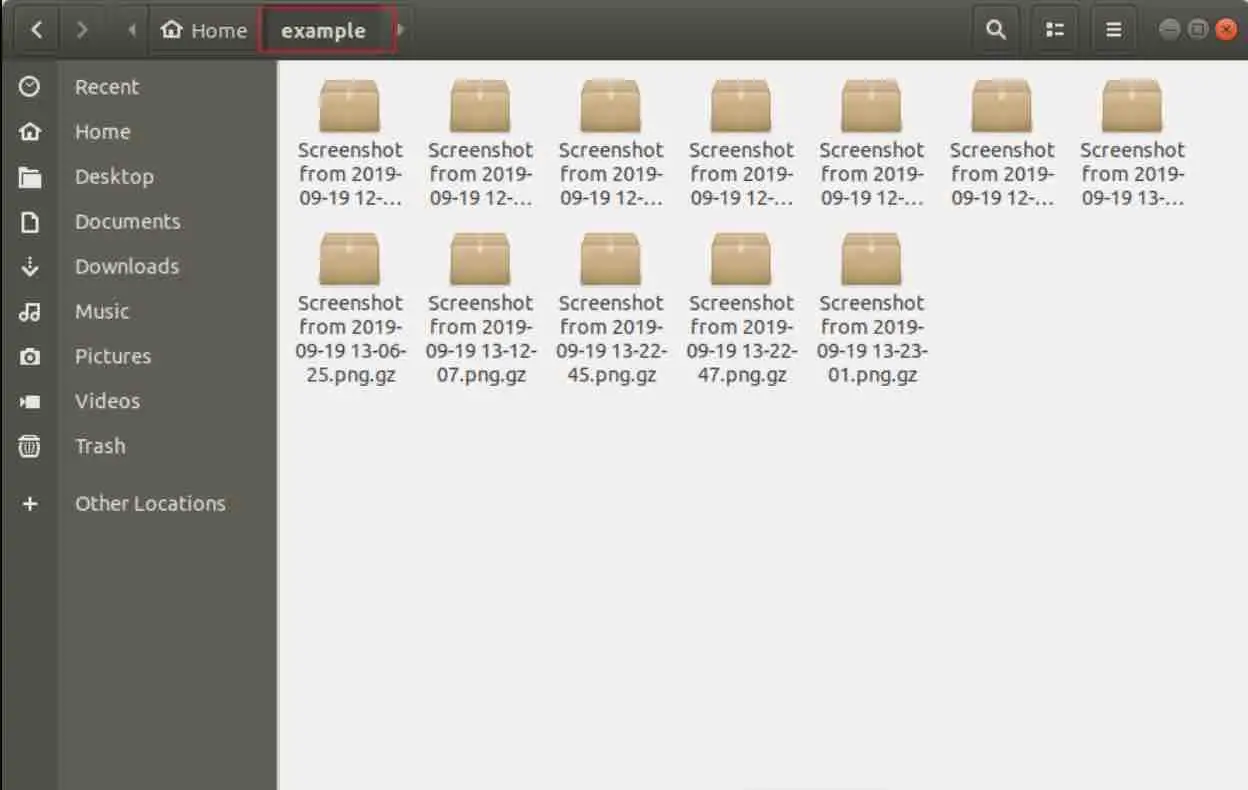
Example of recursively compressing a directory with gzip.
Testing Your Compressed Files: The -t (Test) Option
After transferring a file, you might want to ensure it wasn’t corrupted. The -t (test) option allows you to check the integrity of a compressed file without decompressing it.
gzip -t example.gz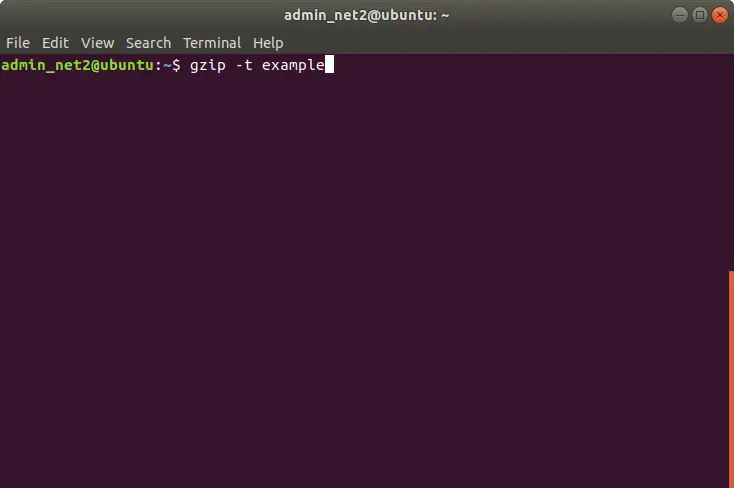
If the command completes without any output, it means the file is valid and error-free. If there’s a problem, gzip will report it.
Fine-Tuning Gzip: Balancing Compression Speed and Size
Gzip also allows you to control the trade-off between compression speed and the final file size. You can specify a compression level from -1 (fastest, least compression) to -9 (slowest, best compression). The default level is -6, which offers a good balance.
- For the fastest compression with a slightly larger file size, use:
gzip -1 example- To achieve the maximum compression, which will take more time, use:
gzip -9 exampleYou can use any number between 1 and 9 to fine-tune the compression level to your specific needs.
If you like the content, we would appreciate your support by buying us a coffee. Thank you so much for your visit and support.