The gzip utility in Linux is a common tool that is used to compress files or in other words, to reduce their size. The original file, when compressed by gzip will have the extension .gz by default. The file name however, when it is very long, will be changed after the compression, .i.e. It will be truncated.
In this article you will learn how to use the gzip utility to compress files along with the different switches used.
Compressing files using Gzip
Let us first display the list of files in the current directory. We use the command below :
ls

gzip linux
Now we will try to compress the file named examples.desktop :
gzip examples.desktop
As shown in the above snapshot, the gzip command has compressed the file examples.desktop. The the extension has changed to (.gz).
The example above showed the most basic usage of the gzip command, namely :
gzip filename [linux gzip]
You may have noticed that the original file is no longer available. You will see below some ways to compress the file without deleting the original one.
The compression quality of some files differs depending on the content and nature of the file. For instance, text files, documents some audio and video files like MPEG and WAV have a good compression rate.
Read: How to Zip all files in a directory in Linux
On the other hand, some other file formats , like MP3 audi files , JPEG images do not get compressed as good as the first ones above. Sometimes, the file size after compression may even increase !! This can be explained by the fact that the MP3 and JPEG files have an already compressed content. Compressing it further may add additional data to it.
Force compression : -f option
Sometimes, when you can execute gzip , it won’t work. It could be that a similar name with .gz extension already exists for instance. In this case, you can force the compression using the -f option as shown below :
gzip -f examples.desktop

linux gzip
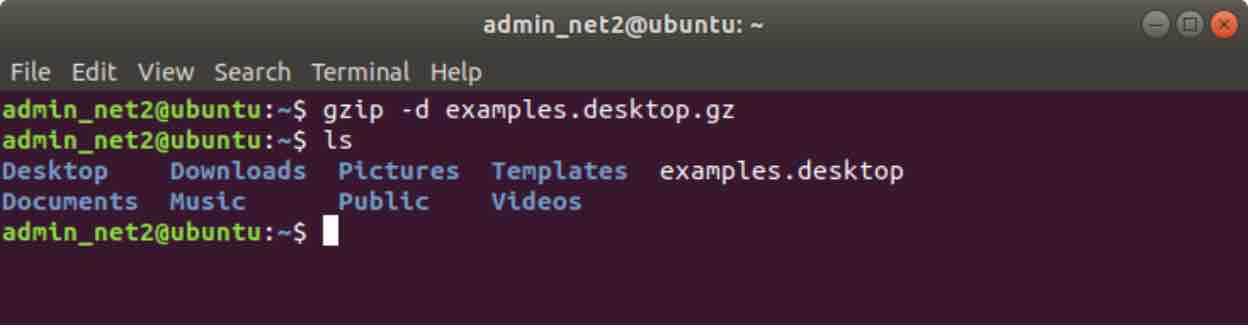
You can decompress the file using the gzip -d command :
gzip -d examples.desktop.gz
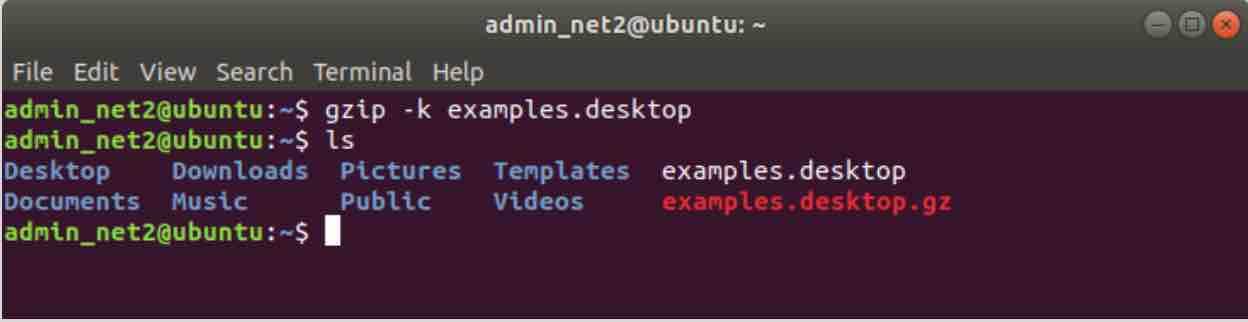
Keep the uncompressed primary file : -k option
As mentioned earlier, when you compress a file using the gzip tool, you would end up with a new file having the extension .gz while at the same time, the original file has been removed or rewritten with the new one.
In case you want to keep the original file after compression, you would have to execute the following command:
gzip -k examples.desktop
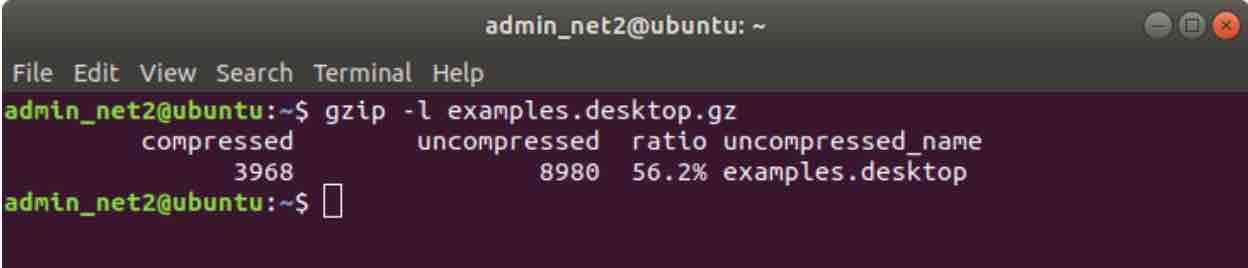
Space Saved : -l option
When compressing a file, its size will be reduced.This is in order to save space on the disk or to send it as an attachment….the gzip command can provide Compression statistics like the amount of space that was saved after the compression operation.
To display such statistics , execute the command below :
gzip -l examples.desktop.gz
Compress file in linux
The statistics data returned by the command above is the following:
Compressed size, uncompressed size, ratio as a percentage, uncompressed filename.
Read: How to use the Tar command in Linux to compress and extract files
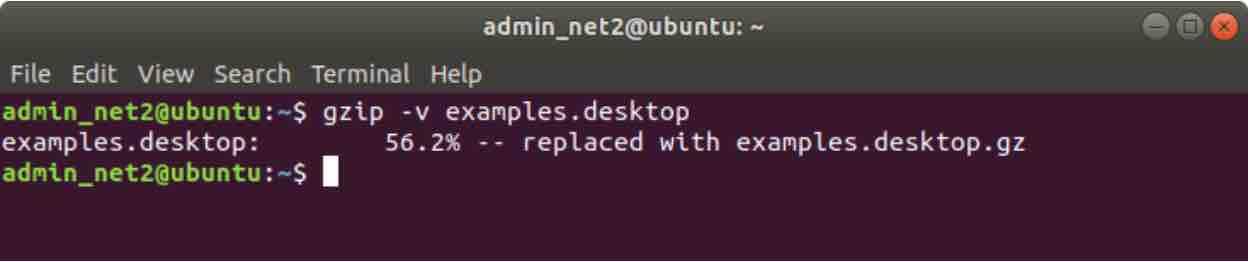
File size compression percentage: -v option
This option shows the size reduction percentage and the name for each file compressed.
gzip -v examples.desktop
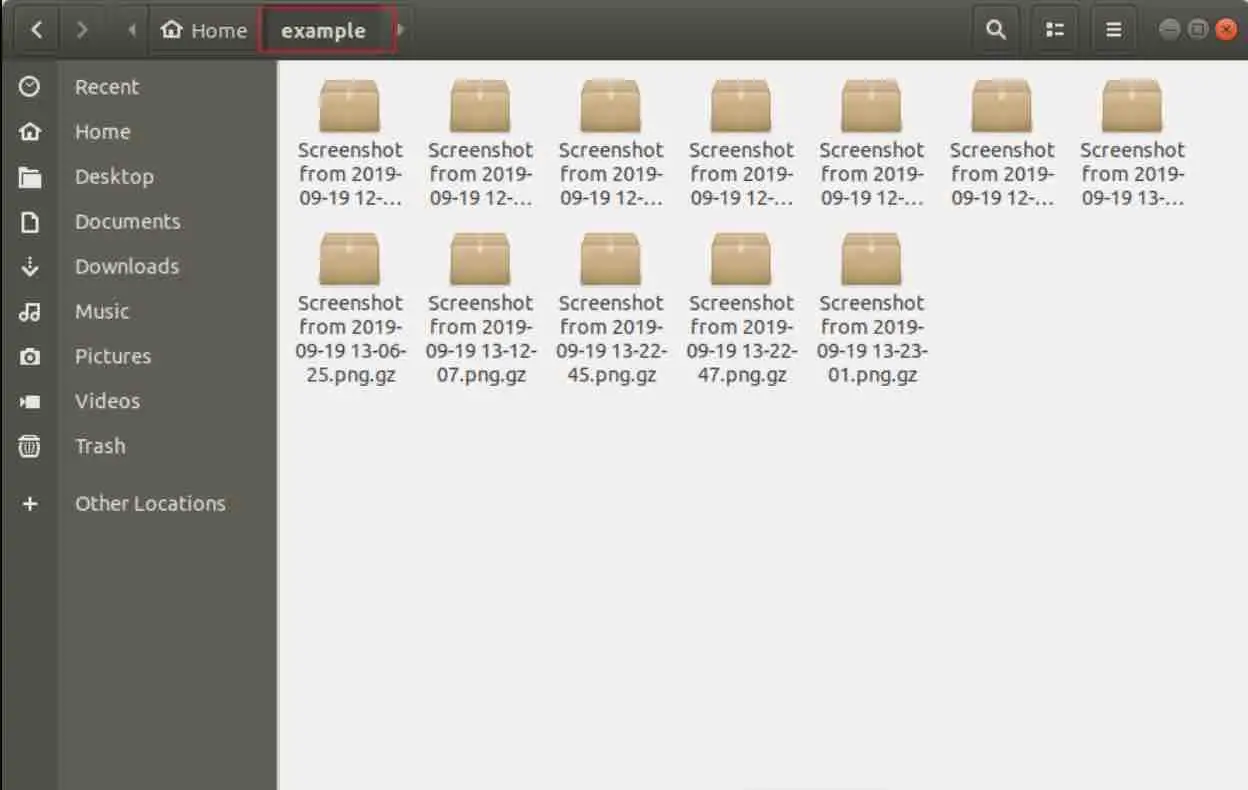
Recursive compression: -r option
The -r option recursively compresses files in a directory and its sub-directories.It visits the directory structure and compresses each file in that folder.
gzip -r home/examples
Here is an output which shows an example of a recursive compression applied to the ‘example’ folder under /home. As you can see, all the files were compressed .
gzip directory in linux: example
Compressed file validity test : -t option
In order to check that a file is valid, you would simply need to execute the following command:
gzip -t example
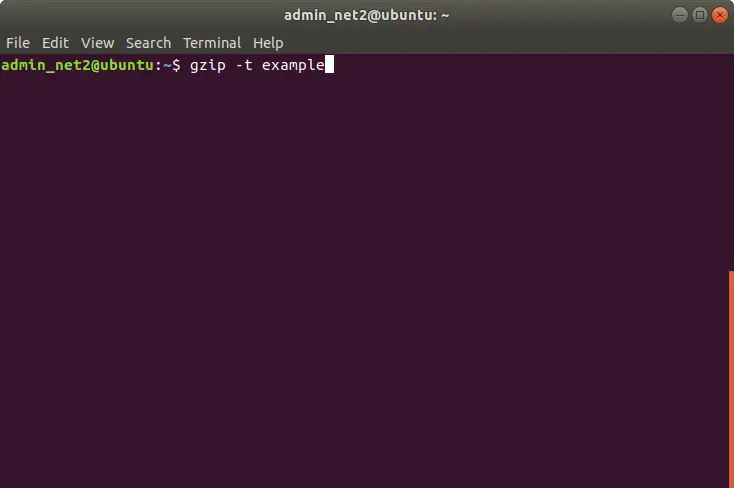
No output will be shown means that the file is valid.
Compression level tweaking
You have the possibility with gzip to control the compression level. If you need smaller compression, the gzip process will run faster whereas for a higher compression, this will take a longer time.
For lower compression and high speed you would need to run the command:
gzip -1 example
To obtain the maximum compression at the slowest speed however, the following command should be executed:
gzip -9 example
In order to tweak the compression level, you would just need to vary the numbers between 1 and 9.
If you like the content, we would appreciate your support by buying us a coffee. Thank you so much for your visit and support.