PHPMyAdmin is one of the most widely used database management tools for MySQL and MariaDB databases. However, many administrators encounter a common limitation when trying to import large database files – the default 2MB file size restriction.
This article provides a comprehensive guide to overcoming this limitation across different server environments.
Understanding the File Size Limitations
When attempting to import a large SQL file into PHPMyAdmin, you might encounter an error or notice that the maximum upload size is limited to 2MB. This restriction is not inherent to PHPMyAdmin itself but is controlled by several PHP configuration parameters that affect file uploads.
The three primary PHP configuration parameters that control file upload size are:
- upload_max_filesize – The maximum size of an uploaded file
- post_max_size – The maximum size of POST data that PHP will accept
- memory_limit – The maximum amount of memory a PHP script may consume
For successful large file uploads, these parameters must follow a specific hierarchy of values:
memory_limit > post_max_size > upload_max_filesize
Read: 4 Ways to Find Large Files on Linux and Free Up Disk Space
How to Modify PHP Configuration Parameters
Solution for Apache with PHP Module
- Locate your PHP configuration file (php.ini). Common locations include:
- Ubuntu/Debian:
/etc/php/[version]/apache2/php.ini - CentOS:
/etc/php.ini - XAMPP on Windows:
C:\xampp\php\php.ini - WAMP on Windows:
C:\wamp\bin\php\php[version]\php.ini
- Ubuntu/Debian:
- Open the file with a text editor (use sudo or administrative privileges as needed)
- Find and modify the following parameters:
# Increase to desired value (e.g., 128M) memory_limit = 128M # Set to a value larger than your database file but smaller than memory_limit post_max_size = 64M # Set to a value smaller than post_max_size upload_max_filesize = 32M - Save the file and restart your web server:
- Apache on Linux:
sudo systemctl restart apache2orsudo service apache2 restart - Apache on Windows: Restart through the XAMPP/WAMP control panel
- Apache on Linux:
Read: Troubleshooting Nginx ‘Address Already in Use ‘ Error
Solution for Nginx with PHP-FPM
- Locate and edit your PHP configuration file as above
- After making changes, restart PHP-FPM:
sudo systemctl restart php7.4-fpm # Replace 7.4 with your PHP version - Restart Nginx:
sudo systemctl restart nginx
Solution for WAMP Server on Windows
WAMP users have an additional method through the PHPMyAdmin configuration file:
- Navigate to
c:\wamp64\alias\phpmyadmin.conf(the path may vary based on your installation) - Modify the following lines:
php_admin_value upload_max_filesize 128M php_admin_value post_max_size 128M - Restart the WAMP services
Solution for Shared Hosting (No Root Access)
If you don’t have access to the server’s configuration files, you can try these alternatives:
- Create or edit a
.htaccessfile in your web root directory and add:php_value upload_max_filesize 64M php_value post_max_size 64M - For cPanel/WHM servers:
- Log in to WHM
- Navigate to “Server Configuration” > “Tweak Settings”
- Select the PHP tab
- Update “cPanel PHP max POST size” and “cPanel PHP max upload size”
Additional Parameters for Large File Imports
For very large database imports, you may also need to adjust time-related parameters:
# Increase execution time limit (in seconds)
max_execution_time = 300

# Increase input processing time (in seconds)
max_input_time = 300
Read: How to fix Filename too long Errors in Git on Windows
Verifying Your Changes
After making changes, you can verify if they were applied correctly by:
- Creating a PHP file with the following content and accessing it through your web browser:
<?php phpinfo(); ?> - Look for the “Loaded Configuration File” line to ensure you modified the correct file
- Check if your new settings for
upload_max_filesize,post_max_size, andmemory_limitare displayed
Read: How To Solve phpMyAdmin Not Working on Ubuntu 22.04
Troubleshooting Common Issues
Modified php.ini But Limits Unchanged
If you’ve modified php.ini but still see the same limits in PHPMyAdmin:
- Wrong php.ini file: PHP might be using a different configuration file. Check using
phpinfo()as described above. - Multiple PHP installations: If you have multiple PHP versions installed, ensure you’re modifying the correct configuration file.
- Server not restarted: Ensure you’ve restarted your web server after making changes.
- Overrides in other files: Check for configuration overrides in:
- Apache virtual host configurations
.user.inifiles (for PHP-FPM).htaccessfiles
Server-Specific Solutions
Lighttpd with Zend Server CE
If you’re using Zend Server CE with Lighttpd (like in some VirtualBox setups), edit:
/usr/local/zend/gui/lighttpd/etc/php-fcgi.ini
cPanel/WHM Servers
For cPanel servers, remember that PHP settings are managed through WHM in the “Tweak Settings” section rather than directly editing php.ini files.
Apache with mod_fcgid
If using Apache with mod_fcgid, you might need to add to /etc/apache2/mods-available/fcgid.conf:
FcgidMaxRequestLen 1073741824
Alternative Methods for Very Large Files
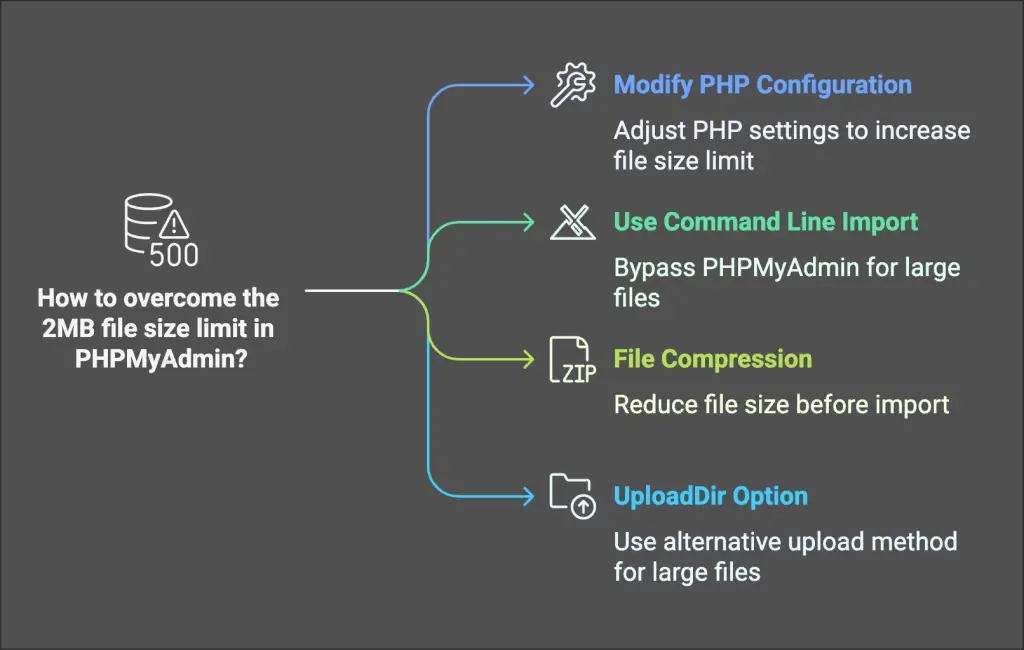
If you still struggle with importing large files, consider these alternatives:
Command Line Import
Use the MySQL command line to import large files:
# Navigate to the directory containing your SQL file
cd /path/to/your/sql/file

# Import the file
mysql -u username -p database_name < file.sql
For WAMP users, you might need to specify the path to the MySQL executable:
C:\wamp64\bin\mysql\mysql5.7.31\bin\mysql -u username -p database_name < file.sql
File Compression
Compress your SQL file before uploading:
- Compress your .sql file to .sql.zip or .sql.gz
- Use the compressed file for import in PHPMyAdmin
Read: 4 Benefits of Compressing Files and Folders Using Tar Backup in Linux OS
Using the UploadDir Option
Configure PHPMyAdmin to use a directory for file uploads:
- Edit your PHPMyAdmin configuration file (usually
config.inc.php) - Add:
$cfg['UploadDir'] = '/path/to/upload/directory'; - Place your SQL files in that directory
- They will appear in the import dropdown menu
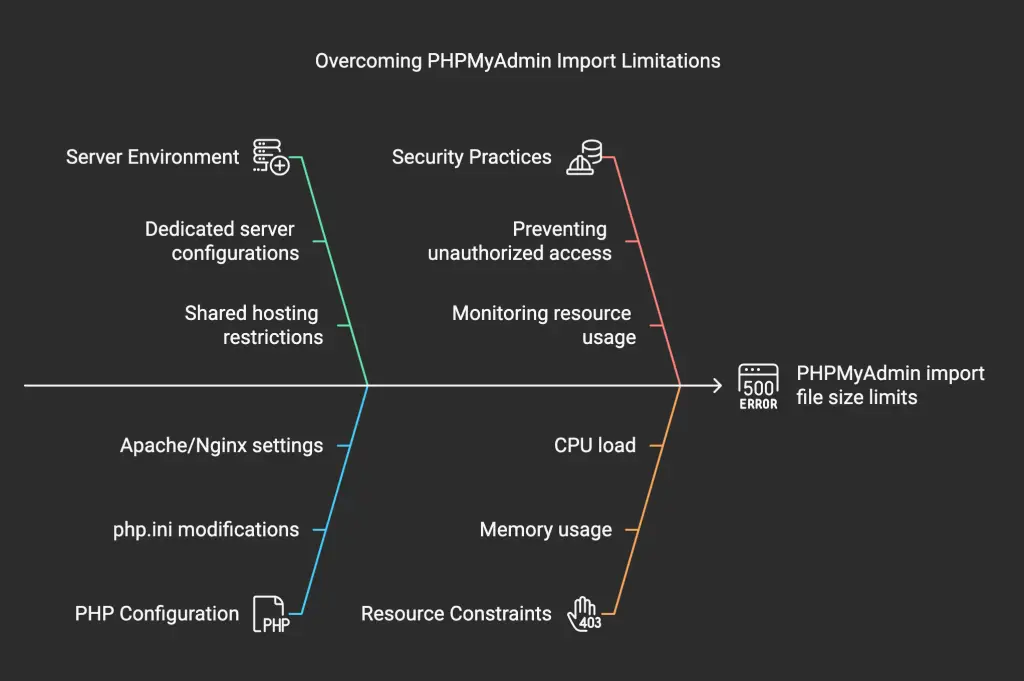
Best Practices for File Upload Limits
While increasing file size limits can solve immediate problems, consider these best practices:
- Security Considerations: Setting excessively high limits can pose security risks, especially on production servers. Only increase limits to what’s necessary.
- Targeted Configuration: Instead of modifying global PHP settings, consider applying changes only to PHPMyAdmin’s virtual host or directory configuration.
- Regular Maintenance: Large database imports often indicate infrequent database backups. Consider implementing smaller, incremental backups.
- Resource Monitoring: Higher upload limits can strain server resources. Monitor memory and CPU usage during large imports.
Conclusion
By understanding the interplay between PHP’s configuration parameters, you can effectively increase PHPMyAdmin’s import file size limits. Whether you’re working with a dedicated server, shared hosting, or a local development environment, one of these solutions should enable you to import larger database files successfully.
Remember to always maintain proper security practices and be mindful of server resource constraints when working with large file uploads.
FAQ
Q: Why is PHPMyAdmin still showing a 2MB limit after I changed php.ini?
A: You might be editing the wrong php.ini file. Use phpinfo() to verify which configuration file PHP is actually using, then restart your web server after making changes.
Q: Do I need to restart my server after changing PHP settings?
A: Yes, most PHP configuration changes require a web server restart to take effect.
Q: What’s the maximum file size I should set?
A: This depends on your server resources. For most use cases, setting upload_max_filesize to 64MB-128MB is sufficient. Remember to follow the hierarchy: memory_limit > post_max_size > upload_max_filesize.
Q: Why am I getting a “Connection reset” error when uploading large files?
A: This could indicate that your server is running out of memory or that the execution time is too short. Try increasing memory_limit and max_execution_time.
Q: Is it safe to set very high values like 1000M for these parameters?
A: On development environments, high values are generally acceptable. On production servers, excessively high values can pose security risks and resource constraints. Use only what you need.
If you like the content, we would appreciate your support by buying us a coffee. Thank you so much for your visit and support.