TeamViewer, a renowned name in the world of remote connectivity solutions, offers a seamless way to access and manage devices across the globe. Whether it’s for file sharing, web conferences, online meetings, or establishing desktop-sharing sessions, TeamViewer has earned its reputation for reliability and versatility. In this comprehensive guide, we will walk you through installing TeamViewer on the Ubuntu 22.04 operating system. By the end of this tutorial, you’ll be ready to harness the power of TeamViewer on your Ubuntu system, making remote access and collaboration more accessible than ever. Let’s get started.
Start by ensuring your system is up-to-date. Use the following command in your terminal:
sudo apt update
Read: Best 14 teamviewer alternatives for Linux/Ubuntu
How to Install TeamViewer via the Ubuntu Repository
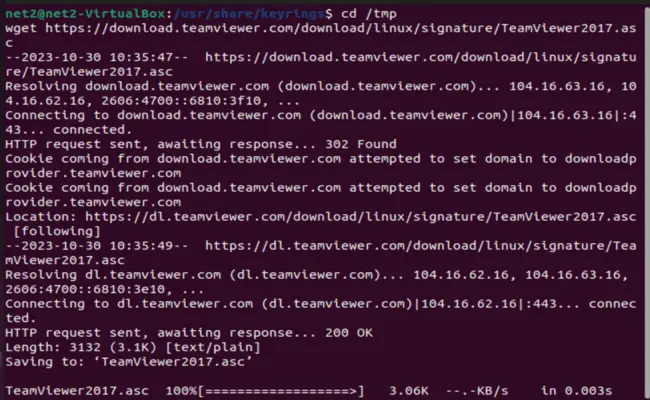
Download and add the TeamViewer repository key by using the command below :
cd /tmp
wget https://download.teamviewer.com/download/linux/signature/TeamViewer2017.asc

Proceed to include the following key in your system using the provided ‘apt-key’ command with sudo privileges :
sudo apt-key add TeamViewer2017.asc

Following that, run the following command to add the official TeamViewer repository, which will be used to configure the stable TeamViewer version:
sudo sh -c ‘echo “deb http://linux.teamviewer.com/deb stable main” >> /etc/apt/sources.list.d/teamviewer.list’
![]()
Read: How to Install TeamViewer on Ubuntu 24.04
Next, update your system repository by running :
sudo apt update

Finally, install Teamviewer by executing :
sudo apt install teamviewer

Once this is done, invoke the following command in order to start using Teamviewer :
teamviewer
Read: How to install Zoom on Ubuntu 22.04
How to Uninstall TeamViewer Using Terminal
To uninstall TeamViewer using the terminal, execute the following command:
sudo apt remove teamviewer
If you like the content, we would appreciate your support by buying us a coffee. Thank you so much for your visit and support.

