In the world of software development, having the right tools at your disposal is essential for efficiency and productivity. Visual Studio Code, is a versatile and popular code editor developed by Microsoft. It is renowned for its flexibility, ease of customization, and cross-platform compatibility. Whether you’re a seasoned developer or just beginning your coding journey, installing Visual Studio Code on your Ubuntu 22.04 system can significantly enhance your coding experience.
Visual Studio Code offers a rich set of features, including:
- Customization: Tailor VS Code to your specific needs with a wide variety of extensions and themes.
- Multi-Platform Support: It is compatible with Windows, macOS, and Linux, providing flexibility for developers.
- Intelligent Code Completion: Benefit from smart code suggestions and automatic completions to boost your productivity.
- Debugging Tools: Debug your code efficiently using the built-in debugging tools.
- Version Control: Easily merge with Git and other version control systems.
- Extensions Marketplace: Access a wealth of extensions from the Visual Studio Code marketplace to extend its functionality.
- Command Palette: Execute commands, modify settings, and more through the command palette.
- Integrated Terminal: Run commands, build, and execute code directly from the integrated terminal.
- Code Navigation: Quickly and effectively navigate your codebase to locate what you need.
This article will walk you through the straightforward process of how to install VScode on your Ubuntu 22.04 system, empowering you to work on your coding projects with ease.
Read: Best online code editors
Updating the System
Before we proceed with the installation, it’s crucial to ensure our system is up-to-date. Run the following command:
sudo apt update && sudo apt upgrade -y
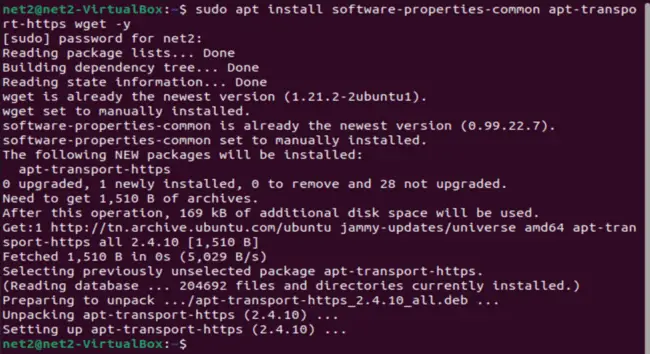
Installing Necessary Packages
Next, we need to install some packages that are required for the installation of Visual Studio Code:
sudo apt install software-properties-common apt-transport-https wget -y
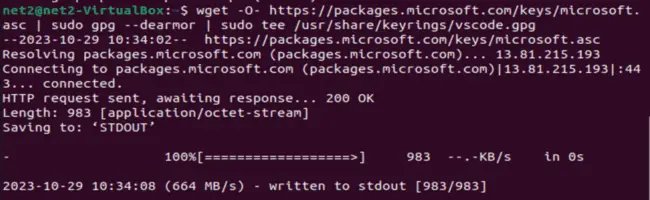
Importing the Repository
With the necessary packages installed, we can now import the Microsoft GPG key:
wget -O- https://packages.microsoft.com/keys/microsoft.asc | sudo gpg –dearmor | sudo tee /usr/share/keyrings/vscode.gpg
Read: How To Boost Code Writing Skills For Better Team Cooperation
This step will confirm the authenticity of the installed packages. Next, we’ll proceed with adding the Microsoft Visual Source repository:
Run the command:
echo deb [arch=amd64 signed-by=/usr/share/keyrings/vscode.gpg] https://packages.microsoft.com/repos/vscode stable main | sudo tee /etc/apt/sources.list.d/vscode.list

Updating the System Again
After importing the repository, it’s a good practice to update our system again:
sudo apt update
Install Visual Studio Code in Ubuntu via Snap Store
Alternatively, you can also install Visual Studio Code via Snap Store. This method is straightforward and doesn’t require adding any repositories:
sudo snap install –classic code
![]()
![]()
Read: Five best code editors for Linux
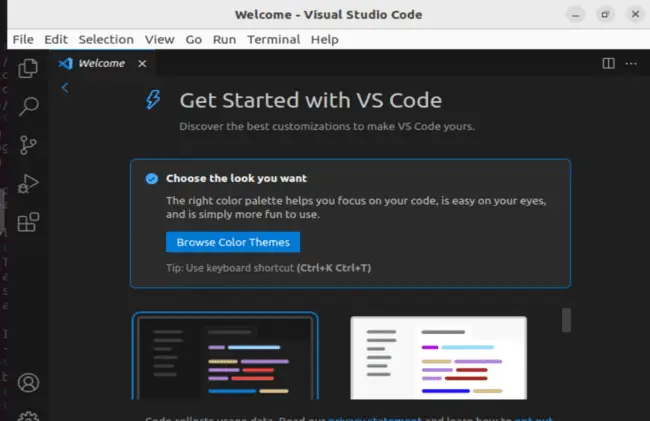
Launching Visual Studio Code
Once installed, you can launch Visual Studio Code from your application menu or by typing code in your terminal.
![]()
And there you are :
How to Uninstall Ubuntu Visual Studio code
If you ever need to uninstall Visual Studio Code, you can do so with this command:
sudo snap remove code

If you like the content, we would appreciate your support by buying us a coffee. Thank you so much for your visit and support.