The procedure for creating a new user account on Windows 10 is very simple although, Microsoft does not make it easier for users who want to create a local user account .
Indeed, the Redmond company prefers to push Windows 10 users to use a Microsoft account rather than a local account and for good reason :if you connect to Windows 10 with a Microsoft account, you should know that you share a lot of information with the Microsoft.
In this short article, you will learn how to create a local user account on Windows 10 . You can either do this using Windows 10 settings or via the command prompt or from the “Local users and groups” window (only available in Windows 10 Professional).
Create a new local user account in Windows 10
Method 1: from Windows 10 settings
1. Go to the Windows 10 settings by clicking on the Start button then on ” Settings ” (cogwheel icon).
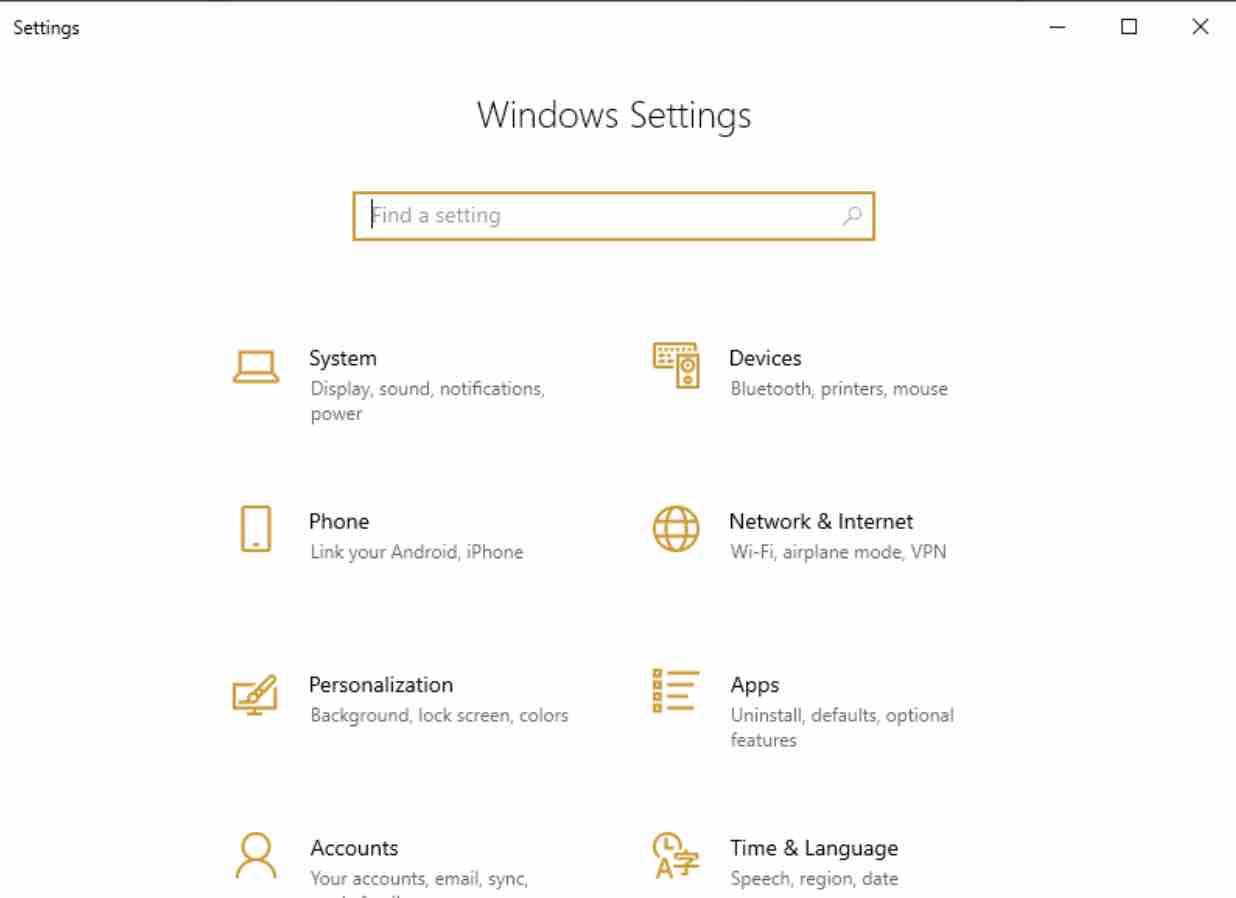
2. Nex click on ” Accounts “.
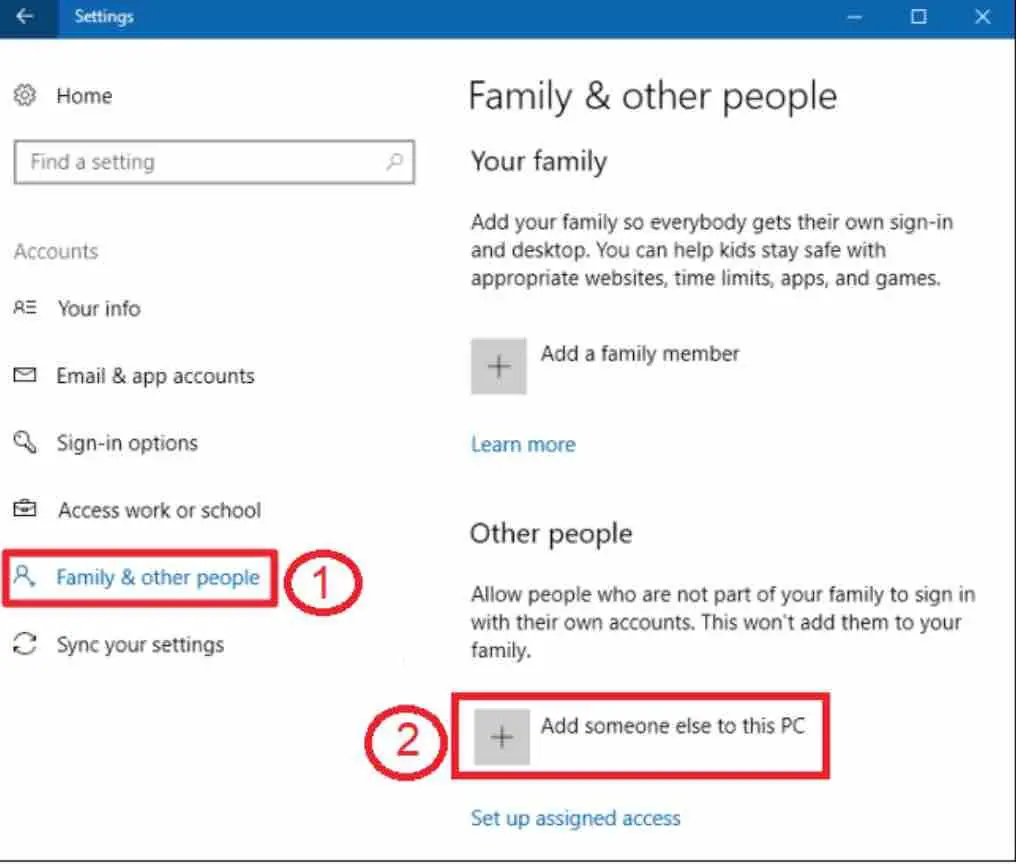
3. On the left pane, click on ” Family and other people “, then on ” Add someone else to this PC “.
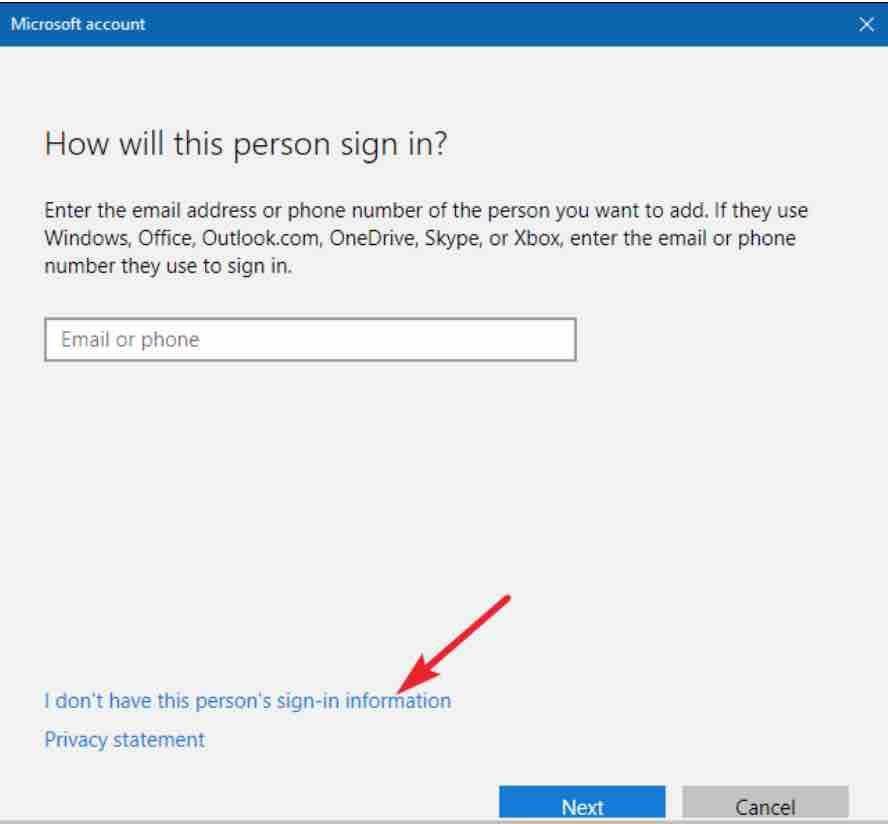
4. On the new window that pops up, click on the link “I don’t have this person’s sign-in information “.
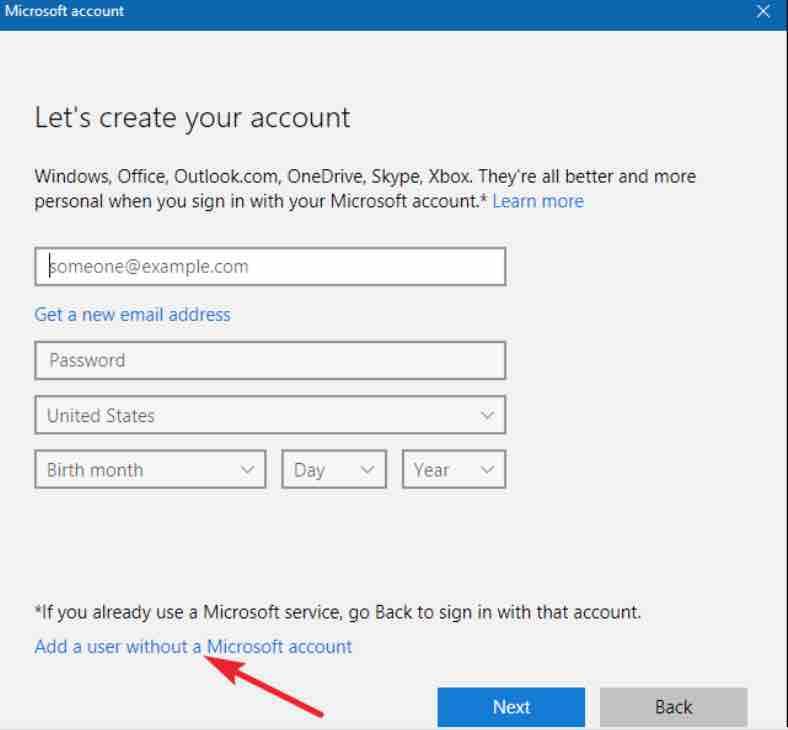
5. Then click on the ” Add a user without a Microsoft account ” link .
6. Finally, type in the username and password and answer 3 secret questions (in case you forgot your password). Then click on ” Next “.Your user account will be created.
Method 2: via the command prompt
1. Start by opening the Command Prompt in administrator mode. To do this, open the Windows 10 Start menu, then type in “Command Prompt”. Right click on it and click ” Run as administrator “.
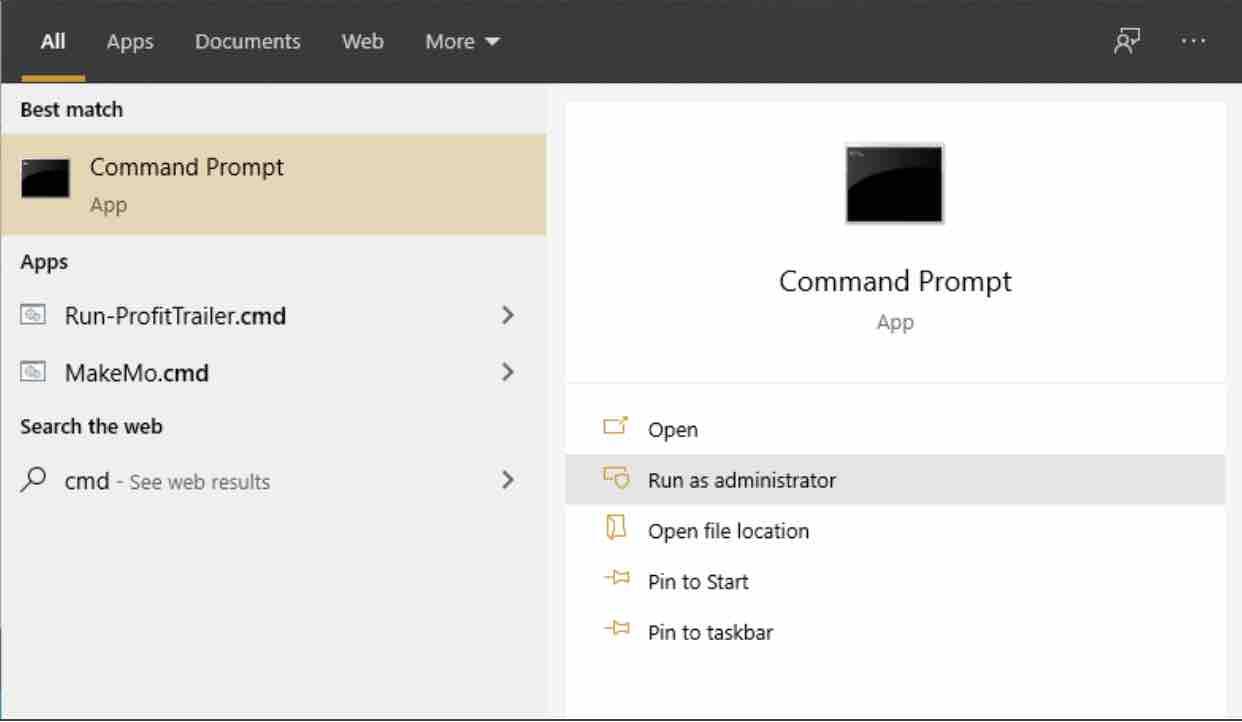
2. Once opened , type in the following command and replace with your username and password accordingly:
net user “user_account_name” “password” / add
If you like the content, we would appreciate your support by buying us a coffee. Thank you so much for your visit and support.
