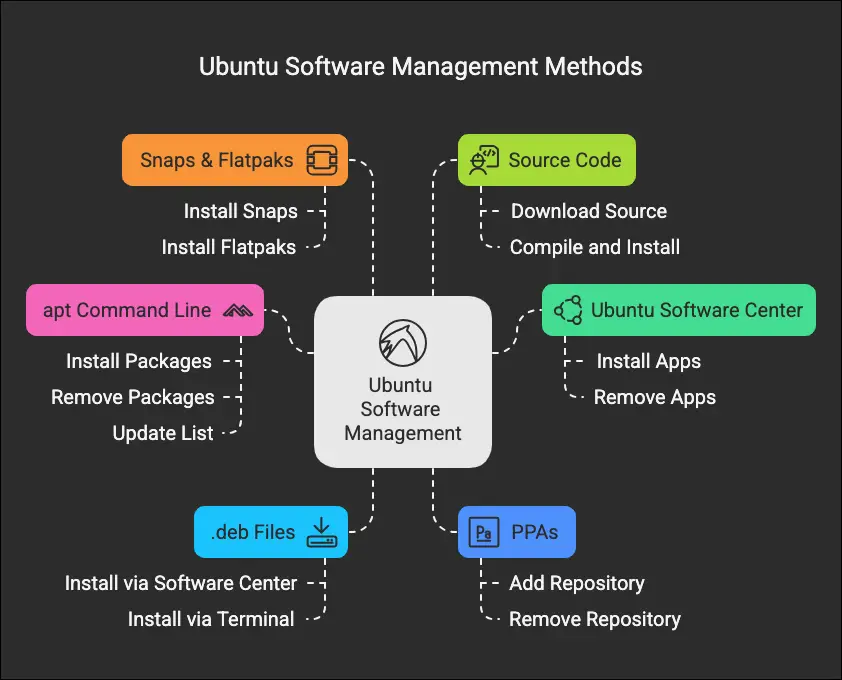
If you’re new to Ubuntu or similar Linux distributions, figuring out how to install and remove applications might seem a bit confusing at first. Don’t worry, it’s quite straightforward once you know the ropes!
In this guide, I’ll walk you through the common ways to manage software on your Ubuntu system, clearing up any confusion so you can easily add new programs and keep your system tidy. We’ll cover everything from graphical tools to command-line methods, helping you find the approach that works best for you. Knowing how to manage applications on Ubuntu is a fundamental skill, and we’ll make it easy.
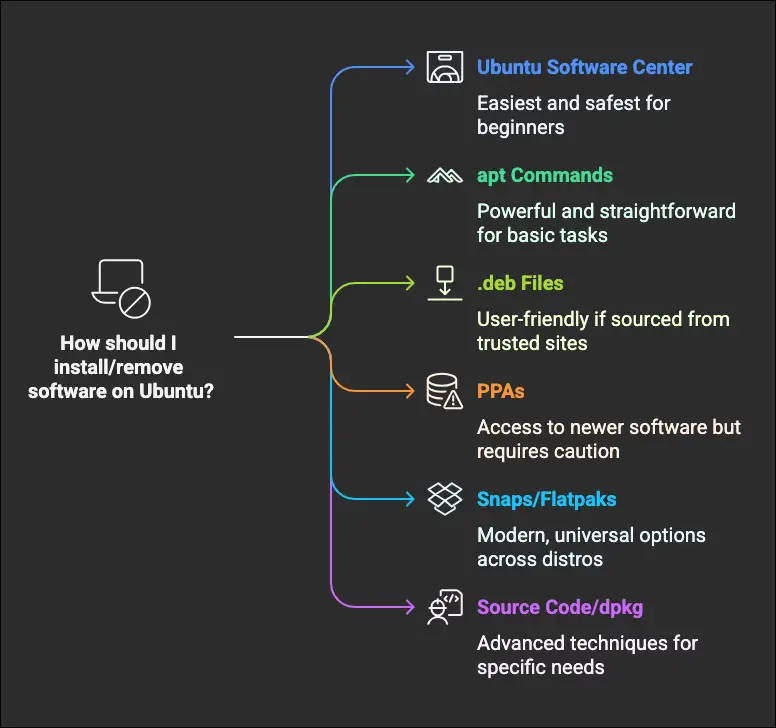
What will be covered in the article
Using the Ubuntu Software Center (The App Store Way)
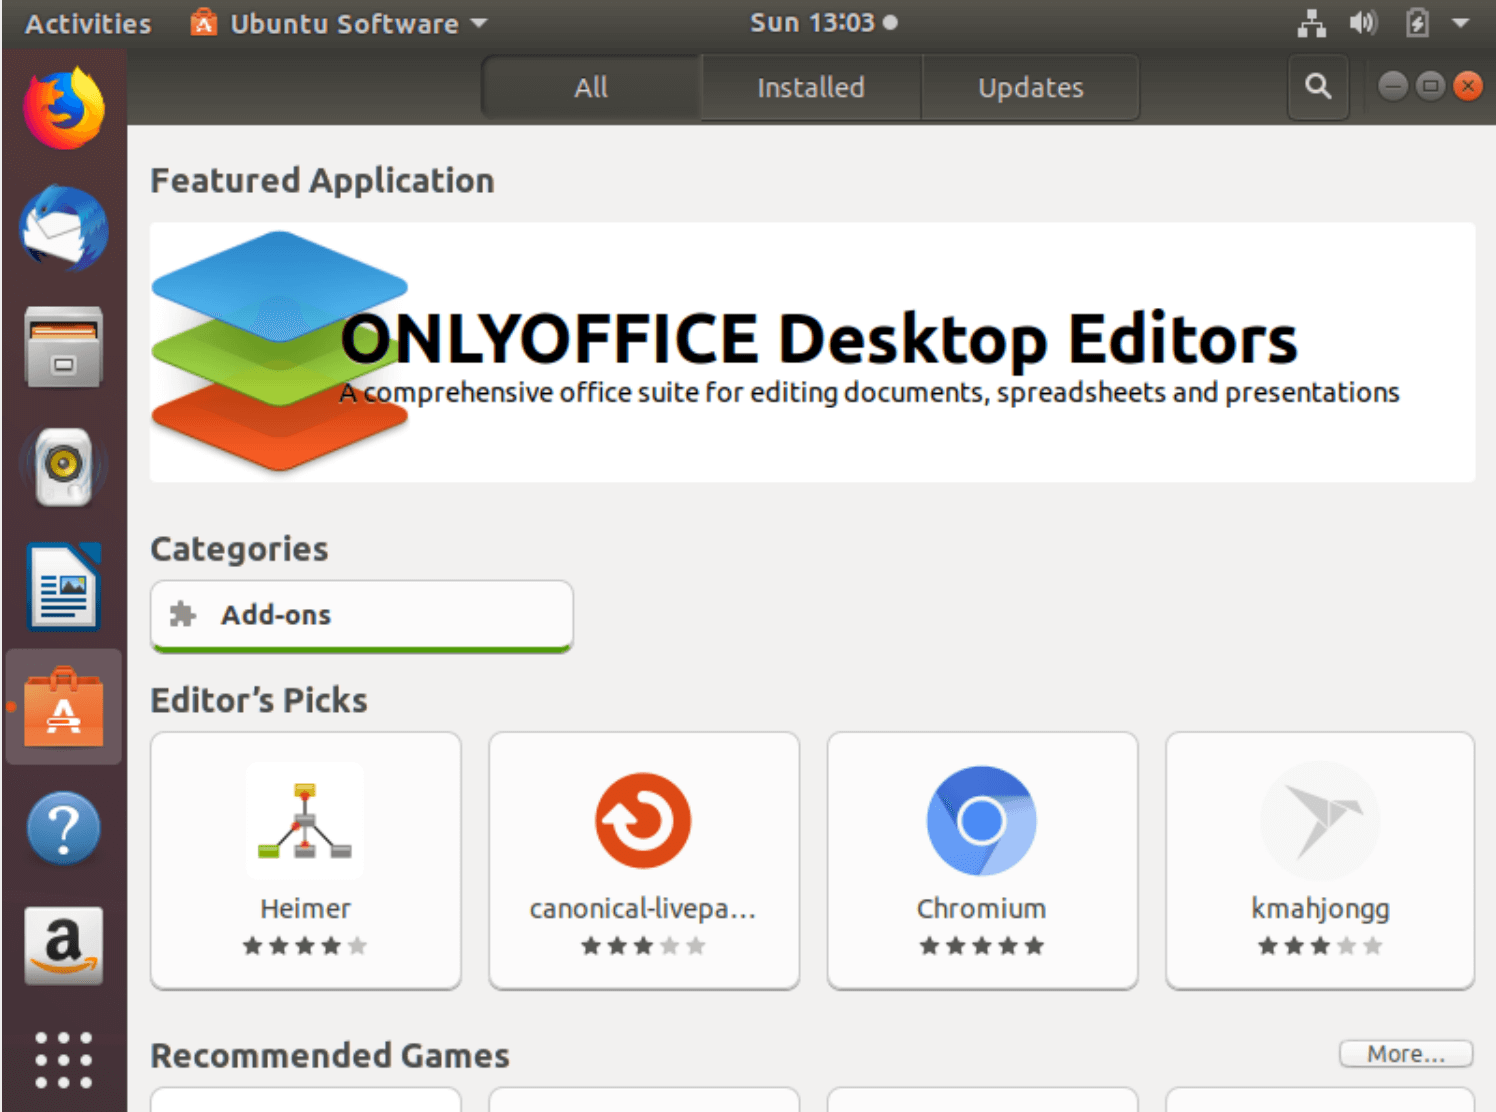
Think of the Ubuntu Software Center like the App Store on your phone. It’s the default graphical tool for finding and installing many common applications. Inside the Software Center, you can either type the name of the application you’re looking for directly into the search bar, or take your time exploring the various software categories and curated picks.
To open it in older Ubuntu versions with the Unity desktop, just press the Super key (Windows key) and type “Ubuntu Software.” You’ll see a reddish-orange shopping bag icon – click that!
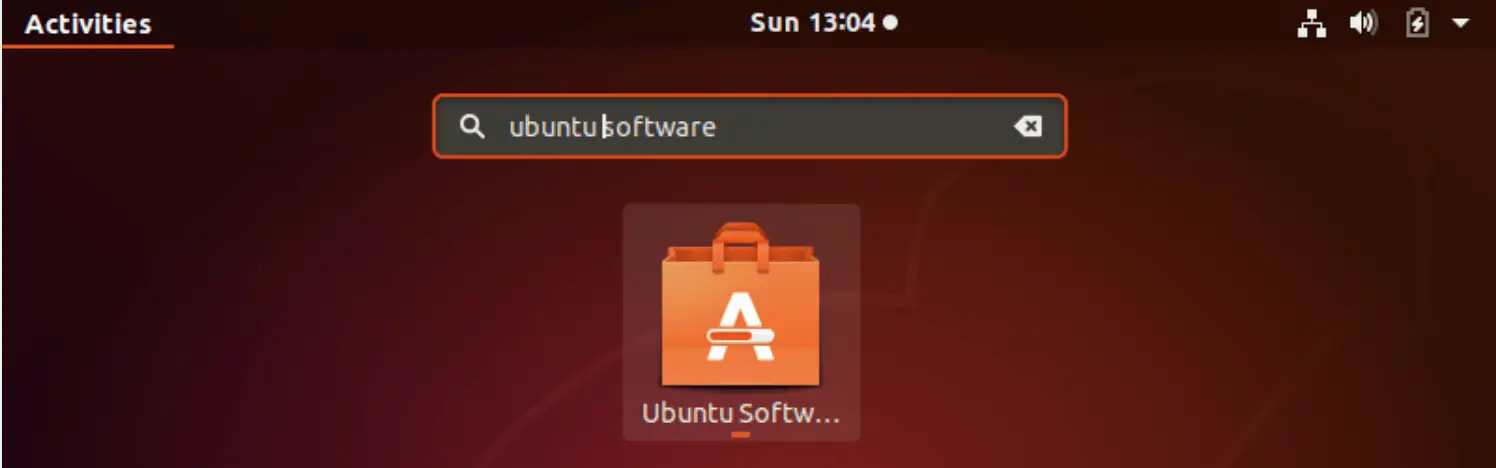
Finding the Ubuntu Software Center
Alternatively, you might find the same icon directly in the main application launcher or dock on your desktop.
The Software Center icon
Spotted an interesting app? Clicking its entry will bring up a dedicated page right within the Software Center, giving you all the details like its description, user reviews, and screenshots.
Read: Launch Ubuntu 24.04 System Settings from Terminal: gnome-control-center
Checking out an app in the Software Center
If it looks like what you need, just hit the “Install” button. Ubuntu will likely ask for your password to confirm you have permission to install software. Enter it, and the installation will begin! It’s a very user-friendly way for installing software graphically on Ubuntu.
Read: 4 Ways to Find Large Files on Linux and Free Up Disk Space
NOTE:
Sometimes, you might look for specific proprietary (non-open-source) applications like Skype or Steam, and not find them initially. This is often because they reside in a separate repository called the “Canonical Partners” repository, which isn’t enabled by default. Here’s how to enable it:
Open the main menu or search for “Software & Updates.” Look for an icon that often resembles a cardboard box with a globe or software packages.
Read: How to restore GRUB Bootloader in Ubuntu
Once the “Software & Updates” window opens, go to the “Other Software” tab.
Navigate to the ‘Other Software’ tab within the ‘Software & Updates’ settings, then find and check the box labelled ‘Canonical Partners’ to activate it.
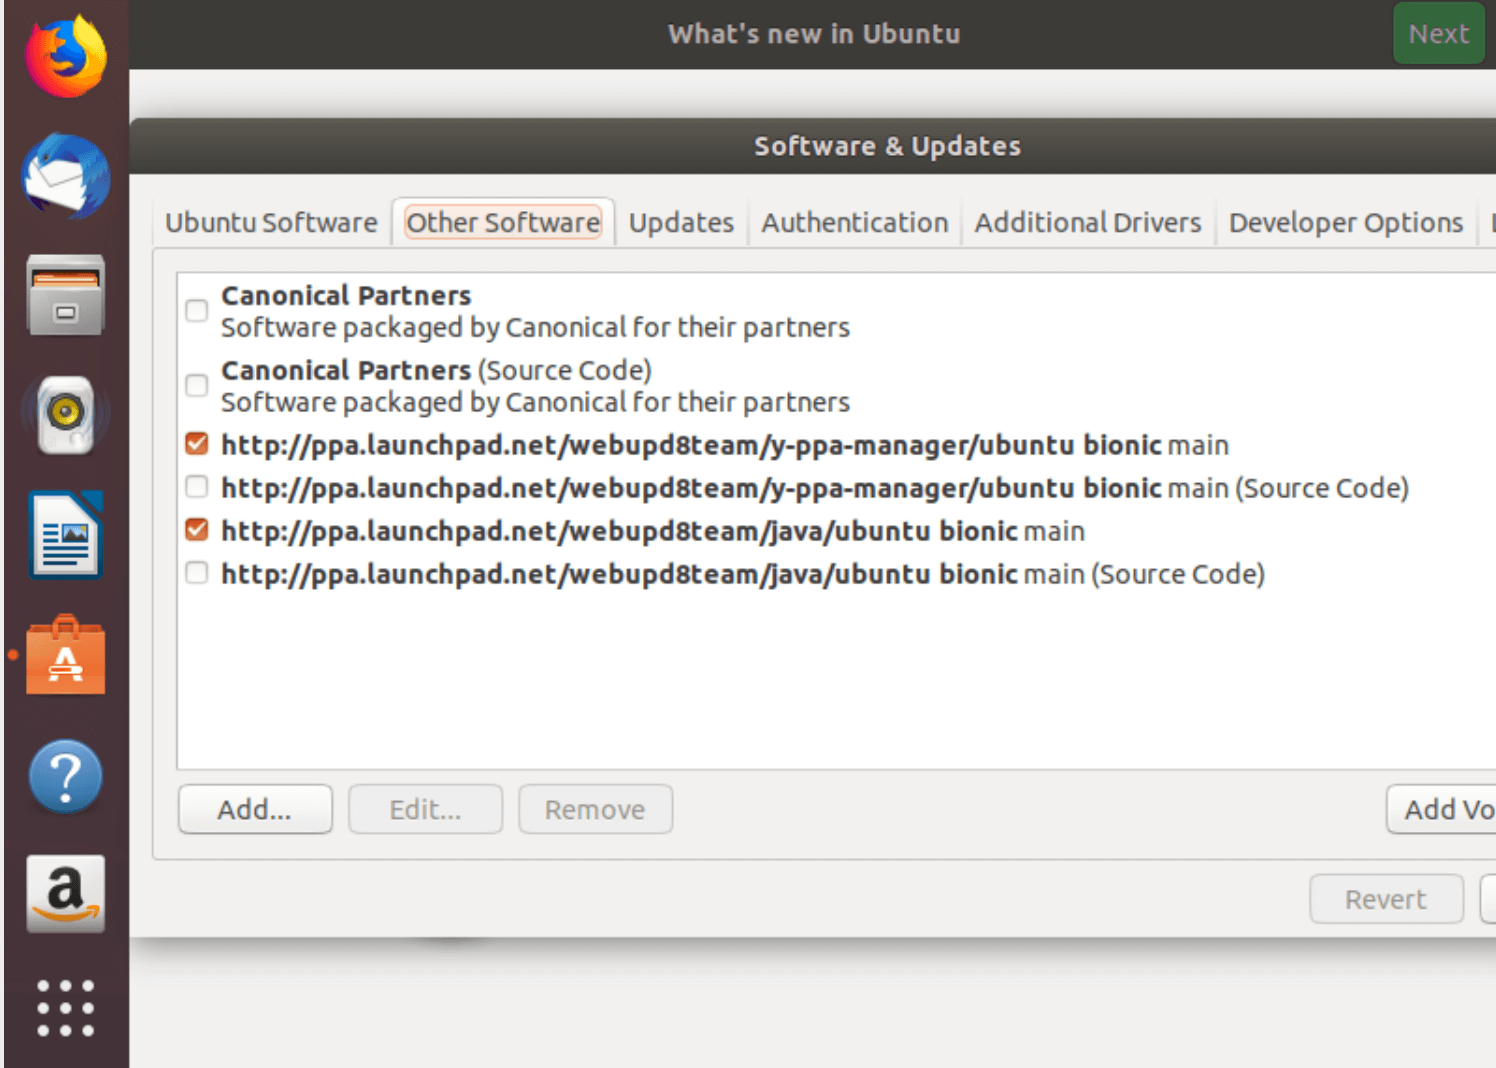
You’ll likely be prompted to enter your password and then asked to reload your software sources. Allow it to reload.
After doing this, proprietary software available through Canonical Partners should now appear in the Ubuntu Software Center.
Removing Software Using the Software Center
Getting rid of software via the Software Center is just as straightforward. Head over to the ‘Installed’ view, locate the application you no longer need in the list, select it, and then click the prominent ‘Remove’ (or ‘Uninstall’) button.

Finding installed applications
Enter your password if prompted, and the application will be uninstalled. Simple!
Read: How to keep Ubuntu clean
Using apt Commands (The Terminal Way)
Alright, for those of us who like using the terminal (or maybe you need to install something specific not easily found in the Software Center), there’s the powerful `apt` command-line tool. Behind the scenes, the Software Center often uses `apt` anyway! Installing via the terminal gives you more control and feedback.
First, open your terminal. You can usually find it by searching for “Terminal” or by pressing `Ctrl+Alt+T`.
The basic command structure to install a package is:
sudo apt install Let’s break that down:
sudo: This stands for “Super User Do.” It tells the system you want to run the command with administrative privileges, which are necessary for installing software system-wide. You’ll always need this for installing or removing packages with `apt`.apt: This is the command-line package management tool itself.install: This tells `apt` that you want to install something.: This is the crucial part – it’s the specific name of the software package you want to install. Finding the correct package name is sometimes the trickiest part (more on that below).
For example, let’s say you want to install `synaptic`, a graphical package manager that’s an alternative to the Software Center. The command would be:
sudo apt install synapticAfter you type the command and press Enter, you’ll be asked for your user password. Type it in (you won’t see characters appear, that’s normal for security) and press Enter.
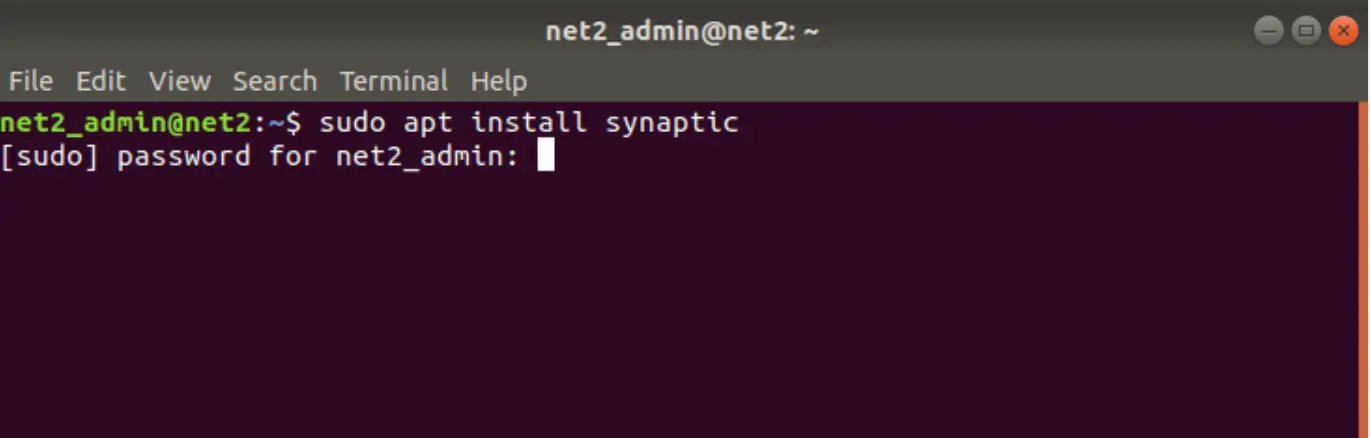
Password prompt in the terminal
Read: How to hide folders and show hidden files in Ubuntu
Next, `apt` will figure out what needs to be installed (including any dependencies – other packages the software relies on). It will show you a list of packages and ask for confirmation, usually saying something like “After this operation, XX MB of additional disk space will be used. Do you want to continue? [Y/n]”. Just press `Y` and Enter to proceed.
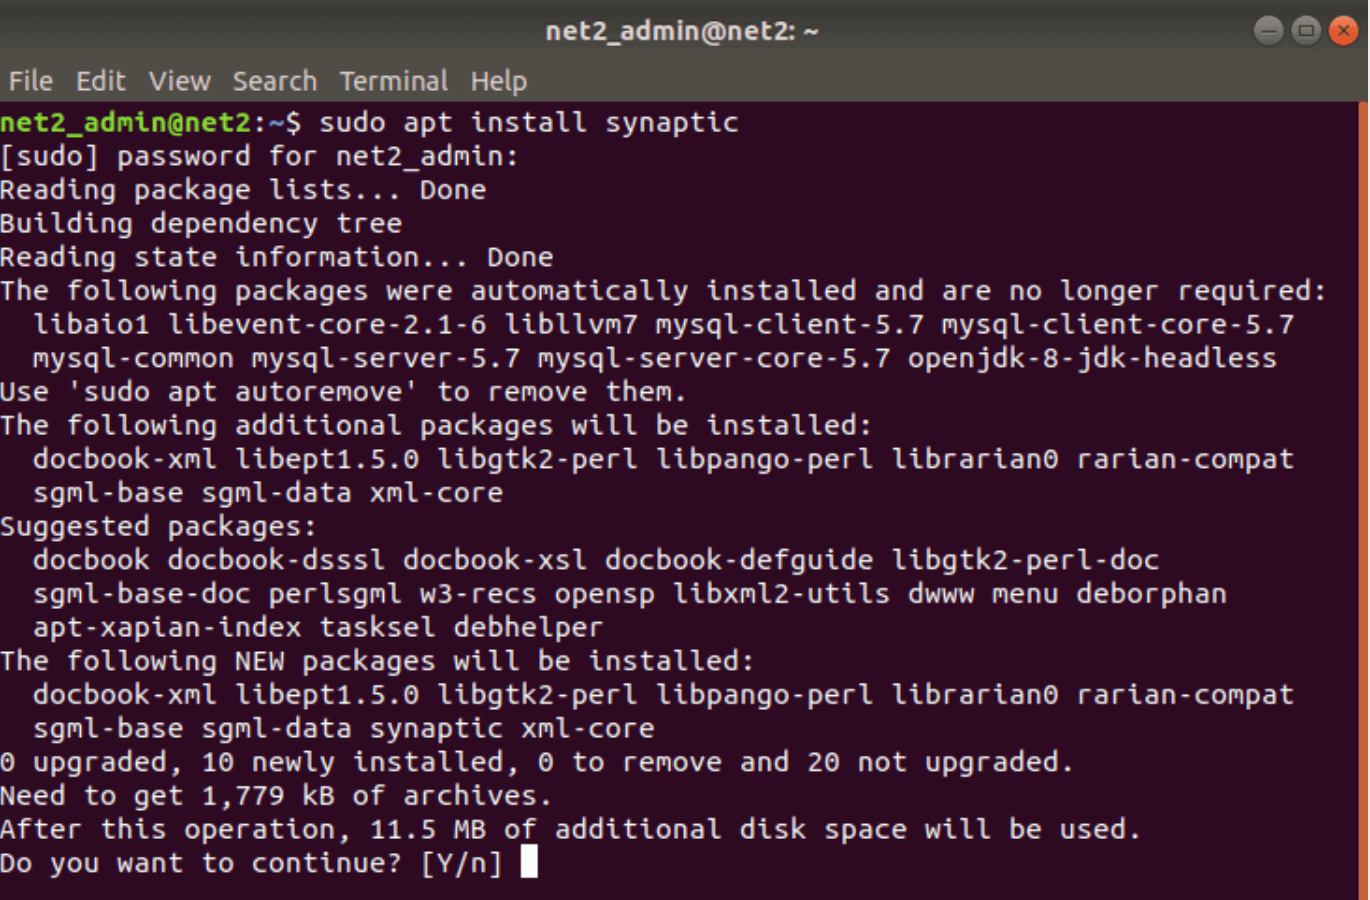
Confirming the installation
`apt` will then download and install everything. Once it’s done, the application is ready to use!
Finding the Package Name: If you’re unsure of the exact package name, often the application’s official website or documentation will tell you. You can also try searching the package cache using `apt search ` (e.g., `apt search filezilla`). Getting familiar with finding Ubuntu package names for apt is a useful skill.
Read: How to solve “ubi-partman failed with exit code 10” On ubuntu 18.04
Removing Software Using the apt Command
Removing software via the terminal is just as straightforward. The command is very similar to installing:
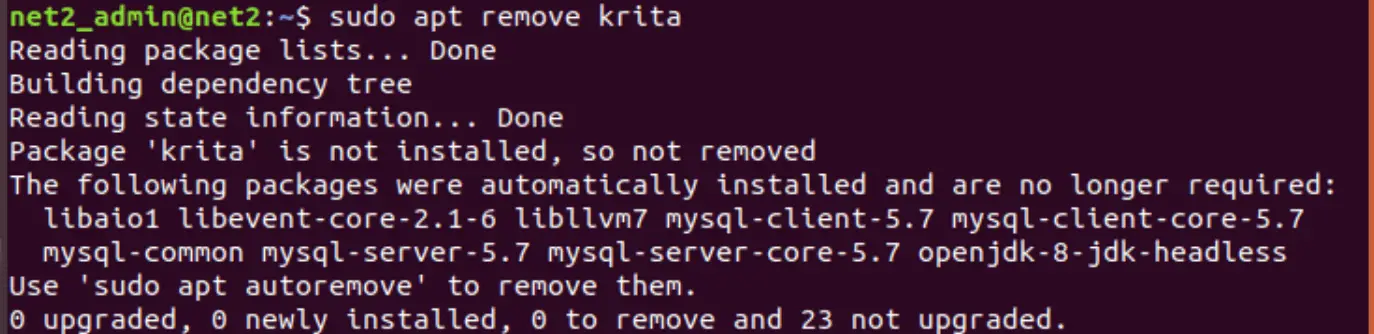
sudo apt remove Replace “ with the name of the package you want to uninstall. For example, to remove `synaptic`:
sudo apt remove synaptic
Removing a package with apt
Again, you’ll need to enter your password and likely confirm by pressing `Y`. This command removes the main application files but might leave behind configuration files.
If you want to remove the application *and* its configuration files, you can use `purge` instead of `remove`:
sudo apt purge If this was your first time using `apt` in the terminal, congrats! It’s a powerful tool and getting comfortable with it opens up a lot of possibilities on Linux.
For more on how to use APT commands, you may want to read our article here.
Using .deb Files (Like Windows Installers)
Sometimes, software developers package their applications as `.deb` files, especially for Debian-based systems like Ubuntu. Think of a `.deb` file as being similar to an `.exe` or `.msi` installer file on Windows. You typically download these directly from the software vendor’s website.
For example, you might download `google-chrome-stable_current_amd64.deb` from Google’s website.

A typical .deb file download
Typically, you’ll grab the `.deb` file directly from the software provider’s site. Once it’s downloaded to your computer (usually your `Downloads` folder), often the simplest installation path involves just double-clicking the file itself. This action usually prompts the Software Center to open, presenting the application details and an ‘Install’ button.
Click “Install,” enter your password, and it should handle the installation for you. This is a convenient way for installing downloaded deb packages on Ubuntu.
Important Considerations:
- Source Trust: Only download `.deb` files from official and trusted sources! Installing software from unknown sources can be a security risk.
- Architecture: Make sure you download the correct `.deb` file for your system’s architecture. Most modern systems are 64-bit (often indicated by `amd64` or `x86_64` in the filename). Older systems might be 32-bit (`i386`, `i686`). Installing the wrong architecture won’t work.
- Dependencies: Sometimes, a `.deb` file might require other packages (dependencies) that aren’t already installed. Double-clicking might handle this, but sometimes it might fail. We’ll see how the command line can help with this shortly.
Removing Applications Installed via .deb Files
Removing software installed this way can usually be done just like removing any other app:
- Try the Ubuntu Software Center first. Go to the “Installed” section and look for the application by name. If you find it, use the “Remove” button.
- If it’s not listed there, or if you prefer a more comprehensive tool, you can use `apt` in the terminal. You need to know the *package name* that was registered when the `.deb` file was installed (it’s often similar to the application name, but not always the same as the `.deb` filename). Use `sudo apt remove `.
- Another excellent graphical tool is the Synaptic Package Manager (mentioned earlier). If you installed it (`sudo apt install synaptic`), you can launch Synaptic, search for the application name, mark it for removal, and apply the changes. Synaptic is great because it shows *all* installed packages, regardless of how they were installed.
Using PPA (Personal Package Archives)
PPAs are a popular way for developers to distribute newer versions of their software or applications not yet available in the official Ubuntu repositories. Think of a PPA as a developer’s own mini-repository hosted on Launchpad (Canonical’s software collaboration platform). By adding a PPA to your system, you tell `apt` to look for packages there in addition to the official sources.
This is useful because the official Ubuntu repositories prioritize stability, meaning software versions there might lag behind the latest releases. PPAs offer a way to get bleeding-edge updates, but they come with a small caveat: you need to trust the PPA provider, as they aren’t vetted by Canonical to the same extent as official packages.
Installing from a PPA typically involves three steps in the terminal:
- Add the PPA repository: You’ll need the PPA address, which usually looks like `ppa:username/ppa-name`. The command is:
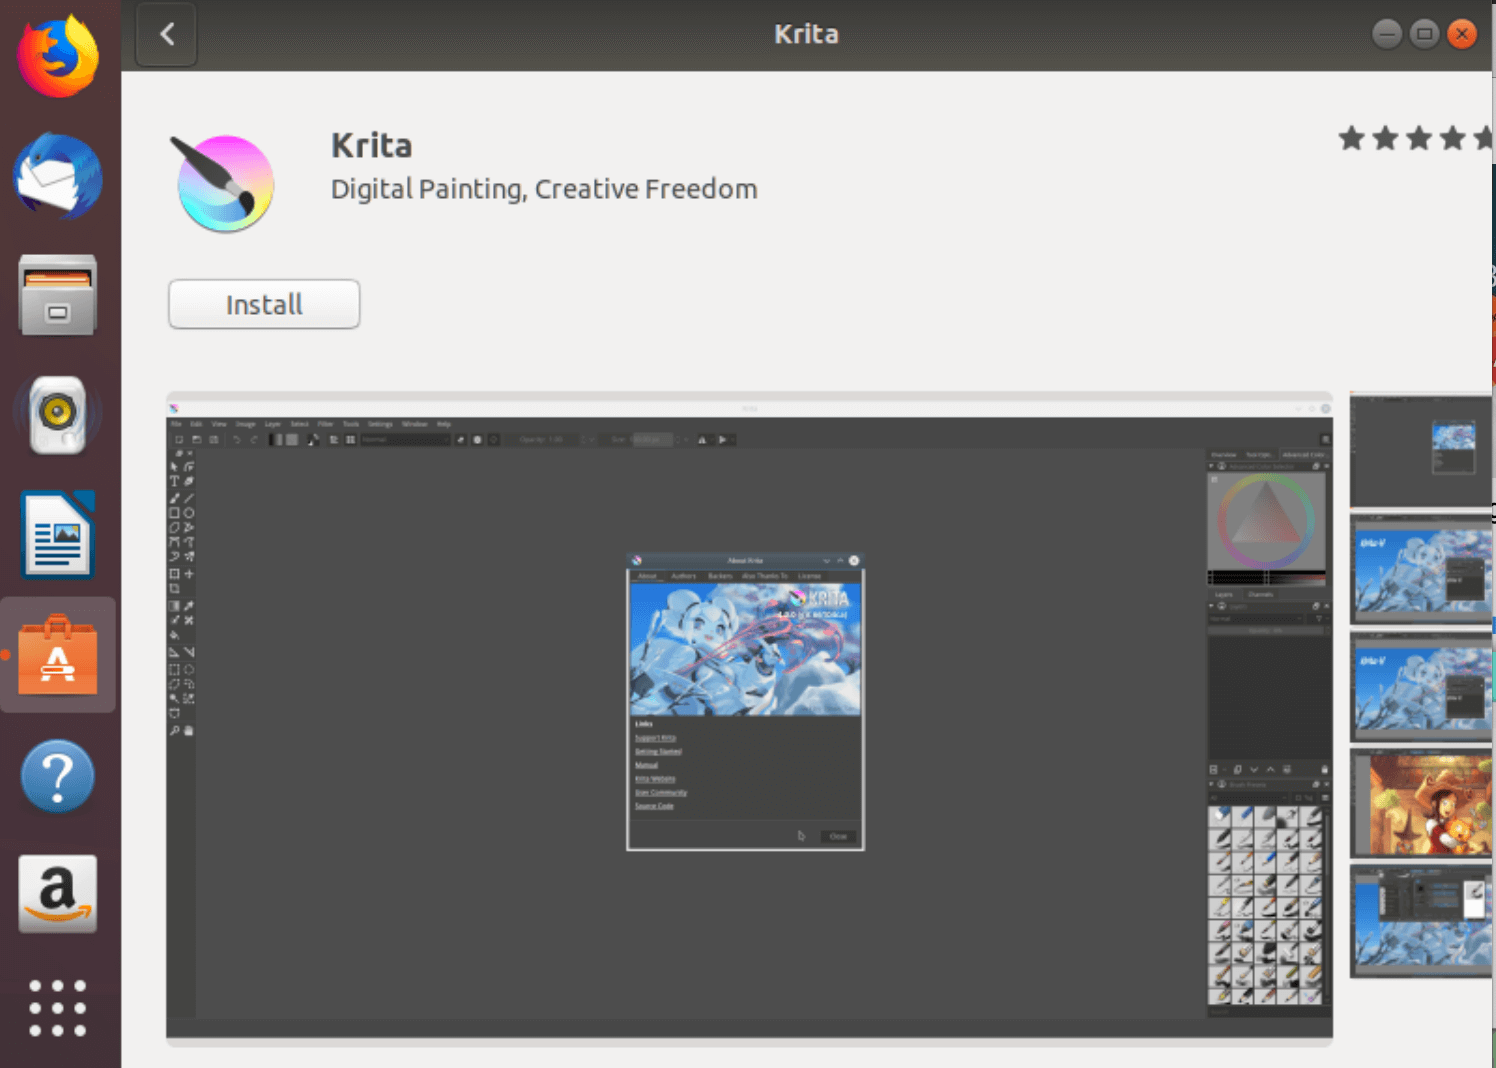
sudo add-apt-repository ppa:For example, to add a PPA for the Krita painting application (this is just an example, the specific PPA might change):
sudo add-apt-repository ppa:kritalime/ppa
You’ll usually be asked to press Enter to confirm adding the PPA. - Update the package list: After adding the PPA, you need to tell `apt` to refresh its list of available packages from all sources, including the newly added one:
sudo apt update
- Install the package: Now you can install the package from the PPA just like any other package using `apt`:
sudo apt installUsing our Krita example:
sudo apt install krita
While powerful, remember to only add PPAs from developers or projects you trust. Adding many PPAs can sometimes lead to dependency conflicts if not managed carefully. Understanding when and how to use Ubuntu PPAs safely is important.
There are also graphical tools available for managing PPAs (like “Y PPA Manager,” though you’d need to install it first), which can help search for, add, and remove PPAs without using the terminal.
Removing Software Installed via PPA (and the PPA itself)
Removing software installed from a PPA involves two steps if you also want to stop receiving updates from that PPA:
- Remove the package: Use the standard `apt remove` command:
sudo apt removeE.g., `sudo apt remove krita`
- Remove the PPA repository: To prevent `apt` from checking this PPA in the future, remove it using `add-apt-repository` with the `–remove` flag:
sudo add-apt-repository --remove ppa:E.g., `sudo add-apt-repository –remove ppa:kritalime/ppa`
Removing Krita and its PPA
After removing the PPA, it’s a good idea to run `sudo apt update` again.
Read: What you need to do to secure Ubuntu
Using Source Code (The Advanced / DIY Way)
Alright, let’s talk about building from source – this route is typically taken by folks comfortable with the command line or when needing very specific versions not available elsewhere. It gives you the most control but also requires more technical know-how, patience, and can be time-consuming.
Here’s the general process, though specifics can vary greatly:
- Download the Source Code: Go to the software’s official website or code repository (like GitHub) and download the source code archive (usually a `.tar.gz` or `.tar.bz2` file).
- Extract the Archive: Use your file manager or the terminal (`tar xvf filename.tar.gz`) to extract the contents into a folder.
- Read the Instructions(!): Navigate into the extracted folder using the terminal (`cd folder_name`). Look for files named `README`, `INSTALL`, or `BUILDING`. **Read these files carefully!** They contain the specific instructions for building and installing *this particular* software. They will list dependencies (other software you need to install first, like compilers and libraries) and the exact commands to run.
- Install Dependencies: Use `apt` to install any required build tools (like `build-essential`, `make`, `gcc`) and libraries mentioned in the instructions. This step is crucial and often where things go wrong if missed.
- Configure, Make, Install (The Classic Trio): The most common sequence of commands, run from within the source code directory in the terminal, is:
./configure(This script checks your system for dependencies and prepares the build environment. It might have options you can specify.)
make(This command compiles the source code into executable binaries.)
sudo make install(This command copies the compiled files to the appropriate system directories, requiring `sudo`.)
Big Downsides:
- No Automatic Updates: Software installed this way won’t be updated automatically by `apt` or the Software Center. You have to manually download and rebuild new versions.
- No Package Management: `apt` doesn’t know about software installed like this, making removal trickier.
- Potential for Errors: Building from source can fail due to missing dependencies, compiler errors, or configuration issues. Troubleshooting requires more experience.
Unless you have a specific reason, sticking to package managers (`apt`, Software Center, Snaps, Flatpaks) is usually much easier and safer for installing applications from source code on Linux.
Removing Software Installed from Source Code
Uninstalling software built from source can be messy. Ideally, the developers provided an uninstall target in their build scripts.
- Check the Documentation: Look in the `README` or `INSTALL` files again for uninstall instructions.
- Try `make uninstall`: Navigate back to the *exact same source code directory* you used for installation in the terminal and try running:
sudo make uninstallIf the developers included this target, it *should* remove the files installed by `sudo make install`.
- Manual Removal (Risky): If `make uninstall` doesn’t exist or doesn’t work completely, you might have to manually find and delete the installed files (executables, libraries, configuration files). This is highly risky, error-prone, and generally not recommended as you might break other things or leave orphaned files behind.
This difficulty in removal is a major reason why using package managers is preferred.
Read: Maximize Ubuntu 24.04 Speed and Efficiency: A Complete Tuning Guide
Using dpkg (The Low-Level .deb Tool)
`dpkg` is the underlying package manager that `apt` actually uses for installing, removing, and managing `.deb` package files. While `apt` is generally preferred because it handles dependency resolution automatically, you can use `dpkg` directly, especially if you’ve already downloaded a `.deb` file.
To install a `.deb` file using `dpkg`, open the terminal, navigate to the directory containing the file (using `cd`), and run:
sudo dpkg -i Replace “ with the actual name of the file. For example:
sudo dpkg -i google-chrome-stable_current_amd64.debHandling Dependencies with dpkg: The main drawback of using `dpkg -i` is that it *won’t* automatically install missing dependencies. If the installation fails due to missing dependencies, you’ll see error messages. A common trick to fix this is to immediately run:
sudo apt --fix-broken install(Or the older equivalent: `sudo apt-get install -f`)
This command tells `apt` to find and install any missing dependencies needed by partially installed packages (like the one you just tried with `dpkg`).
Removing Software Using dpkg
You can also use `dpkg` to remove packages, but again, `apt remove` is generally easier as it handles dependencies better during removal too. The command to remove using `dpkg` requires the *package name*, not the `.deb` filename:
sudo dpkg -r (The `-r` stands for remove). If you want to remove configuration files as well, use `-P` (purge):
sudo dpkg -P If a package configuration is broken, you might try reconfiguring it:
sudo dpkg-reconfigure While useful to know about, most users will find `apt` a more convenient front-end for managing packages than using dpkg commands for package installation directly.
Read: How to Resolve the Sub-process /usr/bin/dpkg returned an error code 1 Error in Ubuntu
Using Synaptic Package Manager (Graphical Power Tool)
Synaptic is a graphical package manager that provides a more detailed and powerful interface than the standard Ubuntu Software Center, while still being user-friendly. It gives you fine-grained control over packages, repositories, and dependencies, closer to what `apt` offers on the command line, but visually.
If it’s not installed by default (it often isn’t on newer Ubuntu versions), you can easily install it using the terminal:
sudo apt install synaptic
Installing Synaptic
Remember to confirm with `Y` if prompted.
Once installed, search for “Synaptic Package Manager” in your application menu and launch it. You’ll need to enter your password as it requires administrative privileges.
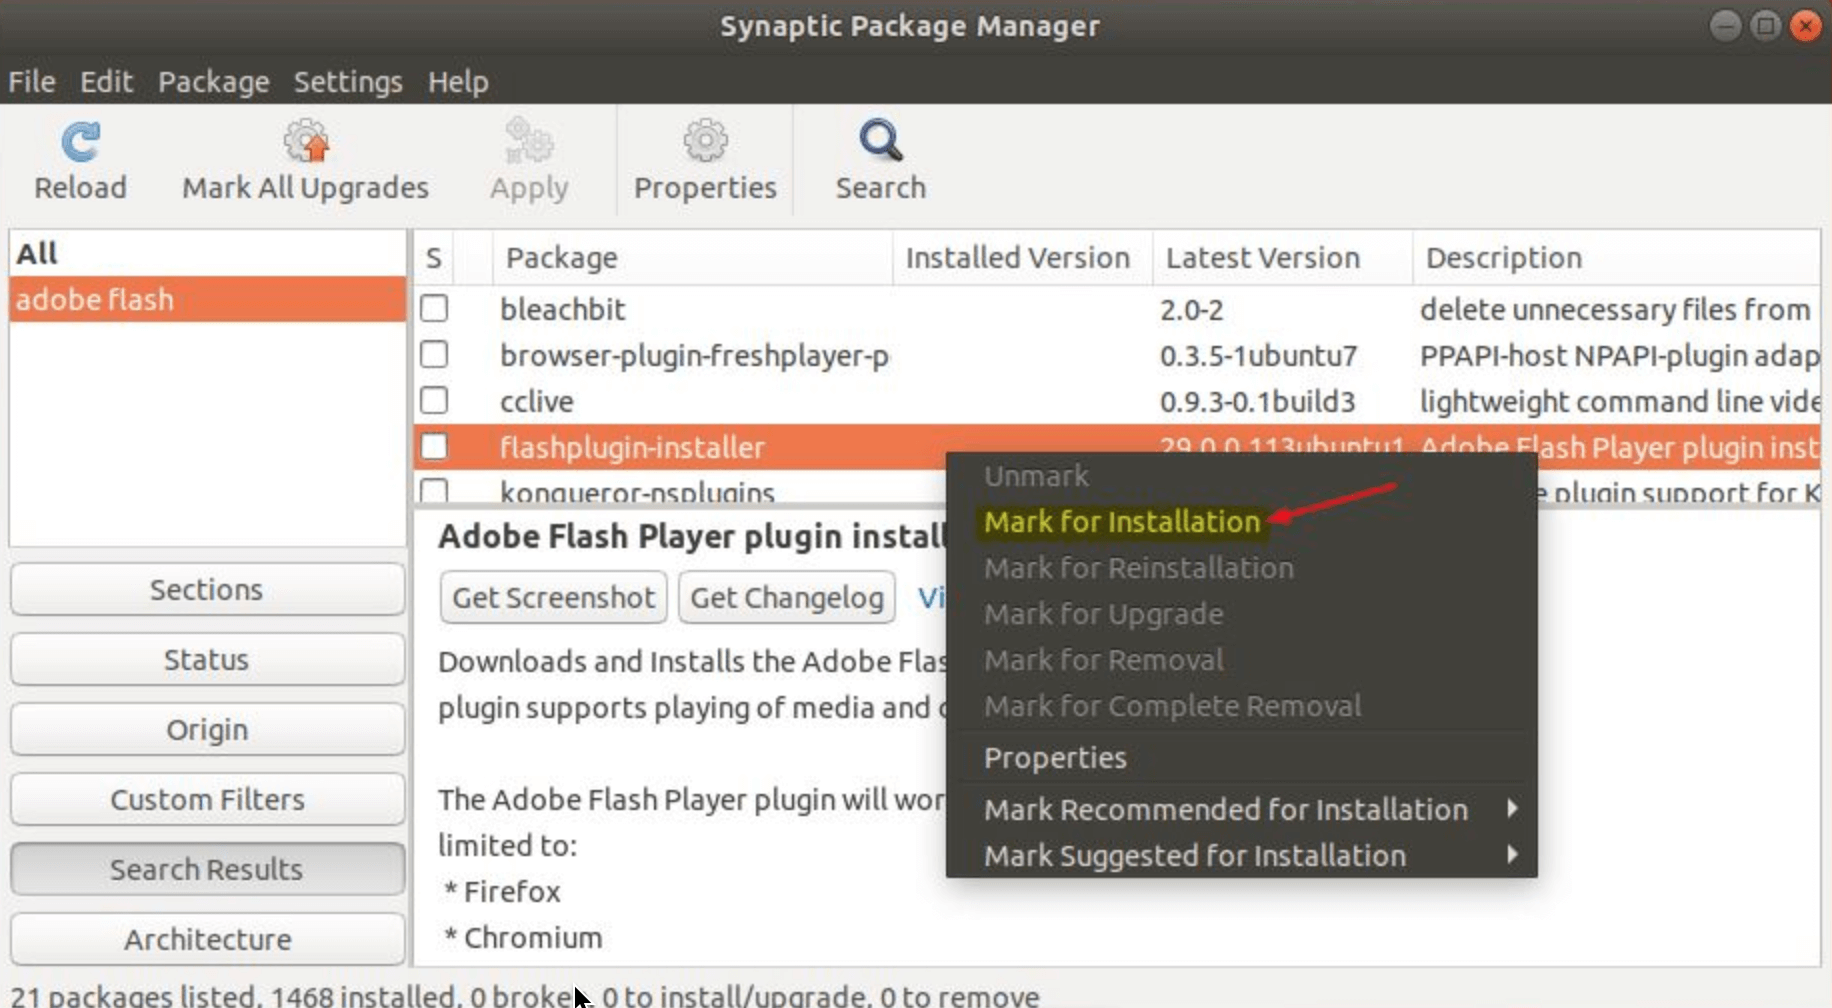
The Synaptic Package Manager interface
Inside Synaptic:
- Use the “Search” button or browse categories to find the package you want.
- Right-click on the package name in the list.
- Choose “Mark for Installation” (or “Mark for Reinstallation”, “Mark for Upgrade”, “Mark for Removal”, “Mark for Complete Removal” i.e., purge).
- Synaptic will automatically mark any necessary dependencies for installation or suggest packages for removal if dependencies require it. Review these changes.
- Once you’ve marked all the changes you want to make, click the “Apply” button in the toolbar.
- Review the summary of actions and click “Apply” again to execute them.
Synaptic is a fantastic tool for users who want more visibility and control than the Software Center offers but prefer a graphical interface over the pure command line. It’s excellent for managing packages visually with Synaptic on Ubuntu.
Using Snap Packages (Universal Linux Apps)
Snaps are a newer packaging format developed by Canonical (the makers of Ubuntu). The idea behind Snaps is to create self-contained application packages that bundle the app *and* most of its dependencies together. This means a Snap package should theoretically run on any Linux distribution that supports Snaps, regardless of the system’s underlying libraries.
Snaps are designed to be secure, running in a sandboxed environment with restricted permissions. They also update automatically in the background (though this can be configured).
On most recent Ubuntu versions, the Snap daemon (`snapd`) is already installed. If you’re on an older version or a different distro, you might need to install it first:
sudo apt update
sudo apt install snapd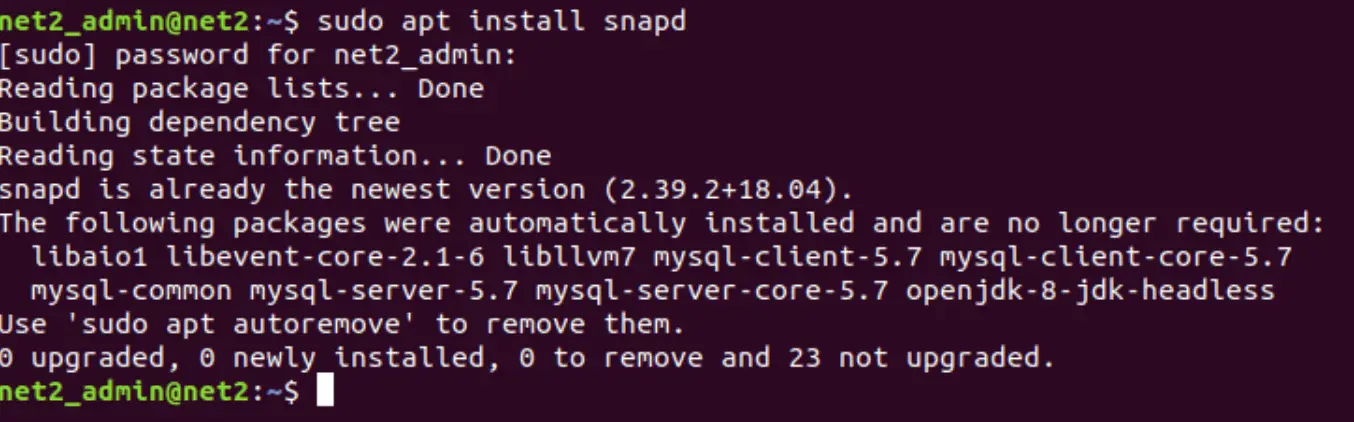
Once `snapd` is running, you can install Snap applications using the `snap` command in the terminal:
sudo snap install For example, to install the Spotify client snap:
sudo snap install spotifyYou can find available Snaps by searching the Snap Store (snapcraft.io) online or using `snap find ` in the terminal.
To remove a Snap package:
sudo snap remove Snaps offer a convenient way to get the latest versions of applications directly from developers, often bypassing the need for PPAs, especially for popular cross-platform apps. Understanding how to install and manage Snap packages on Linux is increasingly important.
Using Flatpak (Another Universal Format)
Flatpak is another popular universal packaging system for Linux, similar in concept to Snaps. Developed primarily by folks associated with Red Hat and the GNOME project, Flatpak also aims to bundle applications with their dependencies to run across different distributions. It also uses sandboxing for security.
You might need to install Flatpak support first. On recent Ubuntu versions, you can install the core Flatpak system with:
sudo apt install flatpak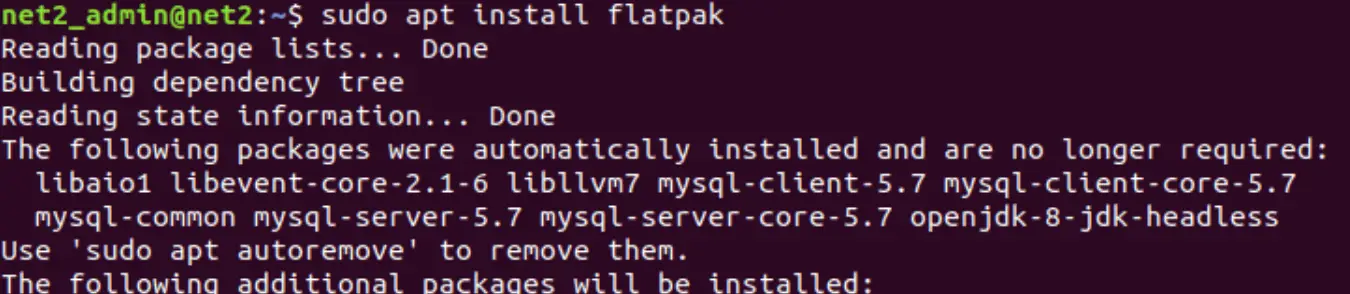
Installing Flatpak support
For older Ubuntu versions, you might need to add the official Flatpak PPA first (check the official Flatpak setup guide for Ubuntu for specifics):
sudo add-apt-repository ppa:alexlarsson/flatpak
sudo apt update
sudo apt install flatpak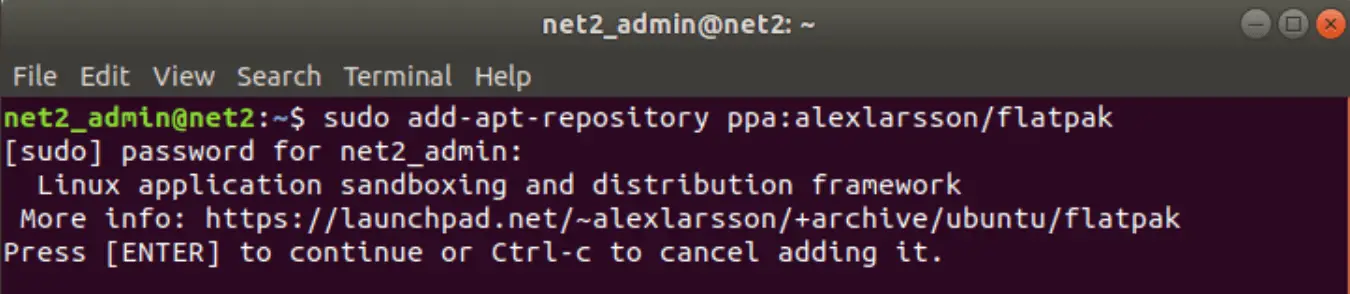
To make Flatpak apps integrate nicely with the Ubuntu Software Center (specifically, the GNOME Software version often used), you can install the plugin:
sudo apt install gnome-software-plugin-flatpakAfter installing the plugin, you might need to restart your computer or at least log out and back in.
Flatpak applications are typically hosted on repositories, the main one being Flathub (flathub.org). You usually need to add the Flathub repository to your system first:
flatpak remote-add --if-not-exists flathub https://flathub.org/repo/flathub.flatpakrepoOnce set up, you can install Flatpak apps using the terminal:
flatpak install flathub (You’ll find the `application_id` on the Flathub website, e.g., `org.gimp.GIMP` for GIMP).
Alternatively, if you installed the software center plugin, you can often download a `.flatpakref` file from Flathub and open it with the Software Center to install graphically.
To remove a Flatpak app:
flatpak uninstall Flatpak provides another excellent avenue for getting applications, particularly desktop-focused ones, across different Linux distributions. Learning how to use Flatpak on Ubuntu gives you more software choices.
For more detailed setup instructions, check the official guide: https://flatpak.org/setup/Ubuntu/
Conclusion
Wow, that’s quite a few ways to install and remove software on Ubuntu! As you can see, you have options ranging from the super simple graphical Software Center to the powerful command-line tools like apt, and even universal formats like Snaps and Flatpaks.
For beginners, sticking to the Ubuntu Software Center or using basic apt commands (sudo apt install, sudo apt remove) is usually the easiest and safest route. Using .deb files downloaded from trusted sources is also quite common and user-friendly.
PPAs offer access to newer software but require a bit more caution regarding the source.
Snaps and Flatpaks are fantastic modern options providing easy access to lots of apps, often directly from the developers, and work across different Linux distros.
Building from source code and using dpkg directly are generally more advanced techniques, best reserved for specific situations where other methods aren’t suitable.
There are even more specialized tools we didn’t cover in depth, like:
- Pip for installing Python-based programs
- Language-specific package managers (like npm for Node.js, gem for Ruby, etc.)
Choosing the right method depends on the software you need, where it’s available, and your comfort level. Don’t be afraid to try the terminal – `apt` is incredibly powerful once you get the hang of it!
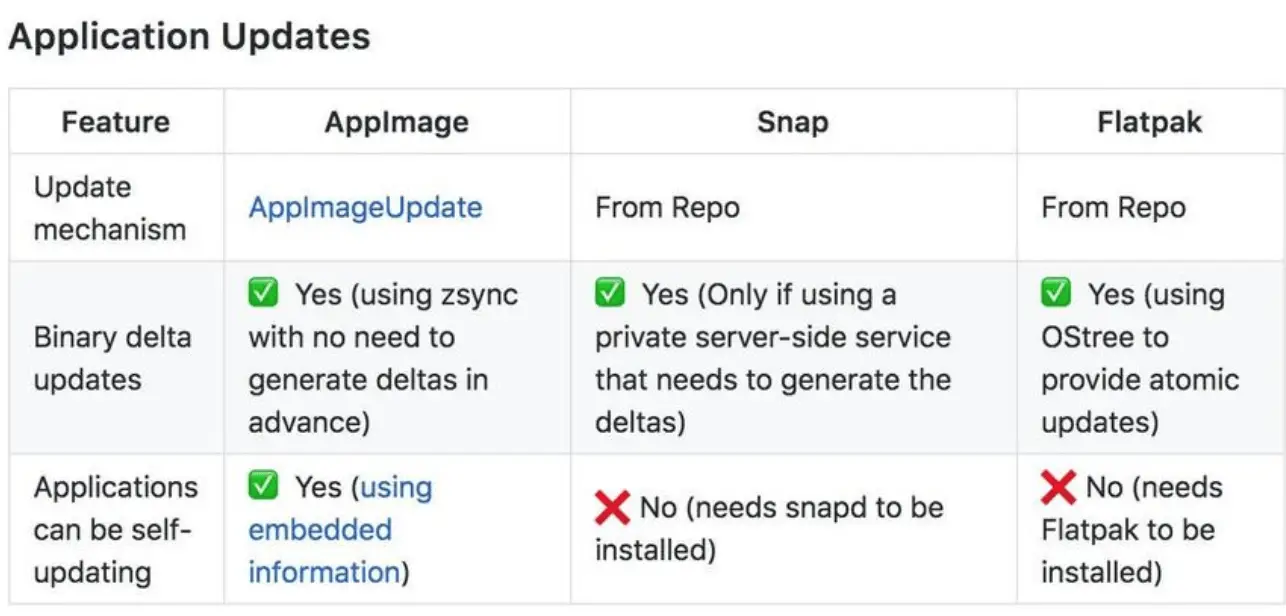
If you’re curious about the technical differences between Snaps, Flatpaks, and another format called AppImage, this comparison chart is quite informative:
Comparison Link: https://github.com/AppImage/AppImageKit/wiki/Similar-projects#comparison
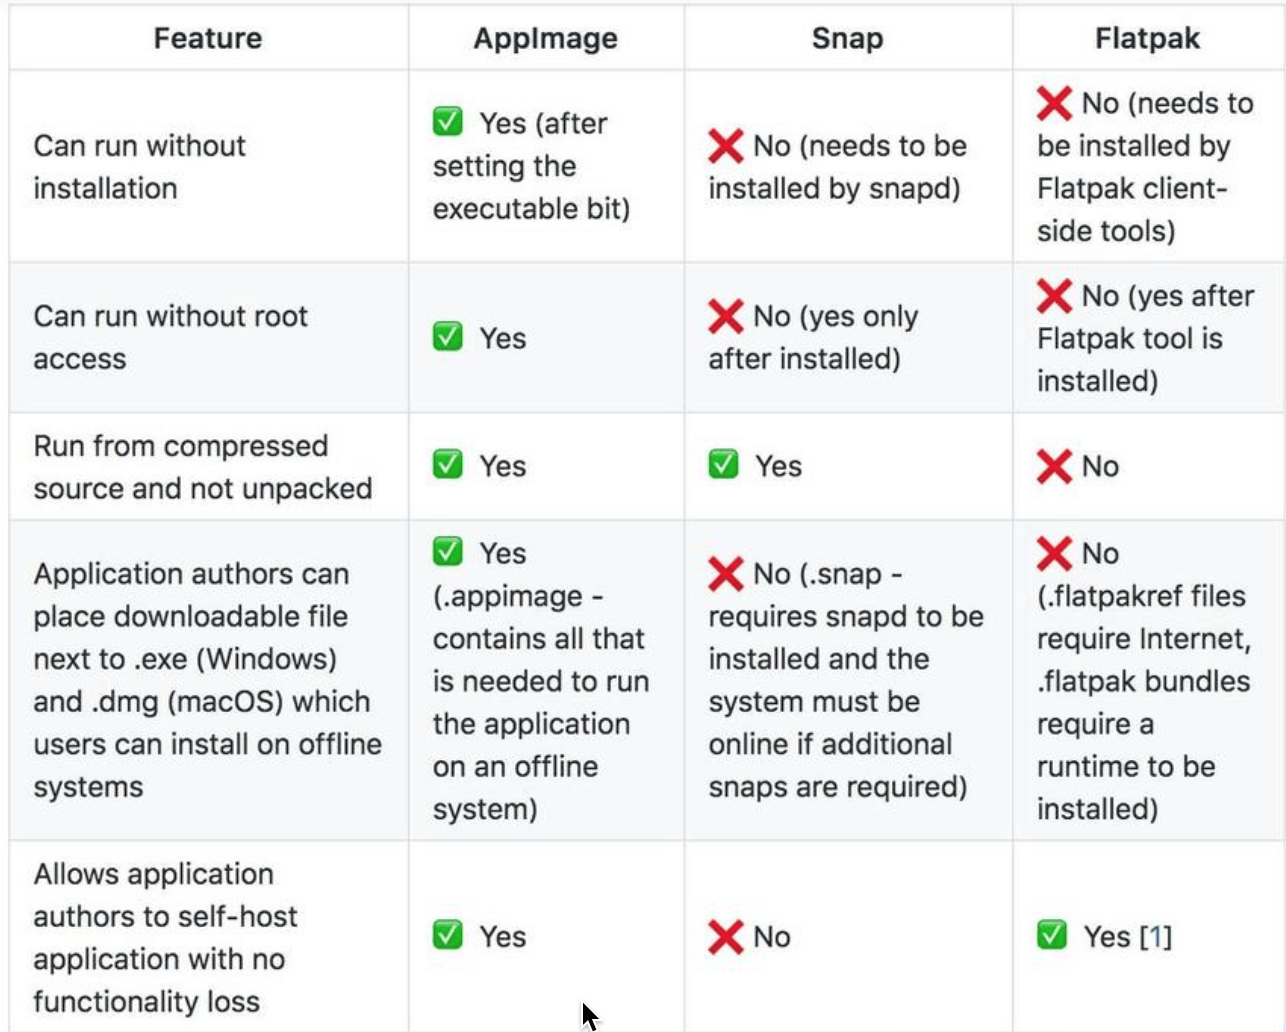
Courtesy: AppImage GitHub Wiki
Courtesy: AppImage GitHub Wiki
Frequently Asked Questions (FAQ)
- Q1: What’s the easiest way for a beginner to install software on Ubuntu?
- The easiest method is usually using the graphical Ubuntu Software Center. Just search for the app and click “Install”.
- Q2: How do I install software using the command line on Ubuntu?
- Open the terminal (Ctrl+Alt+T) and use the `apt` command: `sudo apt install `. You’ll need to know the correct package name.
- Q3: What’s the difference between `apt remove` and `apt purge`?
- `sudo apt remove ` uninstalls the application but usually leaves its configuration files behind. `sudo apt purge ` removes the application *and* its system-wide configuration files.
- Q4: I downloaded a `.deb` file, how do I install it?
- Often, you can just double-click the `.deb` file in your file manager, and it will open with the Software Center or another installer. Alternatively, use the terminal: `sudo dpkg -i `, followed by `sudo apt –fix-broken install` if you encounter dependency errors.
- Q5: What are PPAs and should I use them for installing Ubuntu applications?
- PPAs (Personal Package Archives) are repositories hosted by developers to offer newer software versions. They are useful but use them with caution – only add PPAs from sources you trust. Installation involves `add-apt-repository`, `apt update`, and `apt install`.
- Q6: What are Snap and Flatpak packages for Linux software installation?
- They are newer “universal” package formats designed to run on many Linux distributions. They bundle the app with its dependencies and run in a sandbox for security. You install them using `sudo snap install ` or `flatpak install flathub `, respectively, after setting up Snapd or Flatpak.
- Q7: When should I consider installing Ubuntu software from source code?
- Installing from source code is usually only necessary for advanced users who need the absolute latest (unreleased) version, need specific customization during the build, or when no pre-built package is available. It’s more complex and doesn’t offer automatic updates or easy removal via standard package managers.
If you like the content, we would appreciate your support by buying us a coffee. Thank you so much for your visit and support.