The black window with the blinking cursor is suspect to many users. There is often talk of “cryptic” commands. Admittedly, compared to programs with a the graphical user interface, the command prompt initially offers little help to beginners. The correct commands and options have to be learned beforehand.
But if you have recognized the basic principles, you will find useful helpers on the command line, especially for recurring tasks or for the automation of routine work. After a certain training period, command line tools often prove to be safe and straightforward. Once a configuration has been found, it always works reliably – even on other PCs.
In this article, you will learn some basic CMD commands in windows.
Start tools conveniently in the command prompt
Every tool and every program can be started via the command prompt, this also applies to programs with a graphical user interface. For example, type in :
notepad
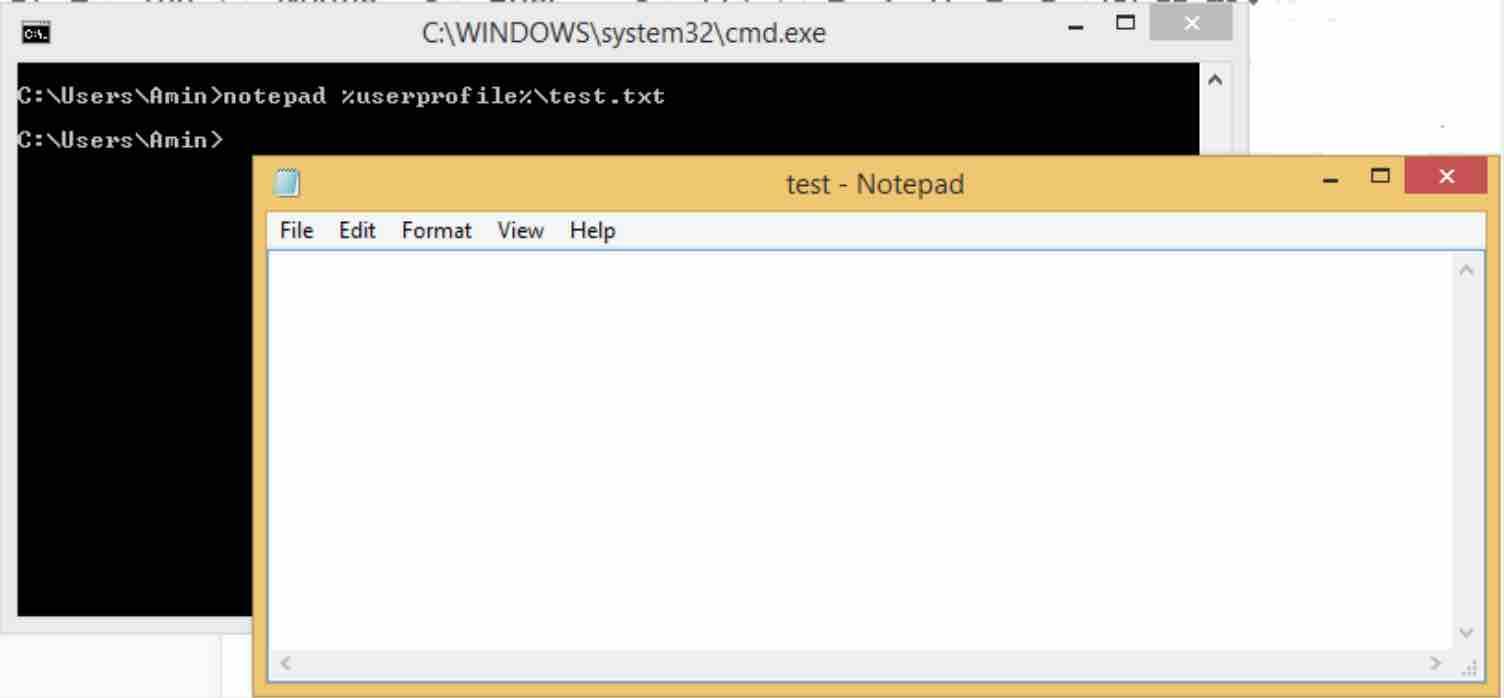
Which starts the Windows editor. You can also add a file name as a parameter, such as
notepad %userprofile%\test.txt
Windows cmd commands
If the file exists, it will be opened by Notepad. If not, you will be asked whether the file should be created again. Confirm with “Yes”.
Read: How to speed up your Windows computer
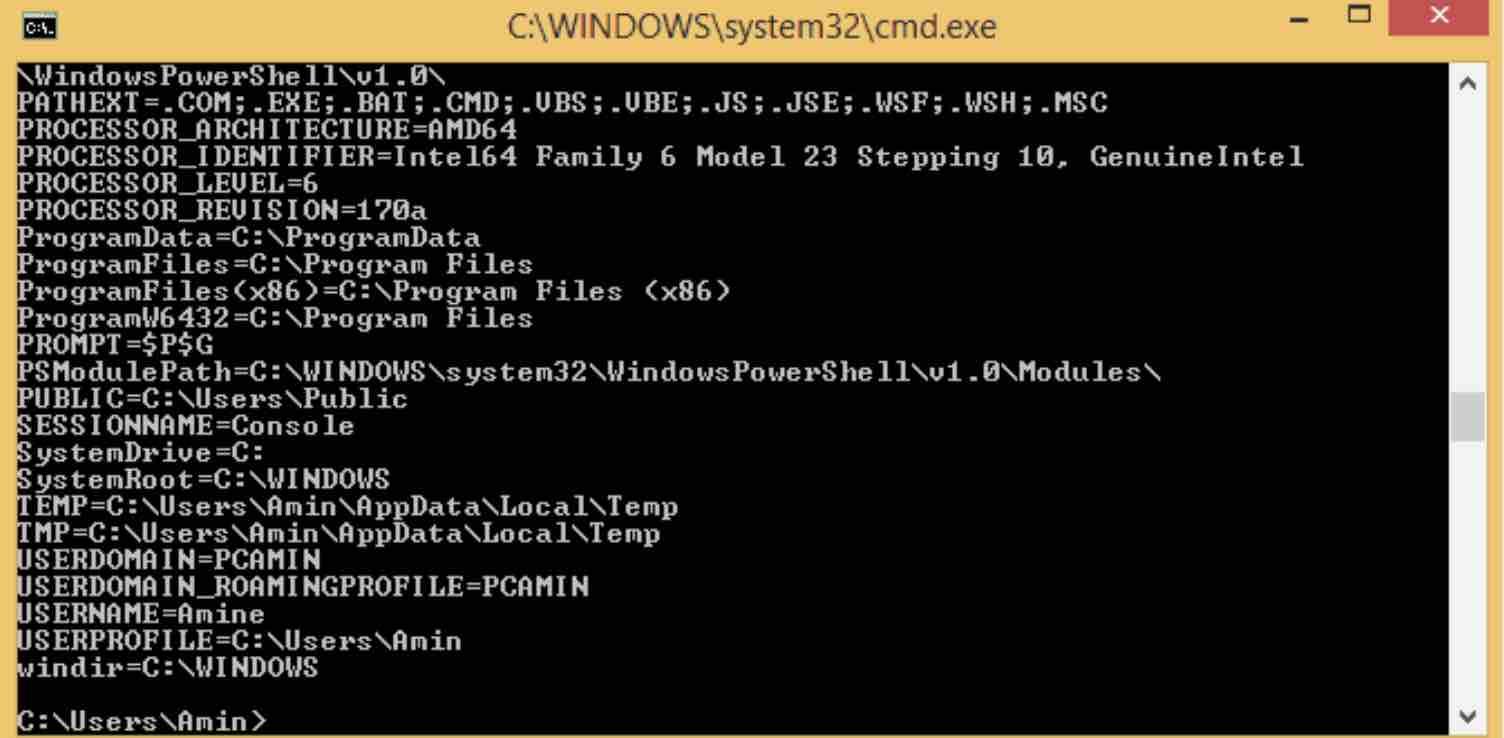
“% Userprofile%” is an environment variable that Windows sets by default. It contains the path to the user profile of the current user – for example “C:\Users\Amin”. You can use the command to find out which environment variables have already been assigned :
set
command prompt commands
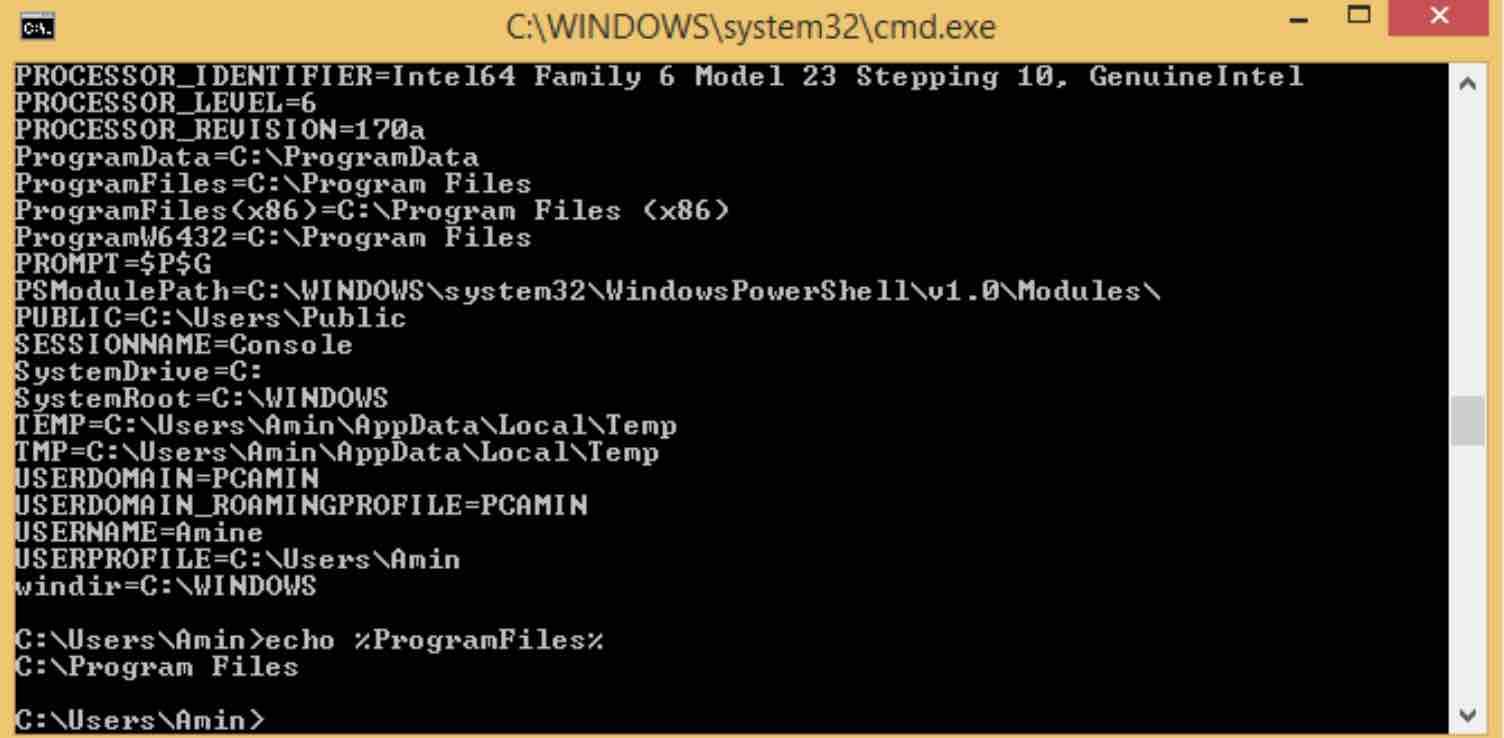
You can also have the value of a single variable output:
echo %ProgramFiles%
Using the variables can save typing, but is mainly used to generalize command lines or batch scripts so that they work for every user and on every computer.
A command line tool can be started in the same way. So the command :
tasklist
For example, displays a list of ongoing processes.
Applications can be started by the name of the program if they are in the directory that the prompt of the command prompt shows. Otherwise, they must be in the search path or you must enter the full path name. For example, if a program can be found in the “C: \ Tools” folder, start it with
C:\Tools\Tool_Name
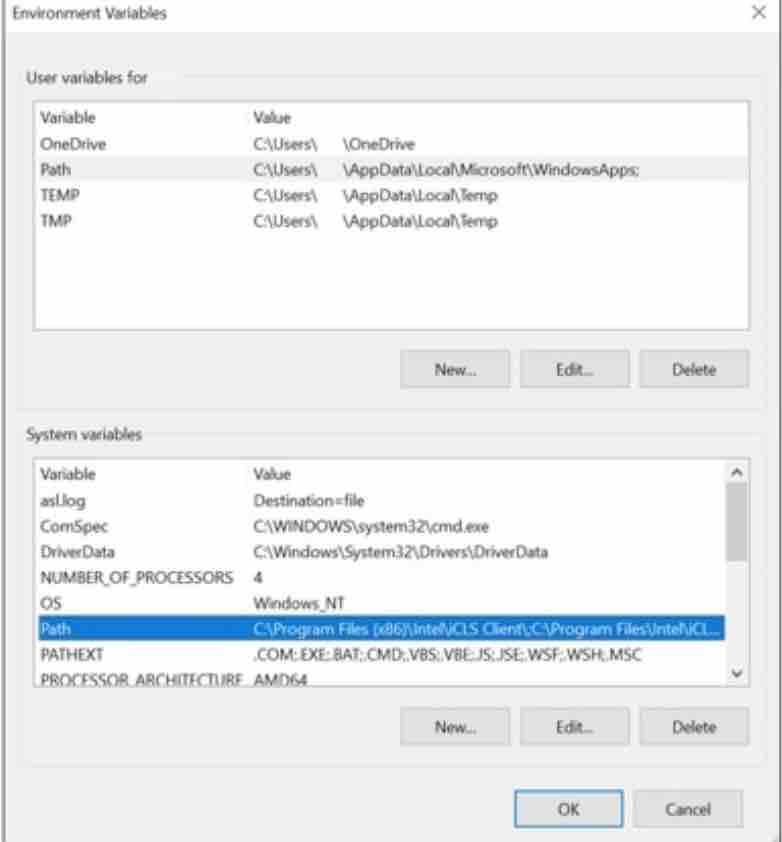
It’s quicker if you add the folder to the search path. Press the key combination Win-Pause, click on “Advanced system settings” and then on “Environment variables”.
Windows path variables
Under System Variables, click Path, and then click Edit. Add the desired directory to the end of the list separated by a semicolon. Windows 10 users click “New” and then type in the path. You must restart the command prompt for the change to take effect. If you now copy programs, but also batch files, to the “C:\Tools” folder, you can simply start them in the command prompt using the program name.
Save file lists or copy them to the clipboard
By default, the dir command lists all elements of the file system in the current folder. With a filter, it can be used to create file lists. For example, if you need a list of all the JPEG files in a folder and its subfolders, use this command line:
dir /s /b C:\images\*.jpg > C:\image\imageslist.txt
With the switch “/s” you take into account all subdirectories. “/b” provides a simple format that only outputs the file name with path, and only of JPEG files in the folder “C:\ Images” (“C:\Images\*.jpg”). “>” Is a redirection character. The output ends up in the specified file and not on the screen. You can also copy the result to the clipboard and then paste the list into an editor using Ctrl-V:
dir /s /b C:\images\*.jpg | clip
The “|” is a pipe command that forwards the output from you to the Clip.exe tool, which copies the received data stream to the clipboard. Clip.exe can also read information from a file:
clip < imageslist.txt
Which copies the content of the specified file to the clipboard.
Sort list: With the switch “/o:n” you can sort its output by name and with “/o:s” by size. However, this does not work properly with the “/s” switch, because the sorting takes place only within a folder. At this point Sort.exe helps:
dir /b /s C:\images\*.jpg | sort >imageslist.txt
Create quick backups with Robocopy
Robocopy windows 10
Robocopy is a reliable command line copy and backup tool. Numerous options provide solutions in all situations, for example exclude options such as “/XD Video” to exclude certain folders, or waiting options in the event of access errors such as “/W:10 / R:3”, which takes ten seconds next of three attempts starts. A typical order for Robocopy commands looks like this:
robocopy C:\Archive\\Server\release\Archive/MIR/XD Temp* /XJD /W:5 /R:1
This means: Copy everything from “C:\Archive” to the network drive “\\Server\release\ Archive”, which is not yet available there. Delete everything that can no longer be found in “C:\Archive” (“/MIR”) and exclude folder names with “Temp” as well as possible folder junctions, and try not to consider the files for long if there are errors to copy.
If you have found the right parameters for the command line, a small batch file is worthwhile so that you do not have to type in complex lines again manually. For more Robocopy examples and information, check this page.
Find files faster on the command line
File lists are also suitable for a small search tool that can be used to quickly locate any file from the command line. To do this, create the batch file filelist.bat with the following content (three lines) in a text editor.
@echo off
dir /s /b c:\ > „%userprofile%\filelist.txt“
dir /s /b d:\ >>“%userprofile%\filelist.txt“
“@Echo off” ensures that no annoying issues appear on the screen. The dir commands create a simple list of all files on drive C: and D: in the text file “filelist.txt”. If D: is not present, simply omit the line. In the event that there are still several drive letters on your system, add further lines according to the same scheme. But don’t forget to redirect your output to the list for all further lines with “>>”, because a simple greater-than character overwrites the existing file, “>>” supplements the file. The resulting list is then in your personal directory, to which the variable “%userprofile%” refers to in this example.
Then create a second batch file called “Locate.bat” and these three lines:
@echo off
type „%userprofile%\filelist.txt“ | find /i „%1“
if errorlevel 1 echo „%1“ not found
The “type” command forwards the contents of “filelist.txt” to the find tool. “%1” contains the search term that you pass on the command line. If find finds something, it prints out the file name with the path. If not, the message “[File] not found” appears.
It is best to save the BAT files in a folder in the search path so that you can call them up quickly (see point 1). Then run Filelist.bat at the command prompt.
For example with the command
locate regedit.exe
determines the path of the program you are looking for. You should restart Filelist.bat at regular intervals so that the file list is as up to date as possible.
Find files based on certain criteria
The forfiles tool works similarly to you and outputs a list of elements of the file system.
At the command line:
forfiles /s /p C:\Windows /m *.exe. [search files windows]
“/s” stands for the recursive listing and behind “/p” the tool expects a directory name. If “/p” is missing, the tool works in the current directory. Behind “/m” is a file mask that limits the search to certain file types.
With forfiles, you usually forward the search result to achieve the desired result:
forfiles /s /p C:\Windows /m *.exe /d 01.12.2017 /c „cmd /c echo @path is since 01.11.2017 new“
The line shows you all the exe files that have been added to the “C:\Windows” folder since 01.11.2017. The tool understands a total of nine variables such as @path, @file and @fsize, with which you should familiarize yourself with “forfiles /?” Before use.
Create a Windows setup stick with diskpart
With the interactive command line tool Diskpart, for example, a bootable USB stick can be prepared for the Windows installation. You will need the files from the Windows installation DVD or from an ISO file downloaded for installation. Unzip the ISO files with 7-Zip .
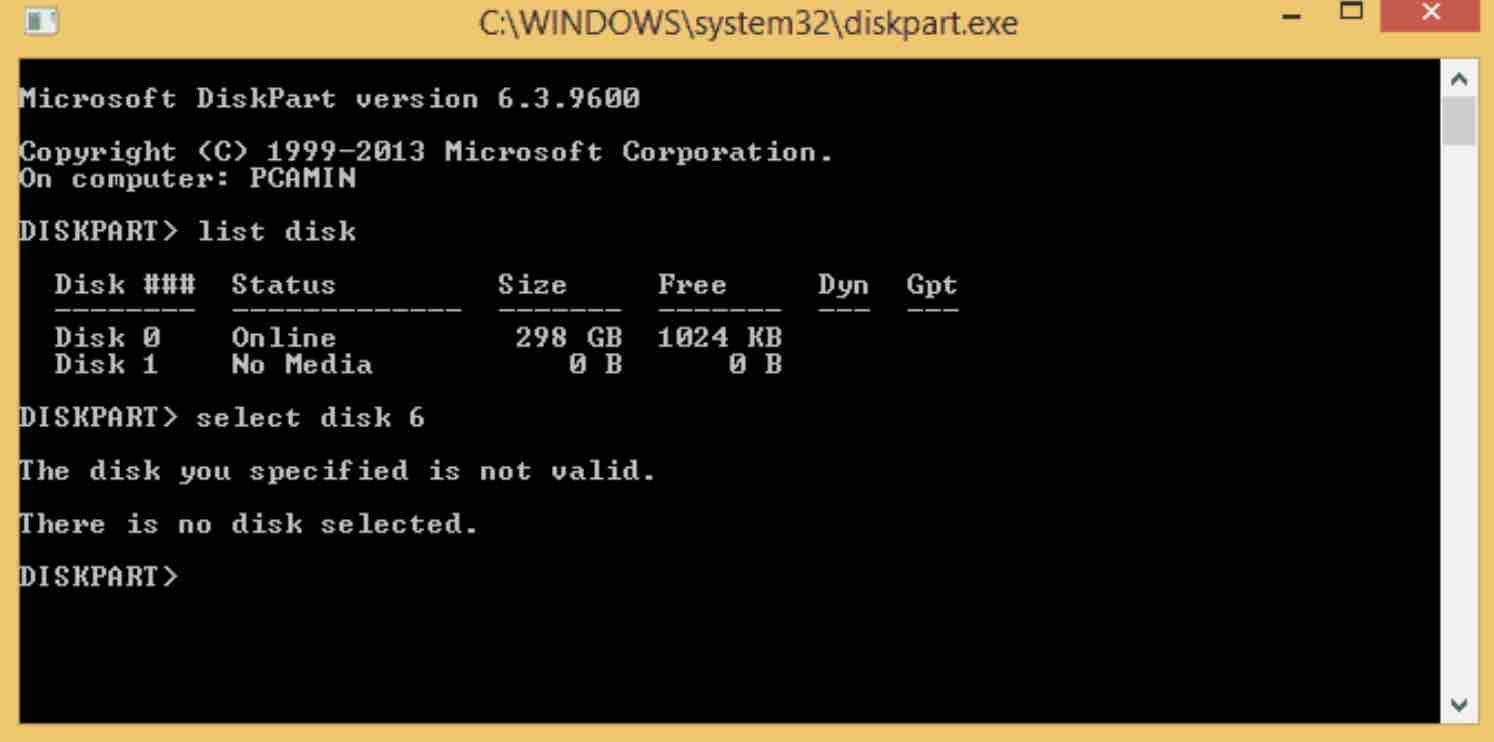
Connect the USB stick to the computer and save all the data on it. Next start Diskpart in an administrative command prompt and now determine the drive number of the USB stick perlist disk. Use select disk X to select the USB stick, where “X” stands for the number of the USB stick that list disk previously displayed. Attention please: Under no circumstances should you choose another drive, because all data on it will be deleted.
The following seven diskpart commands delete the USB stick and make it bootable:
- clean
- create partition primary
- select partition 1
- active
- format fs=fat32 Quick
- assign
- exit
Copy the contents of the Windows installation DVD or the contents of the extracted ISO file onto the stick. You can then boot the PC from the USB stick and reinstall Windows .
Please note: Diskpart is not able to format USB sticks larger than 32 GB with the Fat32 file system. In this case, replace the diskpart format line in our example with:
format fs=ntfs Quick [diskpart windows 10]
However, Fat32 is only required for installation in Uefi mode. For larger sticks, use the Fat32 Format tool , which you simply use:
fat32format.exe X:
call, replacing “X:” with the drive letter of the USB stick.
If you like the content, we would appreciate your support by buying us a coffee. Thank you so much for your visit and support.

I want to learn cmd