Security is a fundamental ingredient in all our electronic devices because personal information must be protected in a vital way, preventing third parties from accessing it.One of the measures that Windows incorporates from previous versions is the login screen in which you must log in to access the computer. Data , programs, passwords are saved in your session , so this security measure is important.
As for login screens, it is appropriate that in the event that another person is going to access the computer, it is better to create a user that is limited in functions such as the guest user, who does not need a password to enter but he will not have all the privileges.
The lock or login screen in Windows 10 appears when you boot the system or when you have it in a suspended state and switch to an active state.
If you want to remove this login screen because it is a computer that you are not interested in wasting time logging in, here are the steps to disable it.
Read: Windows tuning : Deactivating unnecessary services
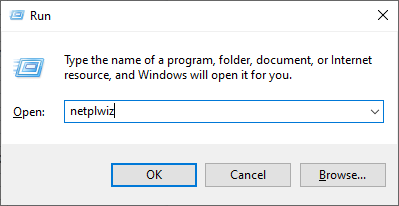
Step 1
The first thing is to make the key combination below which will show the Run window.

Step 2
Now type in the following command, then press OK or Enter:
netplwiz
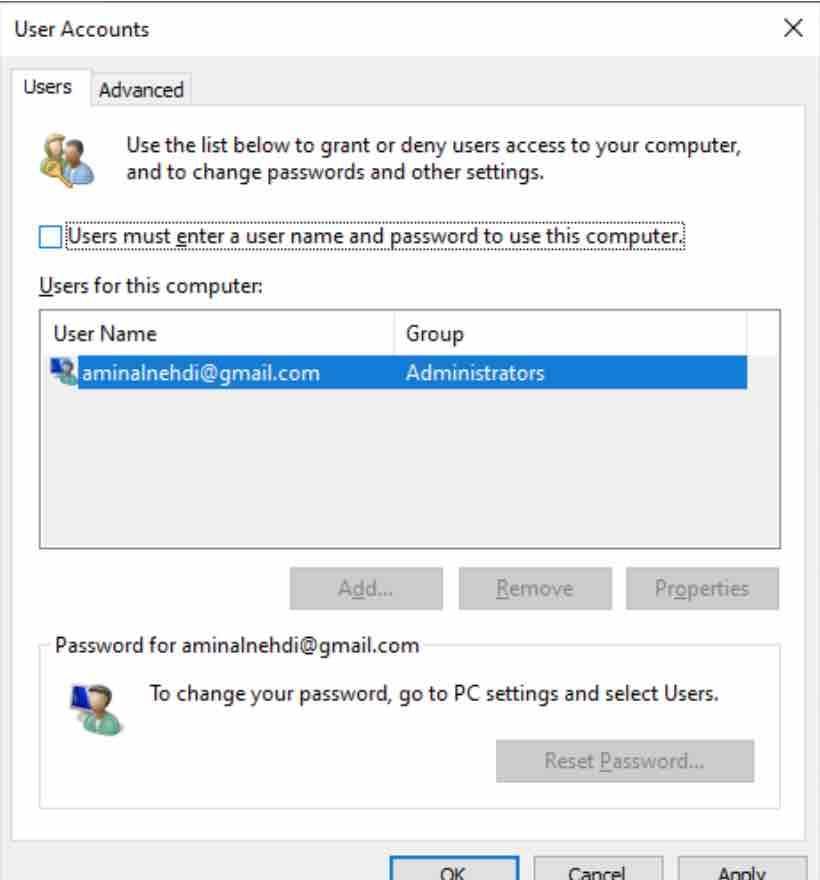
Step 3
Now you have the option: “Users must enter a user name and password to use this computer.” Uncheck it .
Read: How to automate repetitive tasks in Windows
Step 4
Click on OK and a confirmation window will appear so that you can enter the username and password of the user for which this option was unchecked so that he can log in automatically. In this case it is an example for a user of a local account:
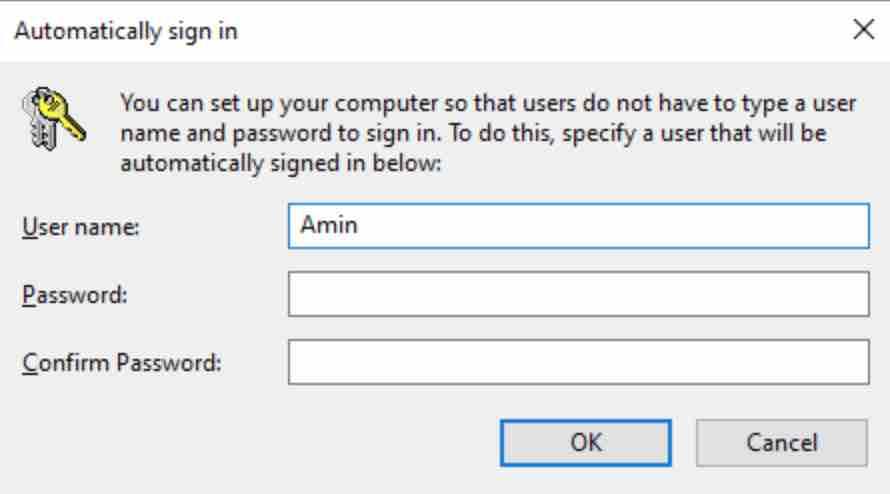
Windows 10 disable login screen
Step 5
This second option would be if you were logged on in Windows 10 with an email or Microsoft account, that is, not local.
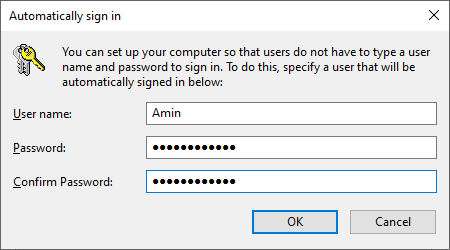
Disable login screen windows 10
Note
Remember that you have to enter the full address as a user to log in correctly.
If you like the content, we would appreciate your support by buying us a coffee. Thank you so much for your visit and support.
In the display which appears as per Step 3, there is no box to uncheck. It just isn’t there in the display so the procedure as outlined comes to a grinding halt right there. I’m running Windows 10 Pro, build no. 19041.450.