Linux offers various methods for installing applications and programs. Advanced users may opt to download source code directly from developer websites and compile it on their systems.
However, this approach is often time-consuming and less practical for general use.
Less experienced users typically prefer a simpler route: downloading binary packages (such as .deb files) and installing them via package managers or by double-clicking, similar to software installation in Windows. For users seeking a balance of convenience and efficiency, Linux repositories provide an excellent method for downloading, installing, and updating software.
Understanding Linux Repositories
Repositories are a key advantage of Linux distributions. A software repository is essentially a curated list of programs, enabling users to easily discover and download a wide range of applications and utilities compatible with their specific Linux distribution.
Repositories provide a secure and reliable source for obtaining software and their corresponding updates. Software installed from repositories typically resolves dependency issues automatically, ensuring smooth operation.
Distribution developers commonly include their own repositories populated with essential software. Furthermore, many independent developers maintain their own repositories to distribute their applications. Users can also create and manage personal repositories, which is particularly useful for sharing custom software collections.
Read: Securing Ubuntu: Best Practices for Keeping Your System Safe
Types of Repositories in Ubuntu
Upon installing Ubuntu, a set of default repositories are configured and categorized into different channels:
- Main: This default repository contains Free and Open Source Software (FOSS) that is freely distributable without restrictions.
- Universe: This repository includes community-maintained free and open-source software. While it offers a vast selection, regular security updates are not guaranteed for all packages.
- Multiverse: This channel hosts software that may have licensing restrictions, although it originates from FOSS. Users are responsible for reviewing software licenses to ensure legal compliance before usage.
- Restricted: This repository contains proprietary, closed-source software, often including essential drivers like NVIDIA graphics drivers.
- Partner: This repository provides proprietary software that has been officially packaged and is supported by Canonical, the company behind Ubuntu.
Beyond these standard repositories, users can enhance their software sources by adding third-party repositories to their Linux system, expanding the range of available software while maintaining a secure installation process.
The following procedures are demonstrated on Ubuntu, but they are generally applicable to any Debian-based Linux distribution.
Read: Linux directories explained
Adding New Repositories to Your Software Sources
To view the current list of repositories configured on your Ubuntu system, open a terminal session (by pressing Control + Alt + T) and execute this command:
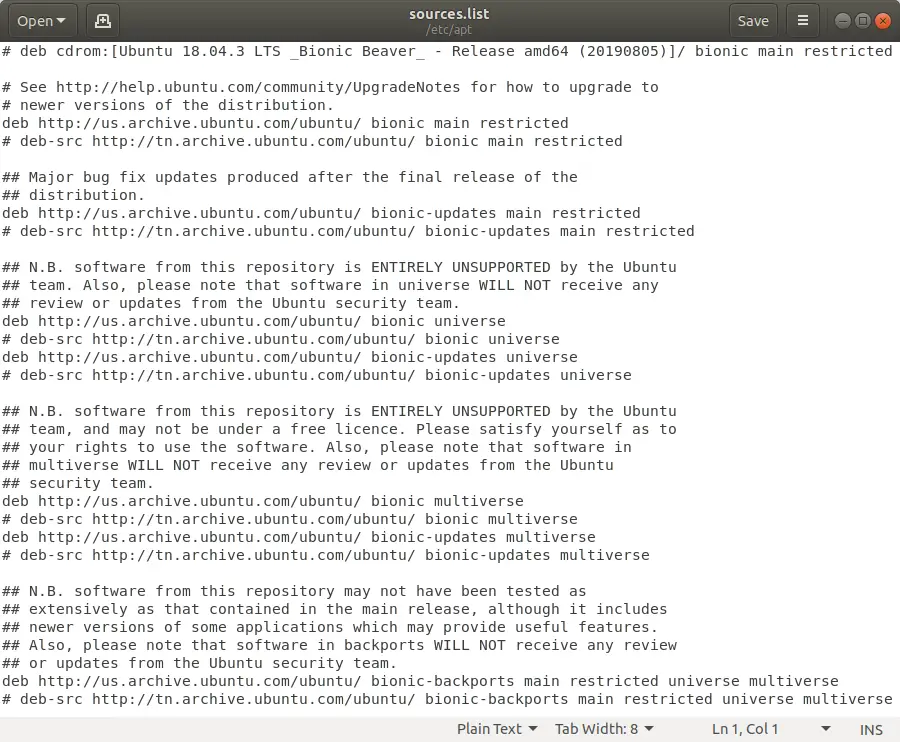
sudo gedit /etc/apt/sources.list

sources.list Ubuntu – Ubuntu repository list
If the above command fails or if you do not have gedit installed, you can use the “nano” text editor instead by running:
sudo nano /etc/apt/sources.list
This will open a file listing your configured repositories. Lines starting without a ‘#’ symbol (e.g., deb http://archive.ubuntu.com/ubuntu/ bionic-updates main restricted) are active repositories. Lines beginning with ‘#’ are installed but currently disabled repositories.
Read: A Deep Dive into Linux Operating System Architecture: Components and Functions
Before enabling and using a new repository, it is crucial to install its security keys. These keys are typically provided along with the repository details, often with PPAs (Personal Package Archives). The following example demonstrates this process using the official Google Chrome repository.
Example: Adding the Google Chrome Repository
To add a Linux repository, or PPA, via the terminal, follow these steps. First, locate the repository information online. For Google Chrome, this information can be found on the official Google website.
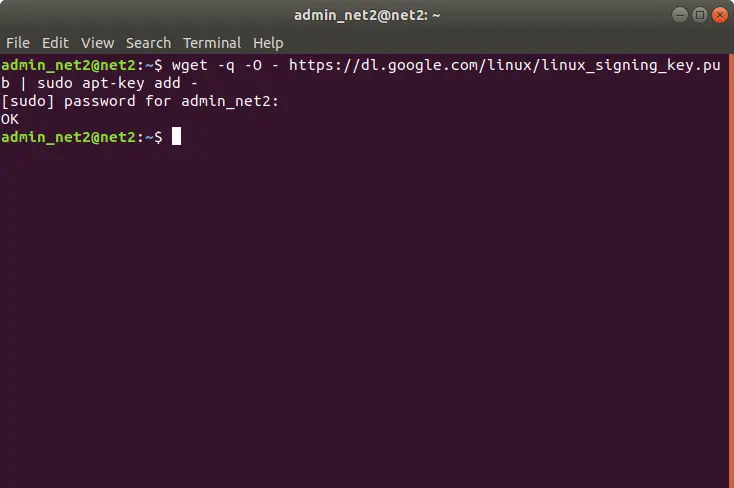
In the terminal, execute the command below to import the security keys for the official Google repositories into your Linux system. This step is essential for verifying the authenticity of software from the repository and preventing errors during installation:
wget -q -O - https://dl.google.com/linux/linux_signing_key.pub | sudo apt-key add -
Read: How to Install Build Essentials in Ubuntu: Essential Developer Tools for Compiling Software
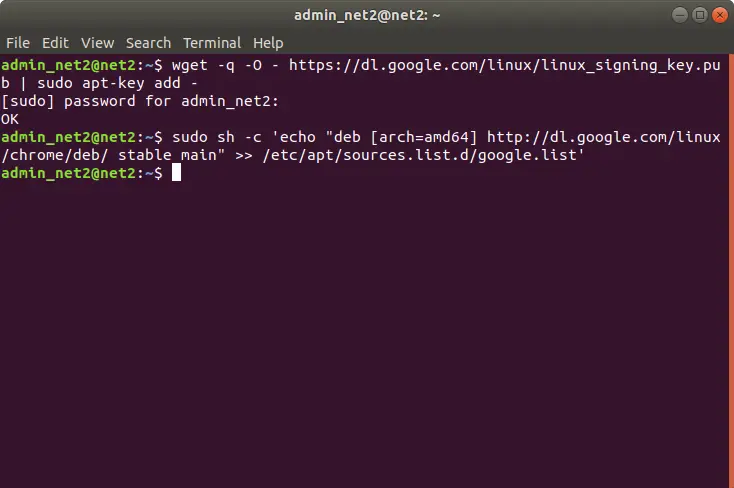
After successfully importing the key, add the Google Chrome repository to your Ubuntu’s repository list by executing:
sudo sh -c 'echo "deb [arch=amd64] http://dl.google.com/linux/chrome/deb/ stable main" >> /etc/apt/sources.list.d/google.list'
If you added the repository via GEDIT as described previously, this last command is not necessary.
Next, update the list of Linux repositories to incorporate the newly added software sources into your system’s package management system. This step ensures that your system recognizes the programs available in the newly added repository, allowing you to install them using apt install.
Read: How to run Windows software on Linux
Updating the Linux Repository List
Whether you have added new repositories using the steps above or simply wish to refresh your software list without adding new sources, the update process is straightforward.
To update your repository list and package information, open a terminal session (Control + Alt + T) and run these two commands sequentially:
sudo apt update(to refresh the software lists from all configured repositories).sudo apt upgrade(to apply available updates to installed packages).
Upon completion, all software installed from your configured repositories that have updates available will be upgraded to their latest versions.
You can now proceed to install software from your Linux repositories using the apt install command (for example: sudo apt install google-chrome).
Removing a Linux Repository
Over time, you might find that a particular Linux repository is no longer needed. This could be because the software has been integrated into the official repositories or simply because you no longer use the applications from that source.
To remove a repository, begin by opening the software repository list file using:
sudo gedit /etc/apt/sources.list
The gedit text editor will display the list of all configured repositories. Locate the specific repository you wish to remove and delete its corresponding line from the file.
After removing the repository entry, update the repository list with sudo apt update to apply the changes to your system.
Read: How to edit a text in Linux using Nano – A beginner’s guide
Removing a PPA (Personal Package Archive)
If you added a repository as a PPA, removal is generally straightforward. Simply execute the following command in the terminal, replacing ppa:repo/repo with the specific PPA URL you wish to remove:
sudo add-apt-repository -r ppa:repo/repo
If the PPA had an associated security key, you can remove it using the command sudo apt-key del followed by the key’s numeric identifier in quotes or its last 8 characters (without quotes).
Read: How to remove PPA in Ubuntu
Finally, update the software list with sudo apt update to finalize the removal process.
If you like the content, we would appreciate your support by buying us a coffee. Thank you so much for your visit and support.