One of the most interesting features of PowerShell is that it is an object-oriented tool. Obviously, if you don’t know what object-oriented programming is , this could be a problem for you. However, in this tutorial you will quickly get used to dealing withobjects, their properties and their methods.
However, this shouldn’t be anything new to you. In the previous tutorials, one of the three helper cmdlets you saw was Get-Member. This cmdlet allows you to obtain the properties or attributes and the methods of a certain object. For example, in the previous article you saw the properties and methods of the command Get-Help.
In this tutorial, you will delve into the realm of objects and in particular objects in PowerShell.
Read: How to fix Powershell error: Running scripts is disabled on this system
Objects in PowerShell
What IS an OBJECT?
An object is nothing more than an abstraction of an element, providing this object with a series of properties and methods.
Properties refer to the intrinsic characteristics of the object whereas the methods are the actions that you can perform with that object. A good example that helps clarify this concept is a file.
Any file on your computer is nothing more than an object, no more, no less. This file, has a series of characteristics, such as, for example, the name of the file, the directory in which it is located, the extension, if it exists, the last time you accessed it, and many others.
The methods of that file are the actions that you can perform on the file. For example, the first thing that comes to mind is to delete the file. It’s that simple ((Get-Item test).Delete ).
Read: How to convert a JSON object to String in Javascript
GET-MEMBER and GET-ITEM
In order to delve into these cmdlet and objects, we are going to use the cmdlet New-Item that allows you among other things to create files. So the first thing is to create a file to be called example.txt. For this, execute the following instruction:
New-Item -Name example.txt -ItemType File
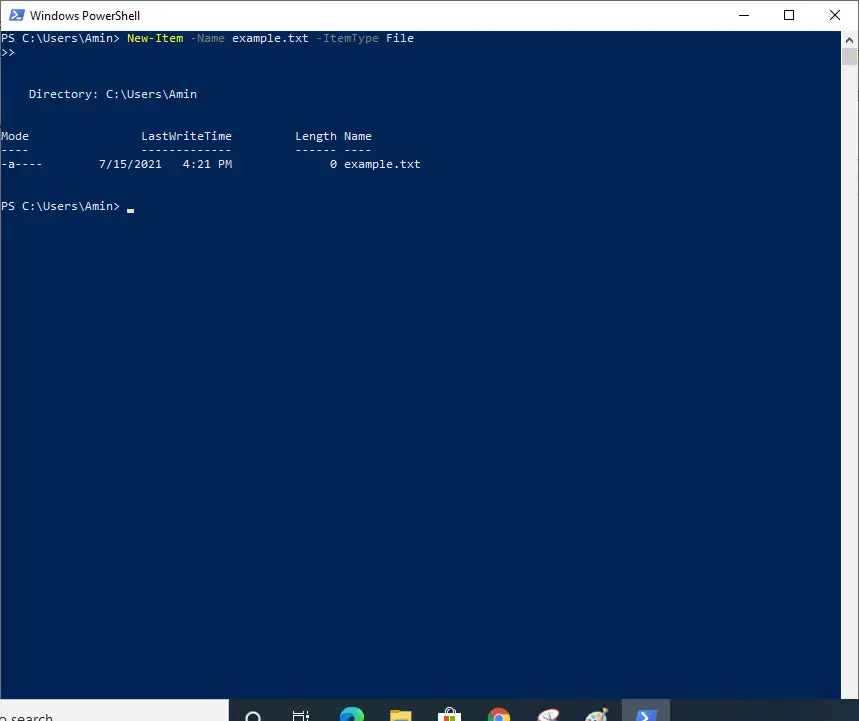
If you now run the cmdlet you will see that among the files and directories listed it has appeared example.txt. In fact, you can confirm its existence using the method Exists:
(Get-Item example.txt).Exists

If you want to see all the properties and methods of your new file object called example.txt. You have to execute the following instruction,
Get-Item example.txt | Get-Member
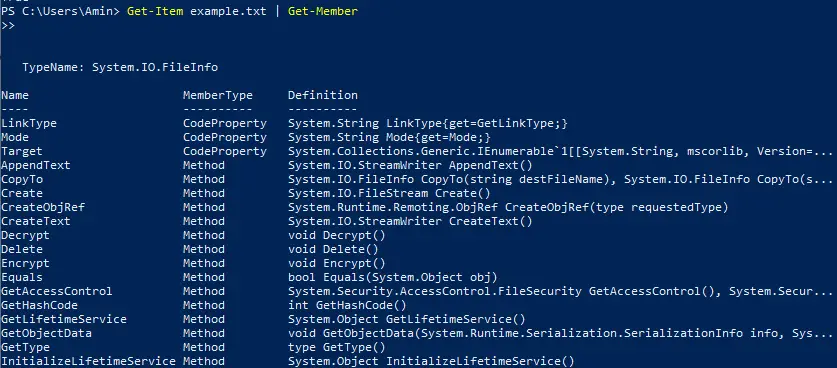
In the next series we will explain the chain separator |. For now, you just have to keep in mind that it is a way to chain the output of one command with the input of the next .
PROPERTIES
If you want to show only the properties, you have to do it in the following way:
Get-Item example.txt | Get-Member -MemberType Property
This will give you the following result,
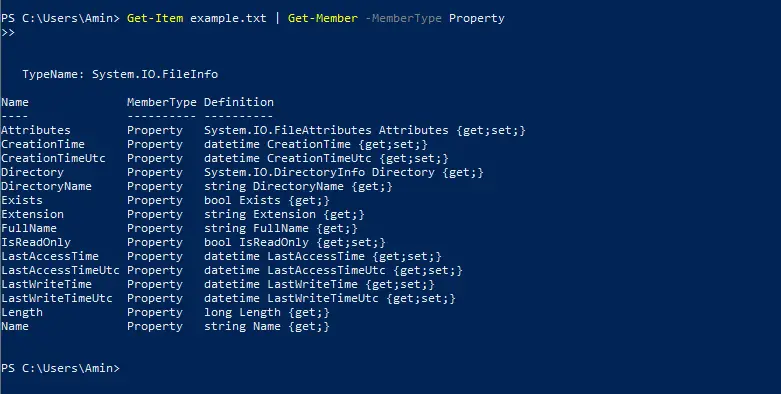
In the definition of each of the properties of your file object, there is the type of property that it returns, as well as whether it is read or read and write.
What is meant by read or read and write? There are certain properties that you can only have information about. For example, that a file exists. Exists is a read-only property.
However, the property IsReadOnly indicates if your file is read only and whether you can modify it. So if you run (Get-Item ./example.txt).IsReadOnly, it will return the value False, indicating that your file is not read-only. However, if you want to make it read-only, you simply have to run (Get-Item example.txt).IsReadOnly = 1, and now when you re-run (Get-Item example.txt).IsReadOnly it will return True.
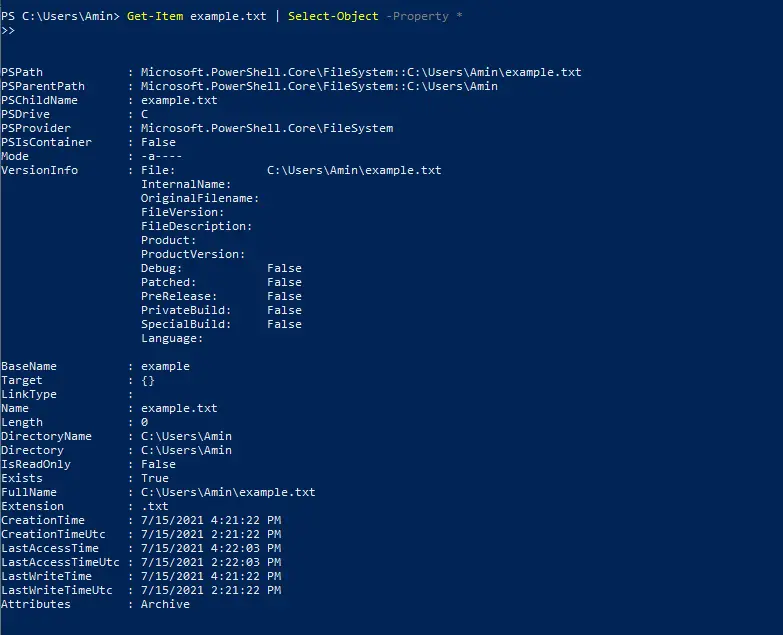
If you want to list all the properties of a certain file or directory, you can do it as I show you for the file example.txt,
Get-Item example.txt | Select-Object -Property *
Whose result will be similar to the one you can see below,
METHODS
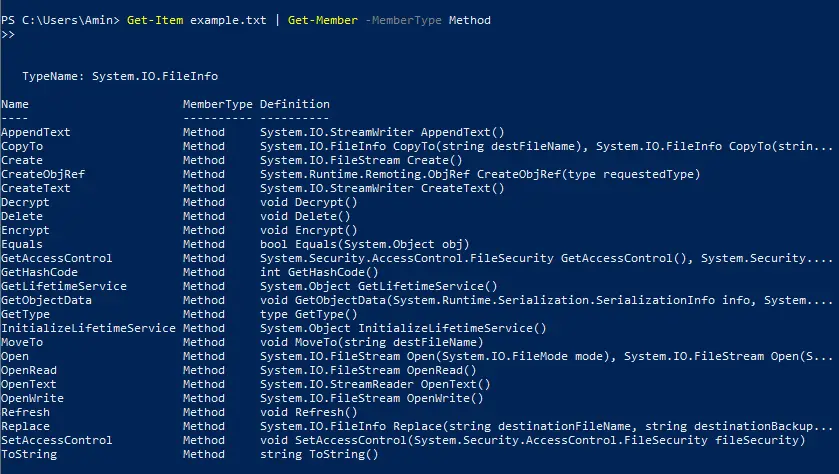
Now to see the methods that can be called against your file, run the following instruction :
Get-Item example.txt | Get-Member -MemberType Method
In addition to using the cmdlet Get-Help , remember that you always have the opportunity to press the tab button for AutoComplete . Autocomplete is your faithful helper .
Now you are ready to work with some of the methods that you saw earlier:
- (Get-Item example.txt).CopyTo(“example2.txt”)copy your first file created with PowerShell,, example.txt into your second file example.txt.
- (Get-Item example.txt).Delete() deletes the file example.txt.
- (Get-Item example.txt).GetHashCode() returns you the hash code of the file example.txt.
Another option to copy a file, instead of using the .CopyTo() file object method , is to use a cmdlet , in particular, it is to use Copy-Item as I show you in the following example:
Copy-To example2.txt example 3.txt
However, if you do it like this, it does not give you any information about the result achieved, as it happens with the method .CopyTo() . If you want to get information, you can run using the option-PassThru.
If you like the content, we would appreciate your support by buying us a coffee. Thank you so much for your visit and support.