You can host multiple websites on a single machine by utilizing Apache virtual hosts. These virtual hosts enable you to define the document root for each site, determining where the website files are stored and served in response to requests. For each domain, you have the option to implement a security policy and utilize SSL certificates.
The document root can be established in any preferred location. In this article, we’ll adopt the following directory structure on Ubuntu 18.04:
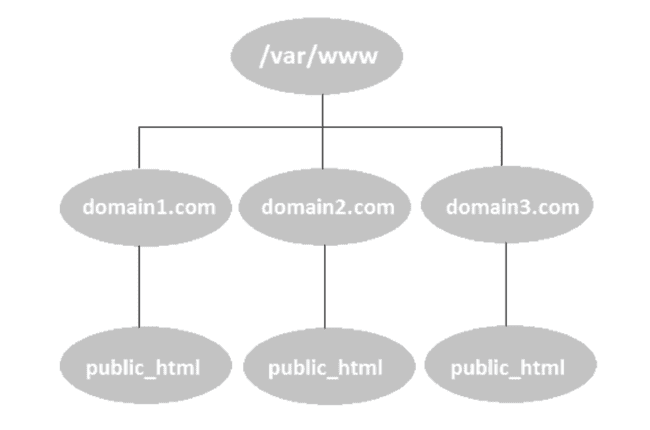
To host each domain on the server, a distinct folder will be generated within the /var/www directory.
Read: How to install Apache web server on Ubuntu 22.04
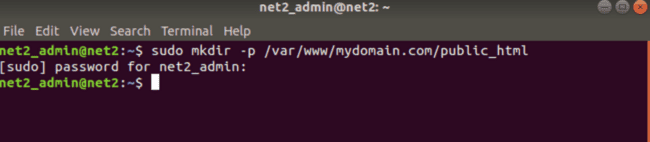
For storing the website files, a directory named public_html will be established under the /var/www folder. Execute the following command to create the mydomain.com directory (utilizing the -p argument to generate parent directories).:
sudo mkdir -p /var/www/mydomain.com/public_html
As depicted in the snapshots above, the commands were executed using the sudo user, resulting in the creation of new files and directories owned by the root user. To mitigate potential permission issues, ownership of the root directory can be altered using the following command:
sudo chown -R $USER:$USER /var/www/mydomain.com/public_html
To check that the permissions are correct, write :
sudo chown -R 755 /var/www/mydomain.com

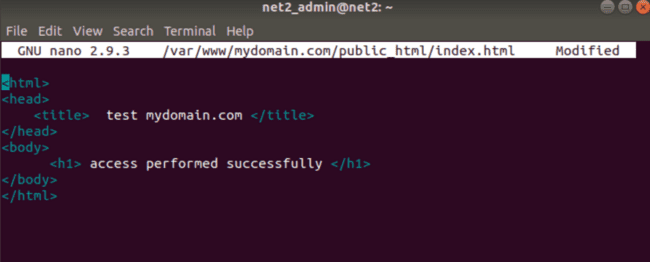
Now, generate an index.html file within the root directory to facilitate subsequent access and verify if Apache is effectively handling our domain name.
Read: How to uninstall Apache2 on Ubuntu 20.04
Execute the nano command or utilize your preferred text editor, following these steps:
nano /var/www/mydomain.com/public_html/index.html
Next, add the HTML code lines below:
<html>
<head>
<title> test mydomain.com </title>
</head>
<body>
<h1> access performed successfully </h1>
</body>
</html>
After completion, save the file and exit (in nano, utilize Ctrl+X, then press Y, and finally hit Enter).
Apache manages its virtual host configuration files in the /etc/apache2/sites-available directory. While Apache includes a default configuration file (000-default.conf), creating a new virtual host configuration file is necessary for the web server to handle distinct domain requests.
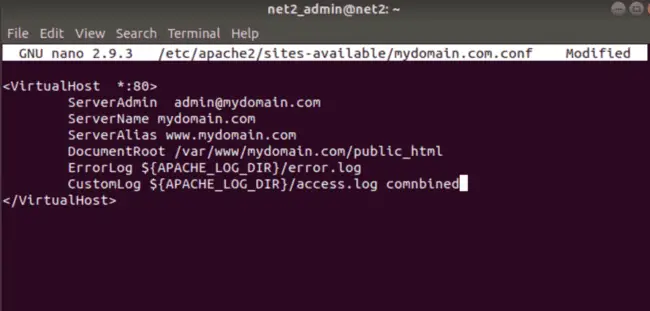
As earlier, employ nano or open your preferred editor to craft the following Virtual Host configuration file at: /etc/apache2/sites-available/mydomain.com.conf :
sudo nano /etc/apache2/sites-available/mydomain.com.conf
![]()
Read: How to Configure Network Settings in Ubuntu 22.04
Next, write the following lines in the file :
<VirtualHost *:80>
ServerAdmin admin@mydomain.com
ServerName mydomain.com
ServerAlias www.mydomain.com
DocumentRoot /var/www/mydomain.com/html
ErrorLog ${APACHE_LOG_DIR}/error.log
CustomLog ${APACHE_LOG_DIR}/access.log combined
</VirtualHost>
Read: Guide to Linux Config Files
Save and close upon completion. Here’s a simple breakdown of crucial fields:
1. `ServerName`: Assign your domain name, ensuring it matches this virtual host setup.
2. `ServerAlias`: Add extra domains corresponding to this virtual host, e.g., www.mydomain.com.
3. `DocumentRoot`: Apache serves domain files from the specified directory in this field.
4. `ErrorLog`, `CustomLog`: Indicate the locations of log files.
When naming the virtual host configuration file, it’s wise to use your domain name as a best practice. However, you have the flexibility to choose any name.
Now, establish a symbolic link between the virtual host file and the /sites-enabled directory, which Apache2 reads during startup. To enable the virtual host, utilize the a2ensite tool, as illustrated below:
sudo a2ensite mydomain.com.conf

Read: How to set up a firewall on Ubuntu 22.04
Deactivate the default site configuration file, 000-default.conf:
sudo a2dissite 000-default.conf

After completion, assess the configuration you established for potential syntax errors using the following command:
sudo apachectl configtest

Upon encountering the above common Ubuntu 18.04 version error, follow these steps to address the issue:
Execute the command below to solve it :
echo “ServerName mydomain.com | sudo tee /etc/apache2/conf-available/servername.conf

And then execute the command :
sudo a2enconf servername

Verify the syntax by rerunning the command to ensure everything is in order:

To implement the changes, restart the Apache server by issuing the following command :
sudo systemctl restart apache2

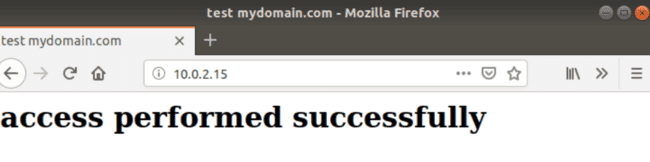
Your Apache server is now hosting your domain name. Verify that your index.html file, created earlier, is accessible by entering your IP Address into the browser:
Conclusion
In conclusion, setting up virtual hosts using Apache provides a powerful and flexible solution for hosting multiple websites on a single machine. By defining distinct document roots for each site, you can effectively manage where website files are stored and served in response to requests. This process allows for the implementation of security policies and the use of SSL certificates for each domain.
The recommended directory structure, as outlined in this article, ensures a systematic approach to organizing website files within the /var/www directory. The creation of individual folders for each domain, such as /var/www/mydomain.com/public_html, facilitates proper management.
To avoid potential permission issues, it’s crucial to adjust ownership using the appropriate commands. Verifying correct permissions is essential for seamless operation.
Crafting an index.html file within the root directory allows for easy testing and verification of Apache’s effective handling of the domain name. This step ensures that the server is correctly configured to respond to requests for the specified domain.
Managing virtual host configuration files in the /etc/apache2/sites-available directory is a key aspect of this setup. Creating a new configuration file for each virtual host is necessary, and the article provides a detailed guide on the essential fields to include. The symbolic link between the virtual host file and the /sites-enabled directory, along with the use of the a2ensite tool, enables the activation of the virtual host.
Furthermore, deactivating the default site configuration file and performing a syntax check with apachectl configtest ensure that the configuration is error-free. In case of encountering common errors on the Ubuntu 18.04 version, the article offers clear steps to address them.
By following these steps and restarting the Apache server, your domain name is successfully hosted. It is recommended to verify accessibility by entering your IP address into the browser, ensuring that the index.html file is correctly displayed. This comprehensive guide equips you with the necessary knowledge to efficiently set up virtual hosts on an Apache server for hosting multiple websites.
If you like the content, we would appreciate your support by buying us a coffee. Thank you so much for your visit and support.