In this article you will learn how to change or configure DNS in Windows 10. Usually when you visit domains like net2.com, your computer does not understand that address, but needs to
translate it to an IP address to which it can connect. DNS or Domain Name System are external servers that carry out this translation.
Your ISP or Internet provider usually gives you routers with pre configured DNS, but you can always use external DNS like Google’s to increase the response speed when searching for a page or add an extra layer of security to avoid, for example, DDoS attacks.
In addition to this you also have to take into account that when a government forces an operator to prevent access to certain pages, this blocking is done by limiting DNS access . Therefore, by changing the DNS you can also quickly skip this type of web page blocking.
Read: Windows tuning : Deactivating unnecessary services
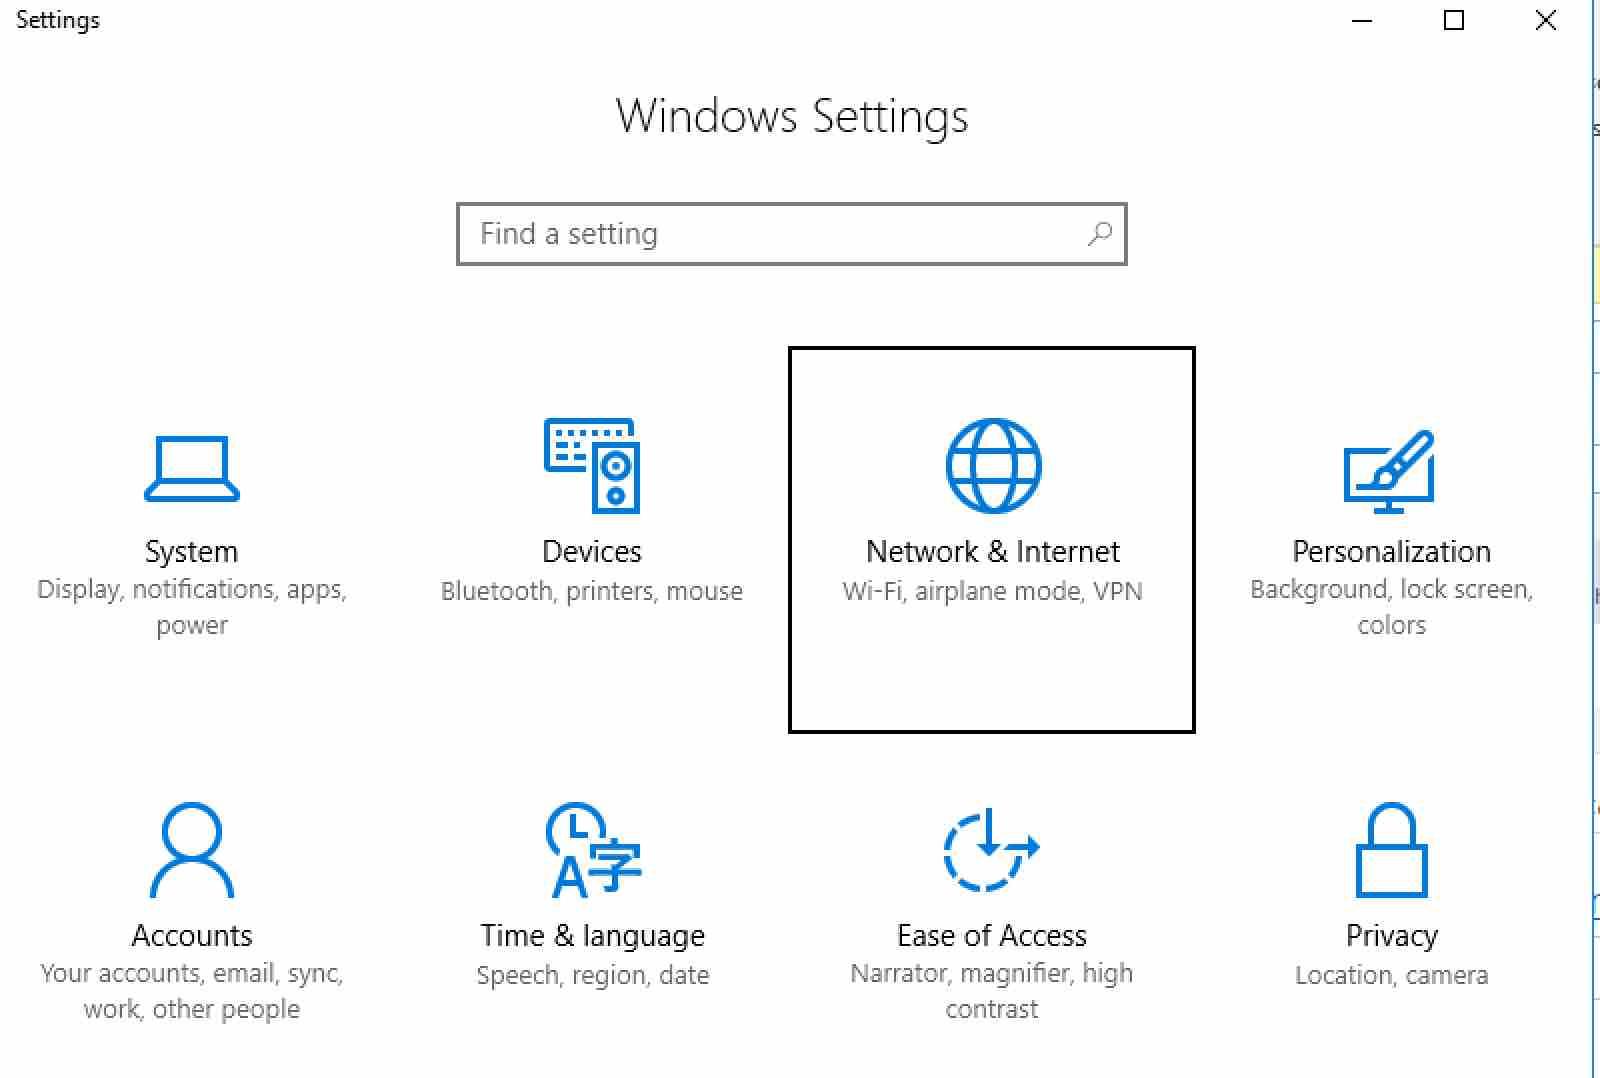
The first step is to enter Windows 10 settings by opening the start menu and click on the gear icon. Once inside you have to click on the Network and Internet option.
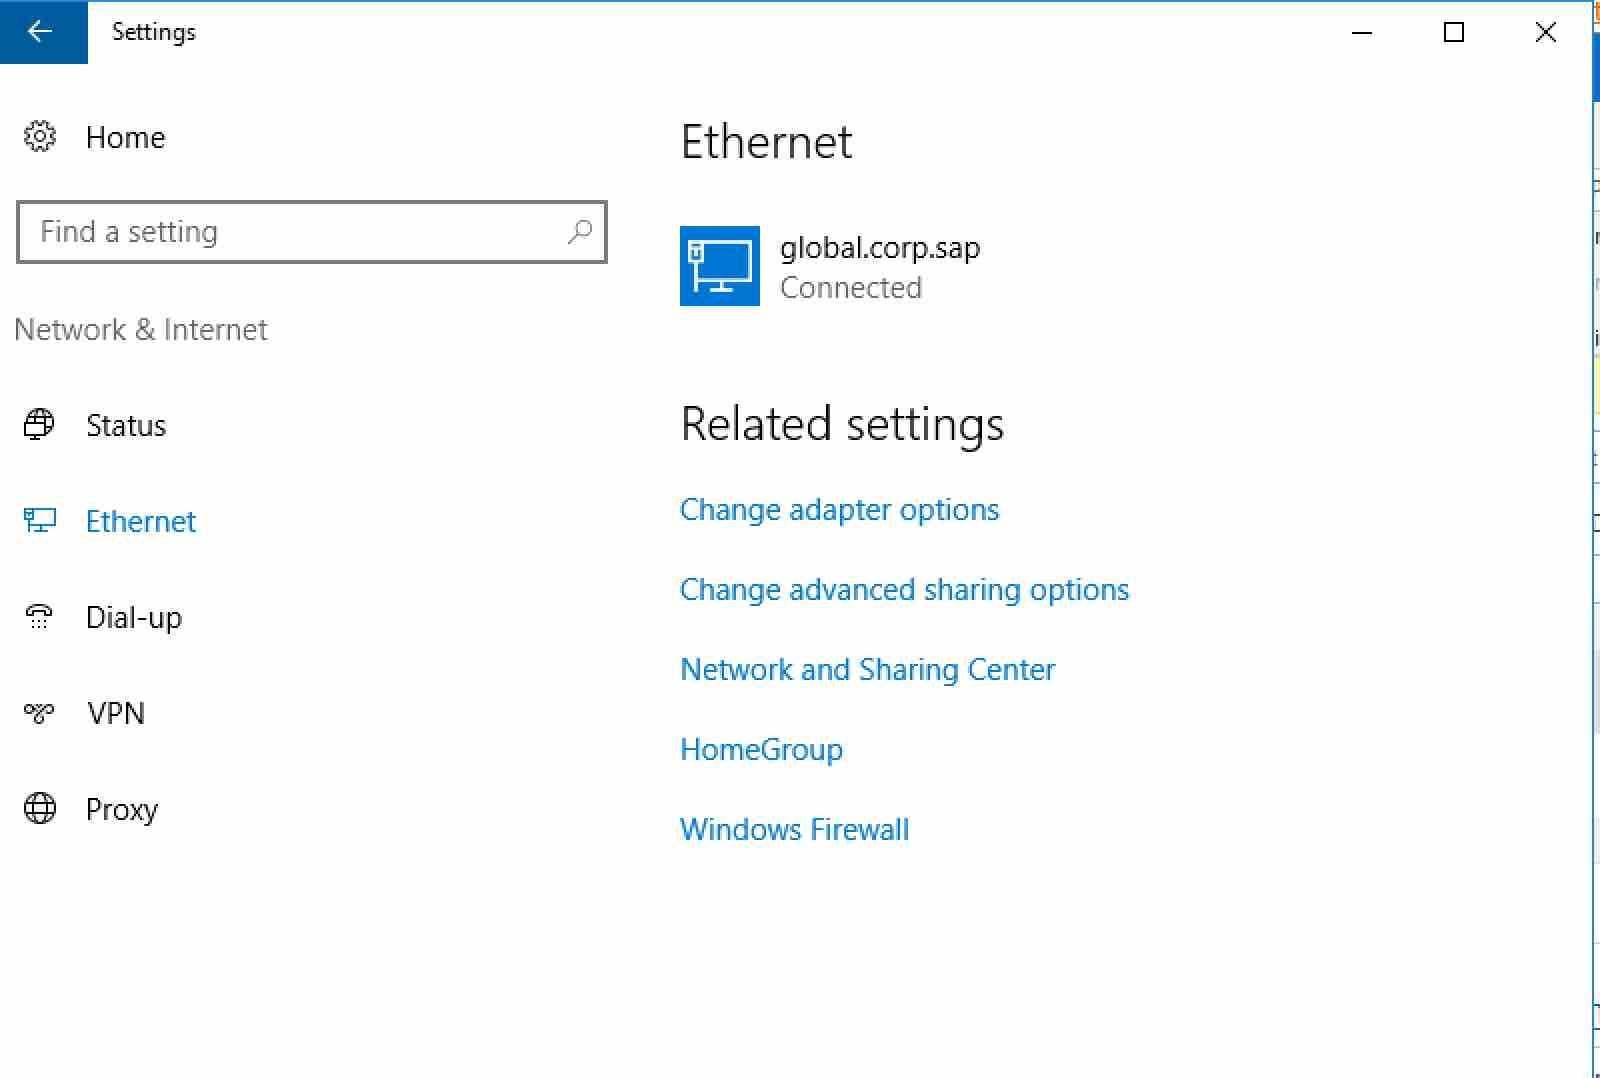
The next step depends on how your computer is connected. If you have it connected directly to the router like me you, will have to select the Ethernet menu item on the left, and if you use a wireless network, choose the Wi-Fi option instead.
Read: How to Fix Corrupt Registry in Windows 10 or 11
In either case, click on the Change adapter options link .
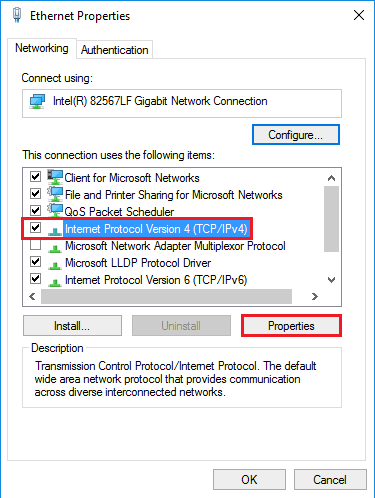
The Network Connections panel will open . Right-click on your Ethernet connection and select the Properties option.
Read: How to speed up your Windows computer
Now a new window will appear with a list of options. Go to the Internet Protocol version 4 (TCP / IPv4) but do not uncheck it, just make a single click on it and in the options that appear under the list, click on Properties . In the menu you have another option for IPv6, but it is a new technology that providers still do not use too much. In any case, if you had IPv6 you should also configure this section in addition to IPv4.
To find out if your connection uses IPv6 or if it still implements IPv4, you can enter pages such as testmyipv6.com where you will find out what technology you are using.
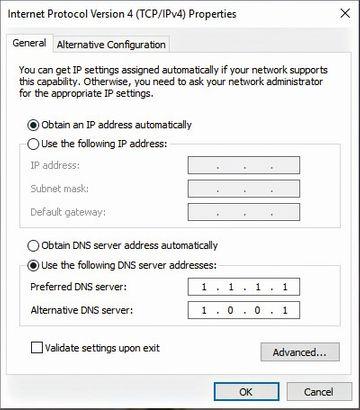
Once you enter the properties window, you would have to choose the option “Use the following DNS server addresses” and enter the DNS addresses you want to use , such as those of Google . Once this is done, click on OK and you will have successfully completed the operation (your windows 10 dns server is now configured). Otherwise you can also use OpenDNS.
Solving “server DNS address could not be found” error
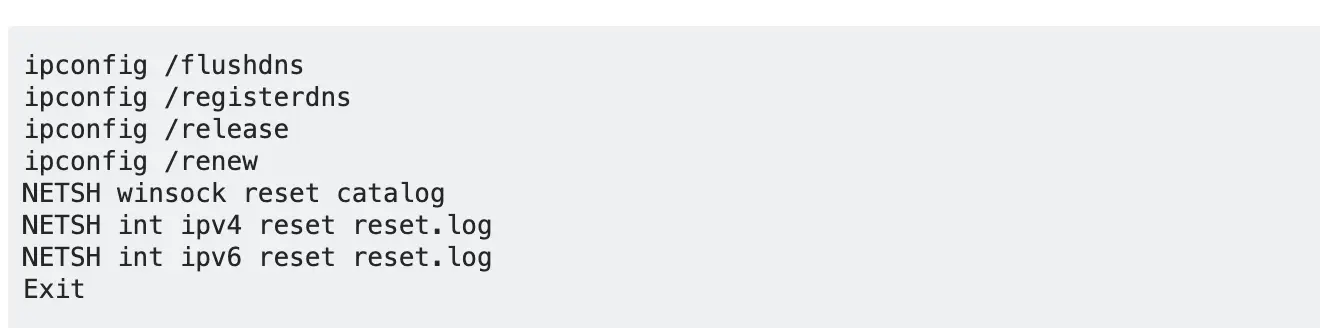
In case you get the error “server DNS address could not be found”, you would need to follow the steps of the last section. In case this persists, try to open the command prompt as an Administrator, and run the following commands:
For more information , you may want to visit the Windows 10 DNS forum.
If you like the content, we would appreciate your support by buying us a coffee. Thank you so much for your visit and support.