Currently, if you are a frequent computer user with an Internet connection, it is likely you have a lot of data stored. This is not only a bunch of personal documents or multimedia files but also data related to programssuch as cache or temporary files. Over time, operating systems would slowly accumulate unnecessary files that could saturate them. The good news is that modern operating systems incorporate tools and solutions for this problem and Ubuntu is no exception.
In this article post, you will learn some tips and tricks to help keep Ubuntu clean.
The importance of keeping Ubuntu Clean
Linux-based operating systems such as Ubuntu generally manage computer resources very well. However, often times, users who install many programs, will not uninstall them afterwards . This will decrease the memory space and will lead to a highly fragmented disk.
Under the above circumstances, the operating system may start to slow down. This becomes very noticeable if you do not have a high-performance computer. But even fast computers can undergo a performance drop over time.
Read: What you need to do to secure Ubuntu
1 Uninstall unused applications
As the operating system is used over time, new applications will be installed from time to time. Some of these installed programs would run as soon as the system boots up. This will lead to additional consumption of resources, i.e. the hard disk, the RAM and the processing power. It is therefore a good idea to examine the installed applications and remove them.
If you prefer to use the terminal, you can issue the following command:
sudo apt remove [package_name]
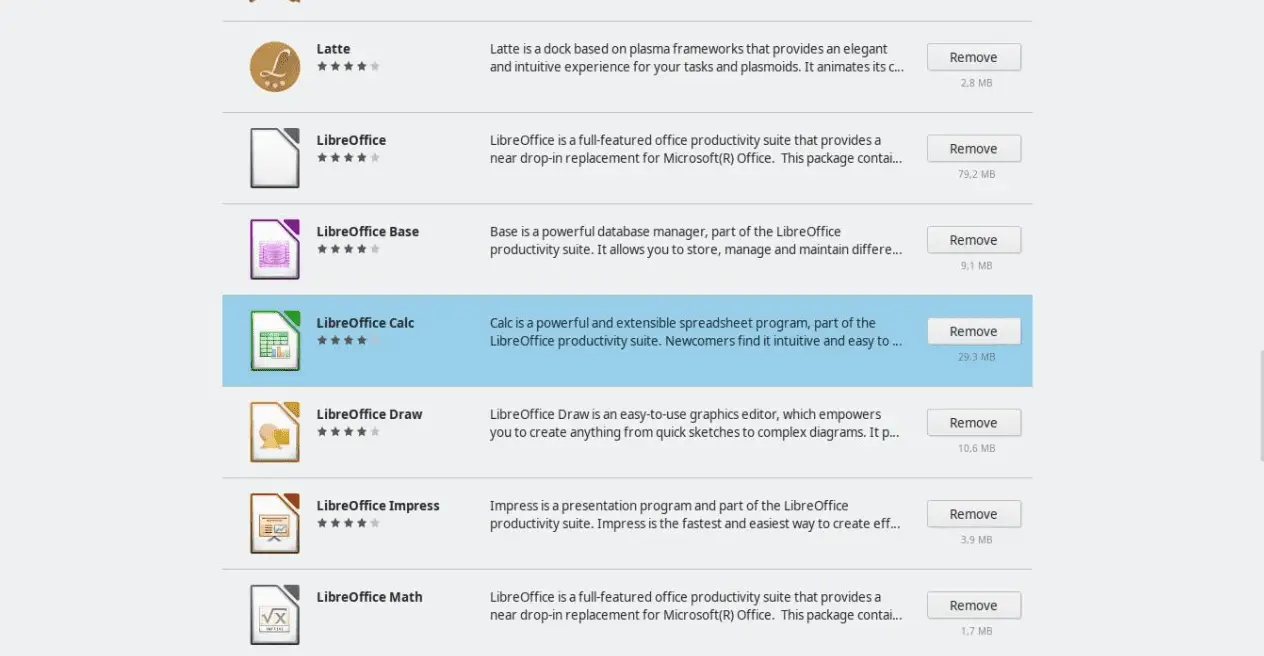
Please note that the package name is usually the same as the program name. On the other hand, it is also possible to do this using the Ubuntu software manager, in the Installed Programs section.
Read: How to free up buffers and cache on a Linux/Ubuntu system
2 Clean APT package manager files
APT is the package manager used by Ubuntu. Thanks to APT , you will be able to install, remove and search for packages. However, the main advantage of using APT is the dependency management of these packages. This makes it quite easy to install applications.
However, as APT installs programs, it would quickly fill up with files that are no longer needed. For example, its cache. When you install a package, first APT downloads it from a repository and then installs it. The package is not removed. Over time, this becomes a problem.
Type in the command below in order to know how much cache is on your system:
APT can also remove dependencies not used by any program. To do this, issue the command below :
sudo apt autoremove
This way you can save a lot of space and help keep Ubuntu clean.
Read: How to clean a log file in Linux/Ubuntu
3 Clear system thumbnail cache
Operating systems store a thumbnail preview whereby operations and multimedia loading are performed more quickly. However, over time, this grows a lot in size which may lose you a valuable space. It’s a good practice to remove this from time to time.
In order to do so, open a terminal and run:
sudo rm -rf ~/.cache/thumbnails/*
If you want to consult the space they occupy, run the command du:
du -sh ~/.cache/thumbnails
4 Deep cleaning with Stacer or Bleachbit
As we have seen, Ubuntu has specific commands to clean the system. Here you will learn a quick and efficient way to do it. This may make newer users uncomfortable however.
Stacer and Bleachbit have been created to make cleaning easier. You will be able to eliminate unnecessary files with a nice graphical interface.
First, we have Stacer that not only allows to do a cleaning of the system but will also monitors the resources of the computer.
In addition, you will be able to configure the services that are executed in the system.
On the other hand, there is Bleachbit which is a ‘veteran’ in this field. Bleachbit will clean all your system with very few clicks. This includes APT and temporary files as well as large files.
Read: 4 Ways to Find Large Files on Linux and Free Up Disk Space
It has a more rustic graphical interface but with very specific functions.
Read: How to recover deleted files on linux: an Exhaustive list of tools
5 Remove old Kernels
Keeping Ubuntu updated is a great way to increase its stability thanks to the numerous security patches that are installed. Many of these patches go directly to the Kernel leading to a new kernel version. Over time, several versions accumulate which would take up valuable space.
To remove these old kernels, first query the installed kernels with the following command:
sudo dpkg –list ‘linux-image*’
Then remove the kernel with the following command:
sudo apt-get remove linux-image-[version]
For example:
sudo apt remove linux-image-4.15.0-20-generic
And repeat the process with every old kernel you may have. Remember to be careful because you can remove the current kernel . Removing old kernels is a great way to keep Ubuntu clean.
6 Synaptic Package Manager
Based on APT, Synaptic Package Manager is a graphical tool that manages packages. It lets you update, install, remove packages and even fix broken package dependencies via a friendly user interface. It serves as a graphical interface to APT making software management much easier. It is suitable for users who are not familiar with the command-line.
Read: How to use the APT command on Ubuntu/Debian Linux systems
In order to install Synaptic Package manager in Ubuntu,
use the following command :
sudo apt-get install synaptic
Once the installation is finished, start the program. You should see the screen below :
Now mark the checkbox beside the package and choose “Mark for complete removal.” Click on Apply :
7 Clean up Grub menu
When you boot up your machine and in order not to see many entries in your grub menu, you can proceed as follow :
Open up Synaptic and look up the word “linux-headers” having the “Installed” status. Those that are not on the latest version can be removed.
Read: How to install and uninstall applications on Ubuntu
Next issue the command:
sudo update-grub
8 Use FSLINT to remove duplicate files
One same file may have different copies lying around in your system. This might lead to increased disk fragmentation which might worsen the system performance over time.
FSlint is a graphical utility tool that removes duplicate files.
Open up the terminal and issue the following command :
sudo apt install FSlint
Now from Applications list , launch the “FSlint Janitor” .
Insert the file path you are looking for. Next click on the “Duplicate” tab and then click on “Find” under the menu.
FLINT not only removes duplicate files but also temp files, empty directories as well as files with incorrect names.
Read: Five best open source Backup utilities for Linux
9 Garbage collecting Orphan packages
When you uninstall an application, packages can become orphaned. In order to remove these orphaned files, you can use “gtkorphan” which is a graphical interface for “deborphan”.
Once this completes, execute the command sudo gtkorphan opening therefore the installed application GtkOrphan .
It has the task of analyzing the system in order to display all of the orphaned packages. Identify those packages and uninstall them.
10 Finding already installed applications
Sometimes you might forget the applications that you have installed. Debfoster utility will help you keep track of the essential packages and removes the unwanted ones.
Invoke the following command in the terminal in order to install Debfoster:
sudo apt install debfoster
Next issue the commands below :
sudo debfoster -q
sudo debfoster -f
Which have the role of Creating the initial keeper file and Forcing the system to conform to it.
If you do not want Debfoster to uninstall specific packages, you can edit the keeper file ( you can find here ” /var/lib/debfoster/keepers”) and delete those packages from the entries list.
Read: Must-do Things After Installing Ubuntu 18.04
11 FDUPES to identify and remove duplicate files
Much like the fslint application, FDUPES is rather a command line utility which removes duplicate files. It can display the duplicate files in a specific folder or within a folder.
In order to install FDUPES, issue the command below :
sudo apt install fdupes
Now you can you can start to search for duplicate files using the command :
fdupes yourfolder_path
In order however to search within a folder, issue the command below :
fdupes -r your_folder
It can display the duplicate files in a specific folder or within a folder.
In order to manually delete the duplicate files, you should add the option below :
fdupes -d yourfolder_path
This will give you the choice to whether you would want to delete the files one at a time or select a range to remove it. If however you want to get rid of all the files without any prompt while preserving the first one, just use the noprompt -N option
12 systemd journal cleanup
The journal of systemd, takes a lot of space if not maintained properly from time to time. In order to know the current usage of the journal, issue the command below :
journalctl –disk-usage
This will return the total size taken up by the journal. In order to carry out some cleaning up and remove older entries in case these are no longer needed, run the command below :
sudo journalctl –vacuum-size=100M
This will remove old entries until the size reaches 100M.
Read: How to analyze Linux systemd logs using journalctl advanced filtering options
Another method would enable you to keep the entries from a specified time period. For instance the command below will keep the entries from the last year :
sudo journalctl –vacuum-time=1years
Conclusion
To guarantee the correct use and operation of the operating system, it is convenient to have it updated and cleaned from time to time. In this post, you have learned some tips on how to keep Ubuntu clean. This can be done via simple commands but also via applications that can perform these tasks quickly and easily such as Stacer.
If you like the content, we would appreciate your support by buying us a coffee. Thank you so much for your visit and support.