We are going to explain the basic operation of Windows File Recovery , Microsoft’s free tool to recover deleted files in Windows 10. There are different methods to recover your deleted files or your photos in Windows, although they usually involve installing third-party paid software.
Windows File Recovery works from the command line and recovers files from local disks, flash drives, memory cards and cameras, and can also be useful in case of corrupted or formatted disks. The tool has two modes: the standard mode, which works with NTFS file systems, and the signature mode, which also works with FAT, exFAT and ReFS.
To ensure that you will be able to recover the lost files, it is best to use Windows File Recovery as soon as possible after erasing or formatting the disc, before other files are written over the deleted one. You can also use it to recover all files with MP3, MP4, JPEG, PDF extensions, as well as Word, PowerPoint and Excel documents, among others.
Windows File Recovery is now available on the Microsoft Store and, according to system requirements, is only compatible with versions starting with the latest Windows 10 update, build 19041.0.
Read: 18 Best Backup and Disaster Recovery Solutions
How to use Windows File Recovery
The first thing you have to do is get Windows File Recovery from the Windows 10 app store .
After you download it, open the start menu and find the name of the application. Click on Windows File Recovery to launch it . The application will ask you for administrator permission in a pop-up window.
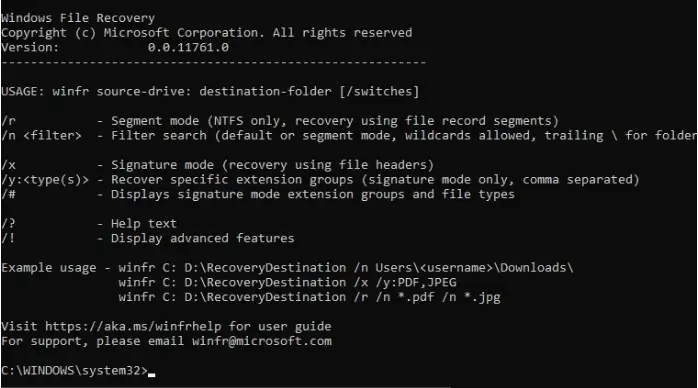
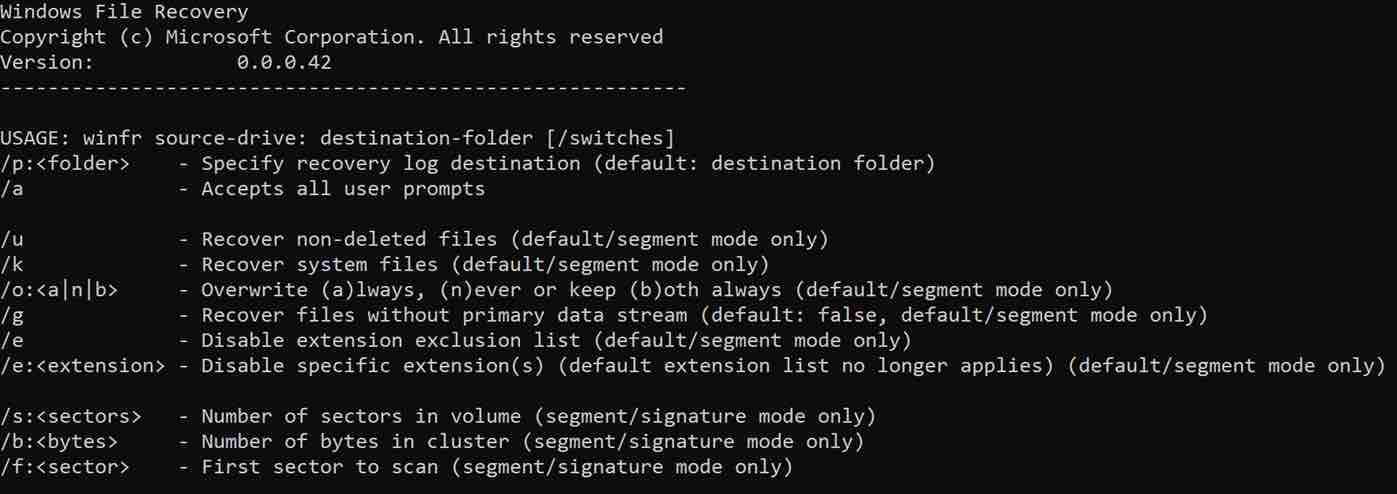
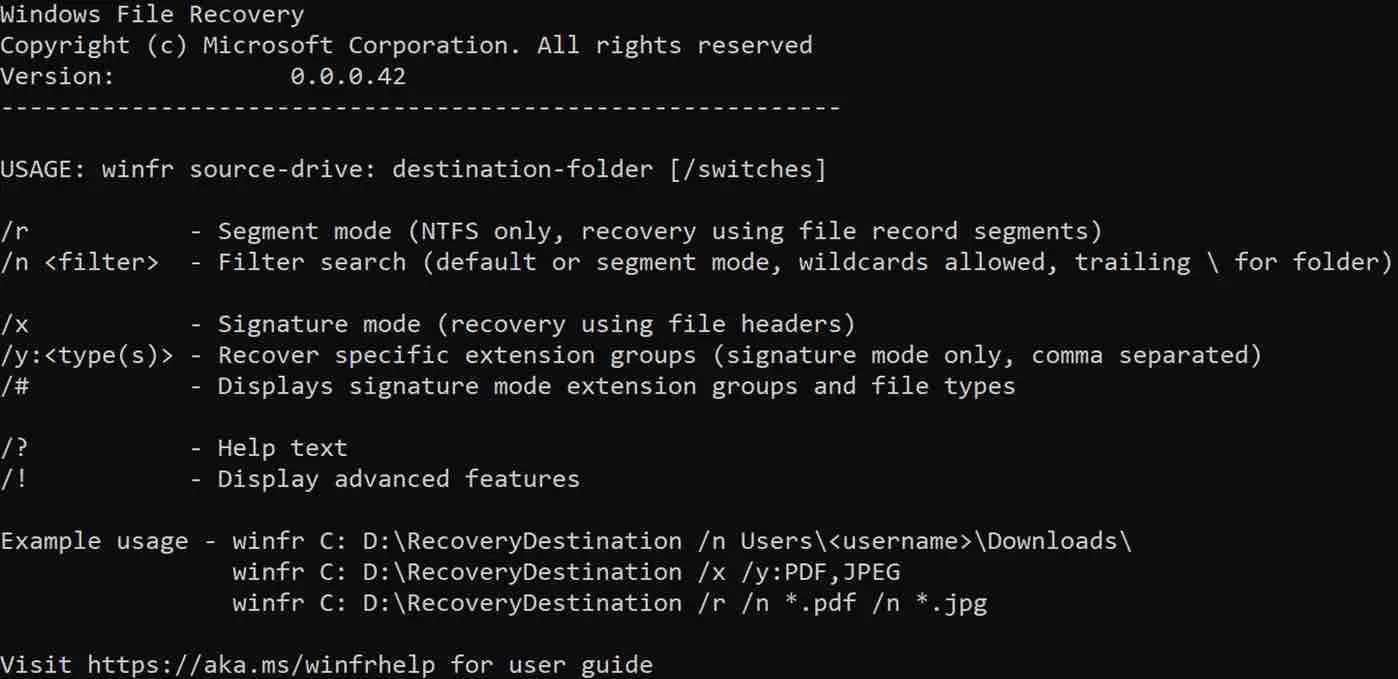
Windows File Recovery will open directly on the Windows Command Prompt console.
Read: How to recover deleted files on linux, an Exhaustive list of tools
Now type in the command below :
winfr source-drive: destination-drive: [/switches]
Here, you will have to choose the drive from which you want to recover the files, the drive to which you want to send them and complete with a specific switch that tells the tool what to do.
In the snapshot below, you can find the role of each ‘switch’ option :
As an example, we will recover JPG image files, which have been deleted from the “C:” drive, and save them in the “Recovered” folder, which is on the “D:” drive. The command would look like the following :
winfr C: D:\ Recovered / Y: jpg.
After the process is finished, enter the created folder that will contain recovered files .i.e. “Recovered”, in the “D:” drive. There, you should find everything the app has managed to restore.
Read: How to backup and restore your Android device with ADB on Ubuntu
For more advanced restores, read the Windows File Recovery user guide by clicking here.
If you like the content, we would appreciate your support by buying us a coffee. Thank you so much for your visit and support.