In today’s fast-paced digital world, keeping your system safe is crucial. One of the best defenses you can have is a firewall. Think of a firewall as a security guard for your computer network. It stands watch, preventing unauthorized people from getting in or out of your private network. This helps protect your system from all sorts of online dangers.
This guide will walk you through setting up the firewall on Ubuntu 22.04. Whether you’re a tech expert or just starting out, this easy-to-follow guide will give you the steps and understanding you need to secure your system effectively.
By reading this article, you’ll learn not just how to turn on your firewall, but also how to allow specific safe connections, like SSH, while blocking those you don’t need. This way, you get the best of both worlds: your system works well and stays secure.
So, let’s get started and make your Ubuntu 22.04 system stronger by setting up a solid firewall.
Read: Litespeed or Apache: Which One is Best for WordPress
1 – Installing and Turning On UFW, Ubuntu’s Default Firewall
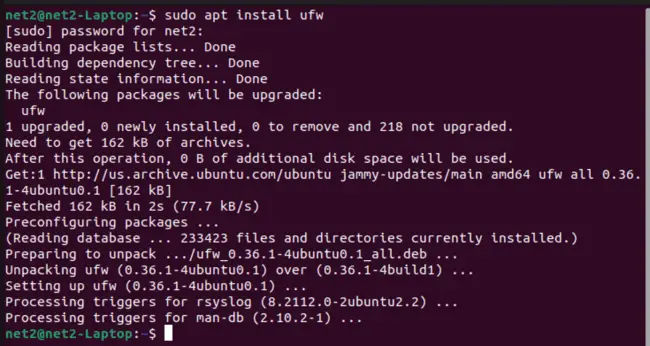
Uncomplicated Firewall (UFW) usually comes already installed on Ubuntu. But if it’s not there, you can easily install it using this command:
sudo apt install ufw
Read: How to use NFS to Share remote files with Ubuntu 20.04
Check Ubuntu firewall status command: Once installed, you can check if UFW is working and its current settings by using this command:
sudo ufw status verbose

Enable firewall in ubuntu : UFW on Ubuntu is off by default. To turn it on, use this simple command:
sudo ufw enable

Read: Virtual host configuration in Apache
Now, your Ubuntu firewall is active and protecting your system:

Ubuntu disable firewall command : If you want to stop UFW from running when your system starts up, use this command to disable it:
sudo ufw disable

If you need to undo all the changes you’ve made to the firewall rules and turn off UFW completely, removing all active rules, you can reset UFW with this command:
sudo ufw reset
Default Rules: UFW allow and deny commands
When you first set up UFW, it comes with some basic rules called default policies. These are designed for typical home users. Basically, it blocks all connections coming into your system but allows all connections going out. This simple setup stops people from getting into your files without permission, while still letting your server services connect to the internet.
You can change these default rules, which are stored in the file `/etc/default/ufw`. To set UFW to block all incoming connections and allow all outgoing connections, use these commands:
sudo ufw default deny incoming

sudo ufw default allow outgoing

Read: How to Secure Your Linux System with 10 Proven Firewalls
2 – Application Profiles
When you install new software using Ubuntu’s software manager (APT), and if that software needs open firewall ports, it will create an application profile. These profiles are stored in `/etc/ufw/applications.d` folder. Each profile lists the ports that the application needs to work correctly.
To see a list of applications that have created these profiles, use this command:
sudo ufw app list

The list you see might be different depending on what software you have installed. If you want to know more about a specific application profile and its rules, you can use the command below, replacing ‘CUPS’ with the application name from the list:
sudo ufw app info ‘CUPS’
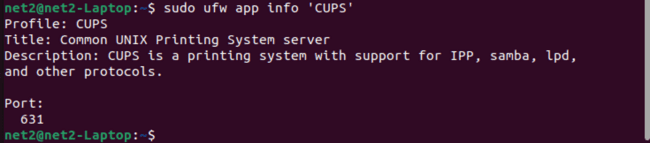
In this example, we used ‘CUPS’, but you should replace it with an application from the list you got in the previous step.
Read : How to Install and Secure OpenSSH on Ubuntu 24.04: Complete Step-by-Step Guide
3 – Setting Up SSH Connections – Ubuntu firewall settings
When you turned on UFW, it blocked all incoming connections. This means you won’t be able to connect to your server remotely right now. So, we need to create rules that allow incoming connections for services like SSH or HTTP. This will let your server respond to requests and let you manage it from afar.
To change your UFW firewall settings to allow incoming SSH connections, use the following command. This UFW allow ssh command will update the firewall rules:
sudo ufw allow ssh

UFW can allow or block services by name because it uses a list of services and their ports from `/etc/services`. To see this list, use this command:
less /etc/services
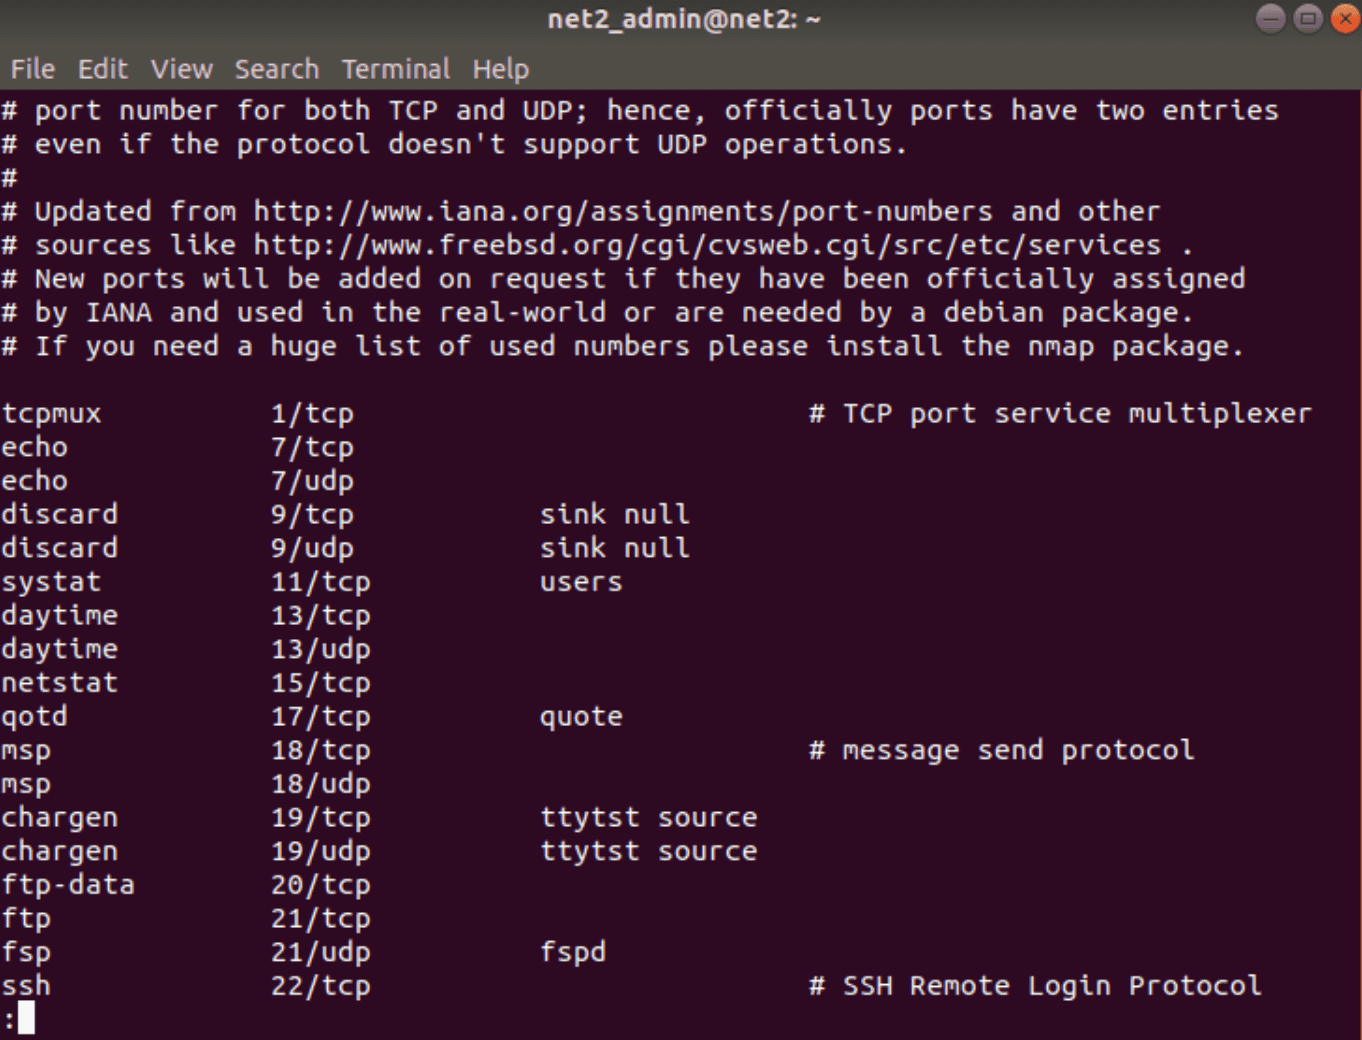
As you can see in the output, SSH service (ssh) usually uses port 22. So, when you enable SSH using the command above, it creates rules that allow connections on port 22.
Read: How to use systemd to troubleshoot Linux problems
Interestingly, instead of using the service name “ssh”, you could also just specify the port number directly, like this: `sudo ufw allow 22`. Both commands do the same thing in this case.
If you’ve changed your SSH server to use a different port, you’ll need to allow that specific port instead. For example, if your SSH server is listening on port 29, you can allow connections on port 29 with this command:
sudo ufw allow 29
Note: If you want to block a specific connection instead of allowing it, you can use the `deny` command.
UFW deny rule :
sudo ufw deny 80/tcp
UFW remove rule: If you want to delete a rule you previously added, use the `delete` command like this:
sudo ufw delete deny 80/tcp
Read : Network configuration in Ubuntu
4 – Enabling IPv6 with UFW
If your Ubuntu server is set up to use IPv6, you should make sure UFW also supports IPv6. This lets UFW protect your system for both IPv4 and IPv6 connections. To enable IPv6 support in UFW, you need to edit its configuration file. Here’s how using the nano text editor:
sudo nano /etc/default/ufw
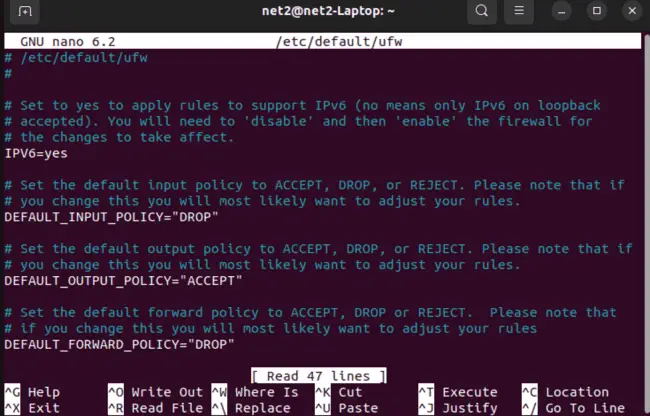
Inside the file, find the line that says “IPV6”. Make sure the value is set to “yes” like this: `IPV6=yes`.
If you made any changes, save the file and exit: press Ctrl+X, then press Y to save, and then Enter.
UFW restart procedure: To apply these changes, you need to restart UFW. First, disable it and then enable it again using these commands:
sudo ufw disable
sudo ufw enable
After restarting, UFW will now be able to manage firewall rules for both IPv4 and IPv6 connections.
Read: 30 Essential Steps to Secure and Harden Ubuntu 24.04
5 – Managing Other Connections and Ports
Now you know how to create rules to allow connections based on service names or port numbers. Depending on what your server does, you might need to allow other specific connections for it to work correctly.
Here are some examples for common services:
To allow regular website connections (HTTP) on port 80, use:
sudo ufw allow http
or
sudo ufw allow 80/tcp
To allow secure website connections (HTTPS) on port 443, use:
sudo ufw allow https
or
sudo ufw allow 443
To allow File Transfer Protocol (FTP) for file sharing on port 21, use:
sudo ufw allow ftp
or
sudo ufw allow 21/tcp
Read: Linux Firewall: The Complete Guide to IPtables, NAT, ip6tables and Network Security
Port Ranges
UFW can also allow connections to a range of ports, not just single ports. When you do this, you need to specify the network protocol (TCP or UDP) that the rule applies to. For example, to allow ports 6600 to 6610 for both TCP and UDP protocols, use these commands:
sudo ufw allow 6600:6610/tcp
sudo ufw allow 6600:6610/udp
Specific IP Addresses
UFW lets you create rules for specific IP addresses too. For example, to allow connections from a specific IP address, like `10.2.3.07`, use this command:
sudo ufw allow from 10.2.3.07
To allow a specific IP address to connect to a specific port, add the port number after the IP address. For example, to allow the IP address `10.2.9.18` to connect to port 22 (SSH), use:
sudo ufw allow from 10.2.9.18 to any port 22
Read: How to display Graphics card information on Ubuntu 22.04
Subnets
You can also allow a range of IP addresses, called a subnet. For example, to allow all IP addresses from `10.2.9.0` to `10.2.9.255` (using a subnet mask of `255.255.255.0`, written as `/24` in CIDR format), use:
sudo ufw allow from 10.2.9.1/24
Similarly, you can allow a subnet to connect to a specific port. For example, to allow the subnet `10.2.9.1/24` to connect to port 80 (HTTP), use:
sudo ufw allow from 10.2.9.1/24 to any port 80
Specific Network Interface
To allow access only through a specific network interface (like `eth1`) for a certain port (like `3333`), use ‘allow in on’ followed by the interface name and the port number. For example:
sudo ufw allow in on eth2 to any port 3333
To find out the names of your network interfaces, you can use this command beforehand:
ip a
If you want your Ubuntu MongoDB server (which uses port 27017) to only accept connections from your private network interface `eth1`, you can use this command:
sudo ufw allow in on eth1 to any port 27017
Blocking connections
For security reasons, UFW is set to block all incoming connections by default. You need to create specific rules to allow the incoming connections you need.
If your server is getting unwanted connection attempts from a particular IP address or subnet, you can block them.
To block connections, just replace ‘allow’ with ‘deny’ in the commands we’ve used so far.
Read: Configuring static and dynamic IP Addresses in Ubuntu using Netplan
Deleting Rules
You can delete firewall rules either by using their rule number or by specifying the rule itself.
A – Deleting Rules by Number
First, get a list of your firewall rules with rule numbers shown next to each rule by using this command:
sudo ufw status numbered
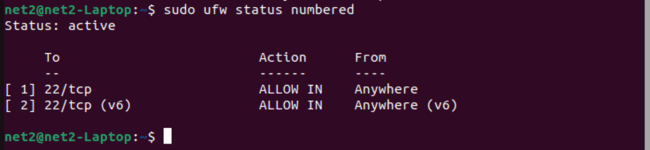
For example, if you want to delete rule number 2 (which allows connections to port 22), run this command:
sudo ufw delete 2
Read: GUFW and UFW Ubuntu 20.10 Firewall Configuration Guide
B – Rule-Based Deletion
To delete a rule by specifying the rule itself, for example, the rule that allows SSH connections, follow these steps:
Run this command:
sudo ufw delete allow ssh
Alternatively, instead of using the service name “ssh”, you can delete the rule by specifying the port number. To delete the rule allowing port 22, use:
sudo ufw delete allow 22
6 – Graphical User Interface for UFW
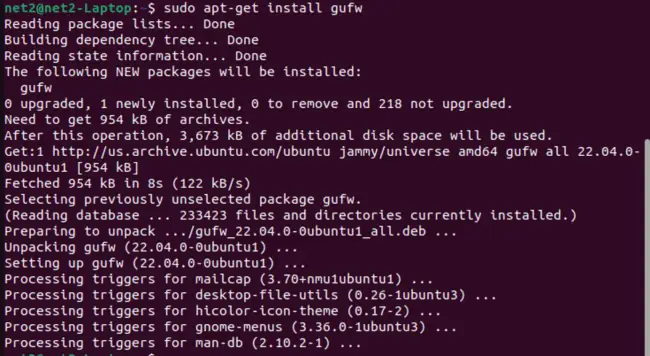
UFW also has a graphical interface (GUI) that you can install on Ubuntu. It’s available in Ubuntu’s software center. You can install it by running this command:
sudo apt-get install gufw
Ubuntu firewall configuration: To open the GUI for UFW, called GUFW, just type `gufw` in the terminal and press Enter. Or, you can find it in your applications menu by searching for ‘Firewall Configuration’. GUFW is designed to be simple, easy to use, and straightforward to navigate.
Read: Linux directories explained
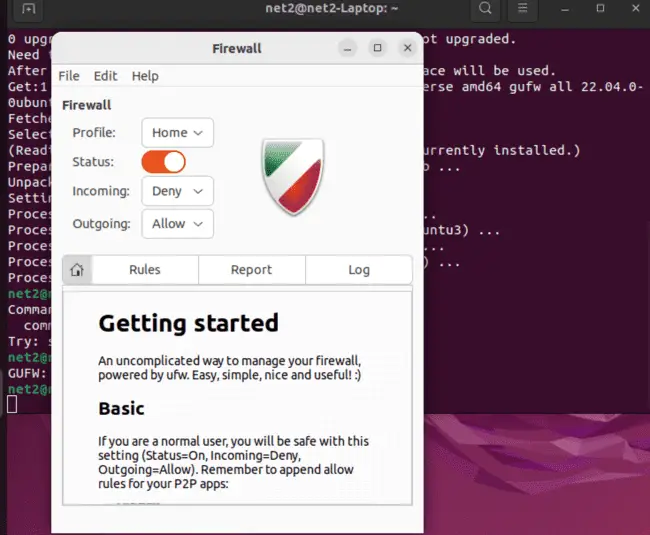
GUFW makes it easy to manage connections, including ports and IP addresses. You can control the default settings for incoming and outgoing traffic and easily add new rules.
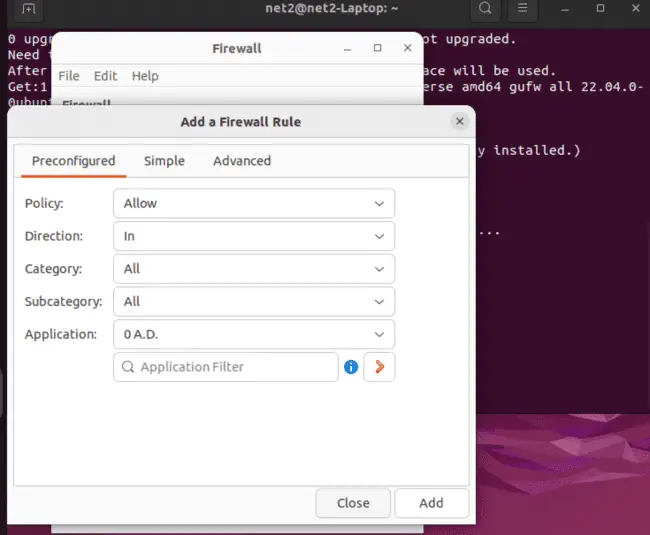
All of these tasks are simple to do within the GUFW interface.
Conclusion
In this detailed guide, we’ve gone through everything you need to know about setting up UFW (Uncomplicated Firewall) on your Ubuntu system. We started with installing and activating UFW and then covered essential commands and best practices to boost your system’s security.
We looked at default rules and how UFW smartly blocks incoming connections while allowing outgoing ones, which is the foundation of a strong firewall setup.
Application profiles are very useful for managing software and their needed ports, giving you a clear picture of your system’s network needs.
Allowing SSH connections and managing specific ports and services ensures you can still remotely manage your server, even with UFW’s strict default settings.
For those using IPv6, we showed you how to enable IPv6 support in UFW, making sure your firewall protection is complete.
Our guide explained how to create rules for different types of connections and ports, whether it’s allowing specific services, setting port ranges, specifying IP addresses, or handling complex network setups.
We also introduced GUFW, the user-friendly graphical interface for UFW, which simplifies managing your firewall rules.
Finally, we touched on UFW’s logging features, showing you how to turn on logs and understand what they mean to improve your system monitoring and security.
By learning how to use UFW, you now have the skills to protect your Ubuntu server, letting you customize your firewall rules to fit your specific security needs while keeping your network communication smooth. Remember, a well-set-up UFW is your first line of defense against unwanted intrusions and a key part of keeping your digital information safe.
For more in-depth information, you can check out UFW’s manual page by running the command `man ufw`.
If you like the content, we would appreciate your support by buying us a coffee. Thank you so much for your visit and support.