MariaDB clients are specialized tools applied by database users to connect to their MariaDB servers, create and manage databases, and manipulate data contained within. And if we narrow things down to command-line clients, we’ll get tools
that allows performing all of these operations from the command line.
The default command-line client for MariaDB is provided by the developer, and there are various third-party alternatives to take note of.
The current version of the MariaDB command line client is available for Windows and Linux.
Read: Best open source database software
Download and install the MariaDB command-line client
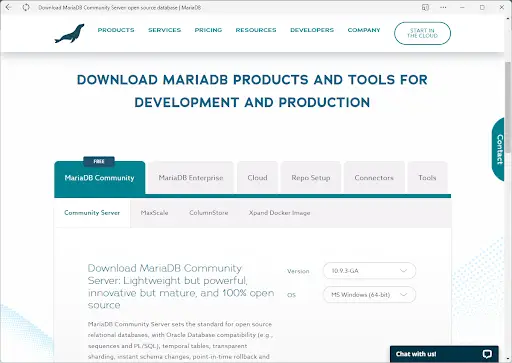
To get the command-line client for MariaDB on Windows, go to the Downloads page (http://mariadb.com/downloads/community/community-server/). The client is a part of the entire package, it does not offer a separate installation. It means you have to download the package at the first step.
Choose the MariaDB Community edition, and specify the OS (in our case, it is Windows) and the version:
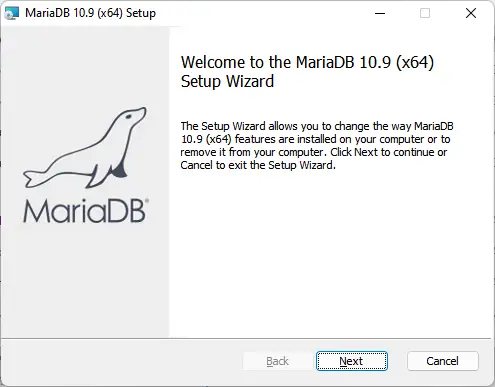
Execute the downloaded package, and after the welcome screen, the Setup Wizard appears:
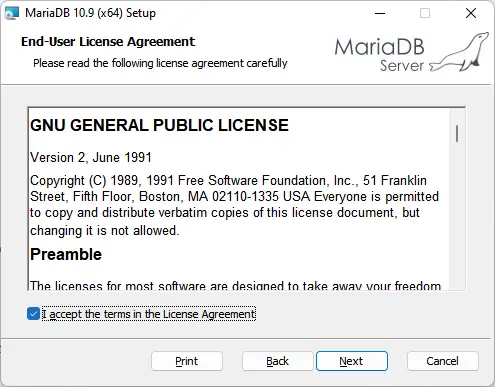
Accept the License Agreement terms and click Next:
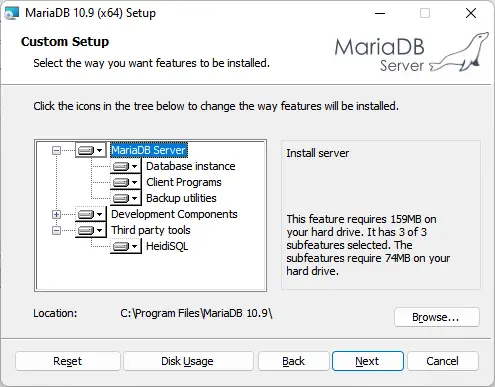
The next screen offers to choose the components to install. Our scenario suggests that all the components except for the MariaDB client program are already installed. Thus, we need to specify the only component we want.
Read: 7 Tips to create a database for beginners
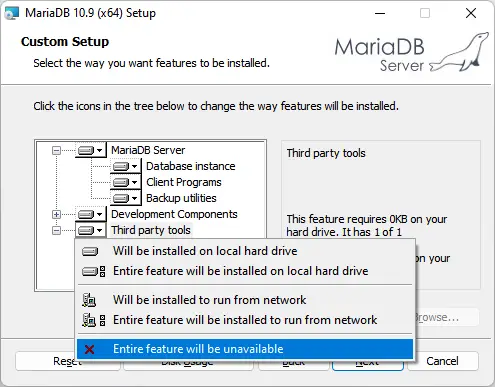
Right-click on the item you don’t need and choose Entire feature will be unavailable:
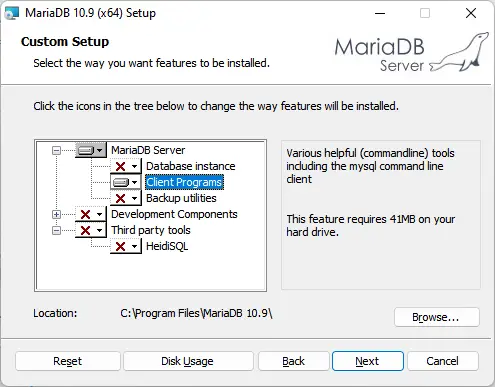
Repeat this for all unnecessary features. After that, you should have the following screen with the Client Programs section allowed for installation only. Click Next:
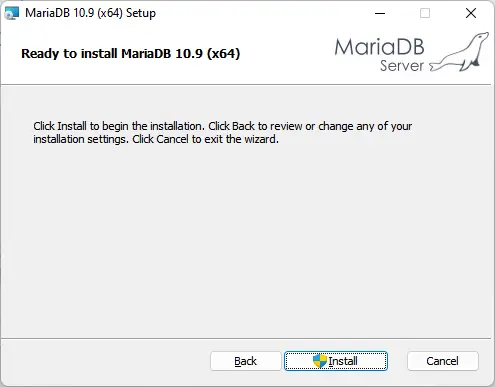
Click Install to start the process of installing the MariaDB client utility:
Read: How to Create and Manipulate SQL Database with Python
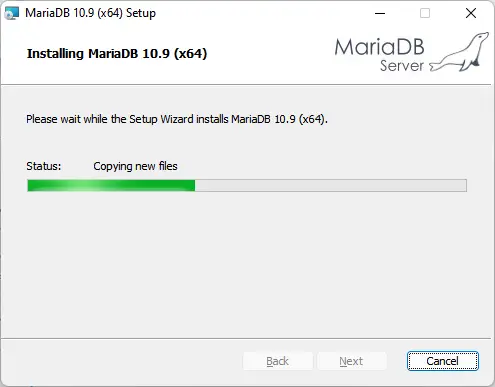
The process starts:
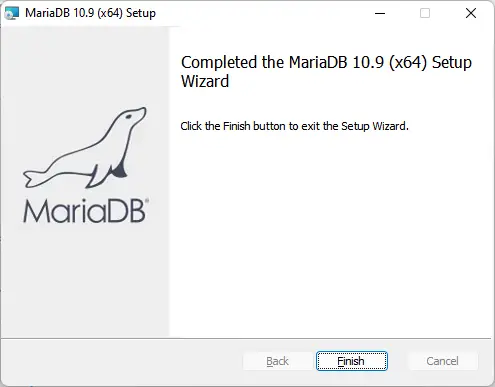
When the installation is complete, click Finish:
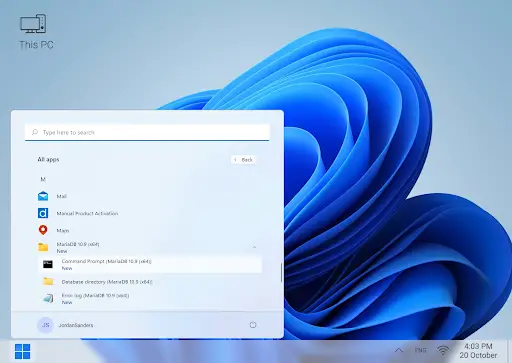
Go to the Windows Start menu to check for the MariaDB client software: All programs > MariaDB. The solution is present as Command Prompt:
We have successfully installed the client app for MariaDB. Now let’s see how to use it to manage databases.
Read: Docker container orchestration tools
Work with the MariaDB command-line client
Sign in as the root user (note that the client is the same for MySQL and MariaDB):
MySQL -u root -p
In this command:
- -u defines the username
- -p defines the password – you should provide it immediately after -p

The client supports plenty of options you need to work with databases efficiently.
Connect to the MariaDB database using your actual connection parameters:
$ mariadb –host FULLY_QUALIFIED_DOMAIN_NAME –port TCP_PORT \
–user DATABASE_USER –password \
–ssl-verify-server-cert \
–ssl-ca PATH_TO_PEM_FILE
Here you need to specify the following:
- FULLY_QUALIFIED_DOMAIN_NAME – your database name or IP address
- TCP_PORT – your database TCP port
- DATABASE_USER – your username
Note that PATH_TO_PEM_FILE is optional and is prompted if TLS is required. If it is the case, replace it with the path to the certificate authority chain (.pem) file.
After putting the correct values into the command syntax, execute the command to connect to the database. Enter the password after the execution.
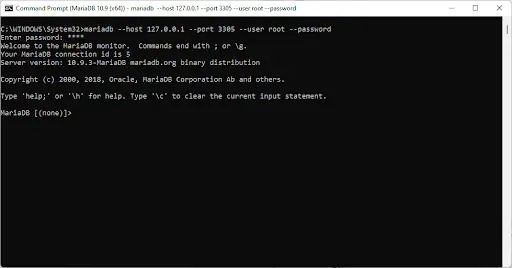
Now you can work with the MariaDB command-line client to perform any required operations with your databases.
Create a database
The command to create a database is as follows:
CREATE DATABASE DatabaseName;
For instance, here we create a database named Test:
CREATE DATABASE Test;
To check if the command has been executed successfully, we view the list of currently available databases with this command:
MariaDB [none]> SHOW DATABASES;
It returns the following result:
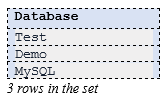
The database has been created successfully. To work with it, specify its name in the SQL statement with the USE command:
MariaDB [(none)]> USE Test;
If you worked with a different database before, MariaDB will show it:
MariaDB [Demo]> USE Test;
Database changed
MariaDB [Test]
Read: The problem of concurrent calls trying to reach the same tables on SQL servers
Create a table in the MariaDB database
To create a new table in the database, execute the following command:
CREATE TABLE tableName (columnName columnType);
For instance, let’s create a table named pages:
CREATE TABLE pages
( page_id INT(10) NOT NULL AUTO_INCREMENT,
page_name VARCHAR(20) NOT NULL,
upload_date DATE,
);
Our pages table contains 3 columns:
- page_id has the INT datatype (the maximum length is 11 digits). NULL values aren’t allowed. The AUTO_INCREMENT keyword means that the values will be generated automatically, starting at 1 and incremented by 1 for each new record.
- page_name has the VARCHAR datatype (the maximum length is 20 characters). NULL values aren’t allowed.
- upload_date has the DATE datatype. NULL values are allowed.
As in the previous example, let’s check if the table has been created successfully:
Read: How to install MySQL on Ubuntu 18.04
MariaDB [Test]> SHOW TABLES;
The result is as follows:

Use the SELECT statement
SELECT is the most commonly used statement in SQL. We will use it to check the contents of the pages table created at the previous stage.
MariaDB [Test]> SELECT * from pages;

Delete a MariaDB database
The following command is used for deleting your database. Note that this action is irreversible.
DROP DATABASE DatabaseName;
To check if the database has been deleted successfully, use the SHOW DATABASES command, as in the earlier examples.
Users can retrieve the full list of commands supported by the MariaDB client by entering \h or help into the command line. The command-line syntax has the following specifics:
- Options come after the command name, beginning with a dash (for the short form of the option name, such as -?) or two dashes (for the long form, such as –help)
- Option names are case-sensitive
Refer to the full list of commands on the official page for more information.
Alternatives to the MariaDB command-line client
Besides the default command-line client for MariaDB, you can work with more advanced GUI-driven alternatives, and one of them is dbForge Studio for MySQL – a database management tool for MySQL designed to be a fast and easy-to-use development environment.
dbForge Studio for MySQL is favored by many users as the most effective MariaDB client with the functionality that that of the default client significantly. Additionally, it has many features letting it stand out from other database management products:
- Develop and debug SQL code
- Optimize queries
- Export/import table data
- Backup, restore, and copy databases
- Compare and synchronize MariaDB databases
- Generate meaningful test data
- Generate database documentation.
Whether you’re a beginner or an established pro, don’t settle for anything less than a professional development environment.
dbForge Studio for MySQL comes with robust database design tools, scheduling and automation features, and data reporting and analysis options. You can build and manage MySQL queries in the quickest and easiest way.
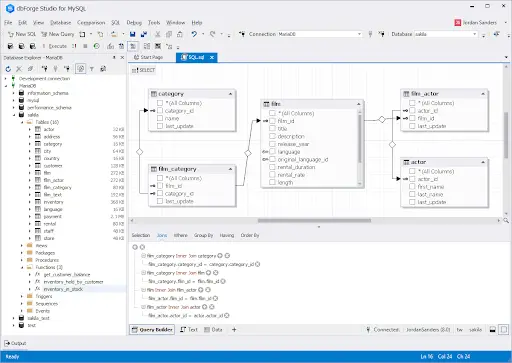
This powerful IDE alternative to the MariaDB client lets you work with databases both visually and through the command line. You can download a fully-functional 30-day trial and test all of its capabilities free of charge to see how they resolve your challenges and ease your daily routine.
If you like the content, we would appreciate your support by buying us a coffee. Thank you so much for your visit and support.


