To create publications in the feed or Stories, it is necessary to know how to activate the camera on Instagram . When using the application for the first time, a window appears asking for access to the camera and microphone. If you do not choose this option, it is not possible to open the camera through the social network.
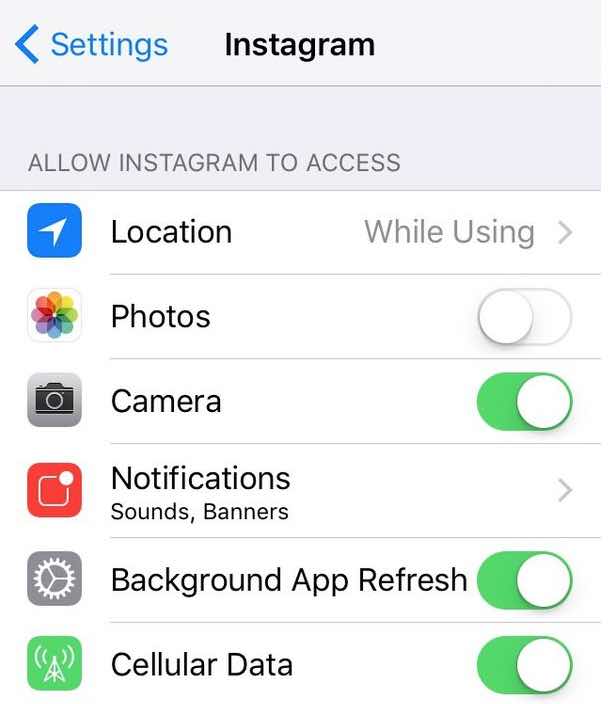
Therefore, if the Instagram camera does not show up, the simplest way to solve this problem is by using your mobile phone settings. See below how to activate the Instagram camera on Android or iPhone .
Read: How does Instagram make use of AI
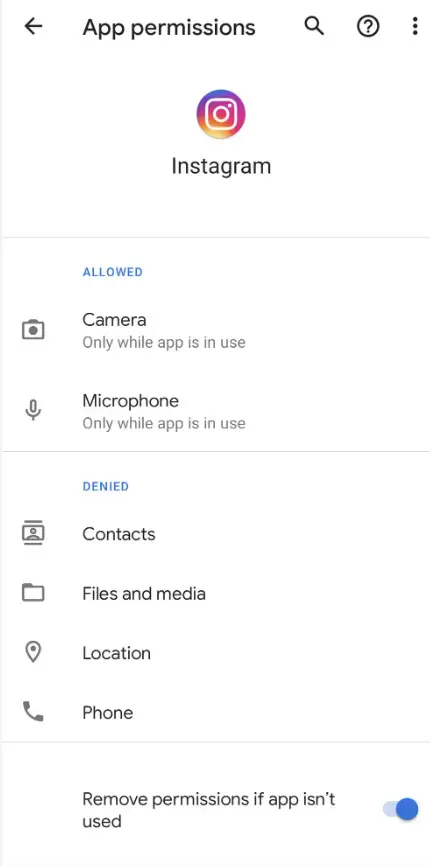
How to Activate the Camera on Instagram on Android
- Open the Android settings and select the “Applications” tab;
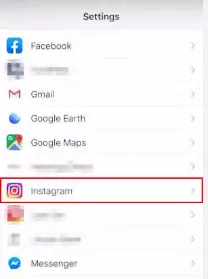
- Then locate Instagram and tap to open more options:
- On the next screen, select the “Permissions” tab:
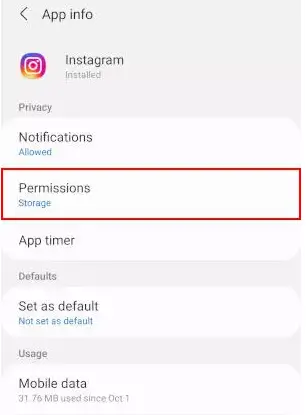
4 . Android will display all access granted to system tools. Next, tap on the “Camera” option.
5 . Finally, allow the app to access your camera during use.
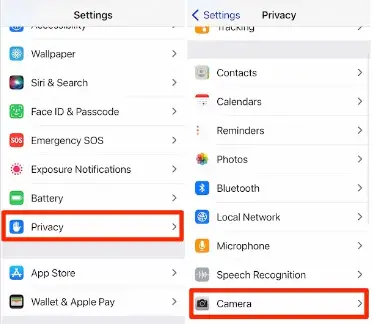
How to Enable the Camera on Instagram on iPhone
- Open the Settings screen and select the “Privacy” tab.
- Then tap on “Camera”.
- On the next screen, all the apps that have already requested access to your camera are shown. Activate the option referring to Instagram.
Read: 8 Best Instagram Tools to Grow and Engage Followers
What to do when Instagram camera is not working
In some situations, just granting access in the settings is not enough. In some older models, for example, the disabled camera issue may result from a storage space problem. In this situation, it is recommended to reinstall the application, free up space in your memory and even install Instagram Lite, the lighter version of the app available for Android.
Also, errors with the camera can be related to bugs and problems in the application. If the problem with activating the camera persists, it is recommended to reinstall Instagram on your phone or clear the app’s cache .
If you like the content, we would appreciate your support by buying us a coffee. Thank you so much for your visit and support.


