In the rapidly evolving digital landscape, securing your system is of paramount importance. One of the most effective ways to enhance your system’s security is by setting up a firewall. A firewall serves as a barrier or shield that prevents unauthorized access to or from a private network, thereby safeguarding your system from potential threats.
This article aims to guide you through the process of configuring the Ubuntu 22.04 firewall. Whether you’re a seasoned professional or a novice user, this comprehensive guide will provide you with the necessary steps and insights to secure your system effectively.
By following this guide, you will not only learn how to set up a firewall but also understand how to permit specific connections, such as SSH, while denying unnecessary ones. This balance ensures optimal operation without compromising security.
So, let’s embark on this journey of fortifying your Ubuntu 22.04 system by setting up a robust firewall.
Read: Litespeed or Apache: Which One is Best for WordPress
1 – Installation and activation of UFW, Ubuntu Default Firewall
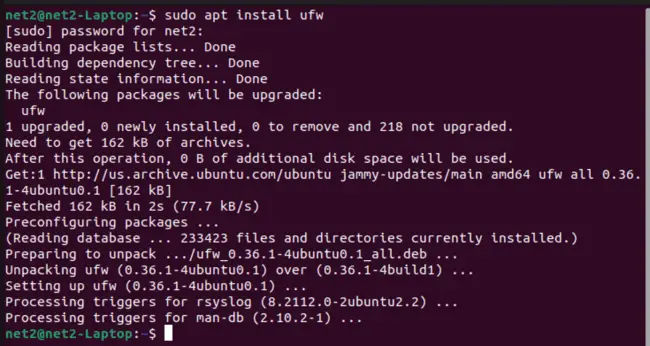
Uncomplicated Firewall (UFW) is typically pre-installed on Ubuntu systems. If it’s not already installed, you can add it to your system using the command:
sudo apt install ufw
Ubuntu firewall status command: After the installation process is complete, you can verify the UFW status with the following command:
sudo ufw status verbose

Enable firewall in ubuntu : By default, Ubuntu UFW is not enabled. To activate it, use the following command:
sudo ufw enable

Read: Virtual host configuration in Apache
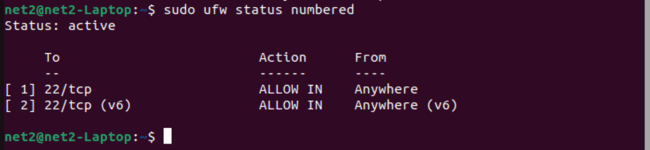
Now, the firewall status in Ubuntu is active:

Ubuntu disable firewall command : If you wish to prevent UFW from launching and running at system startup, use this command:
sudo ufw disable

If you need to revert all changes made to the rules and disable UFW, thereby deleting all active rules, you can reset UFW with this command:
sudo ufw reset
Default Rules: UFW allow and deny commands
The initial UFW rules defined when setting up the UFW firewall are known as default policies. These are designed for typical home users. Essentially, all incoming connections are blocked while all outgoing connections are permitted. This basic firewall functionality prevents unauthorized access to your files, while allowing services on your server to communicate with the outside world.
You can modify the default rules used by UFW, which are located in the /etc/default/ufw file. To set the defaults so that all incoming connections are blocked and all outgoing connections are allowed, use these commands:
sudo ufw default deny incoming

sudo ufw default allow outgoing

Read: How to Secure Your Linux System with 10 Proven Firewalls
2 – Application Profiles
When the APT package manager installs a new package that requires UFW open ports, it creates an application profile in the /etc/ufw/applications.d directory. This profile specifies the ports that the installed application needs to operate properly.
To see which applications have generated a profile, use the following command:
sudo ufw app list

The output may vary depending on the packages installed on your system. If you want to learn more about a specific profile and its associated rules, you can use the command below:
sudo ufw app info ‘CUPS’
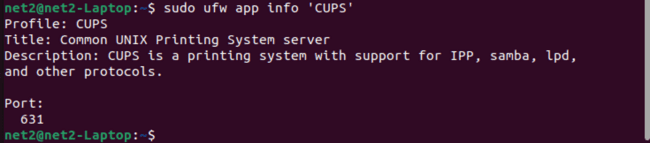
In this example, we’ve used ‘CUPS’ , but you should replace ‘CUPS’ with an entry from the list generated by the previous command.
Read : How to install OpenSSH server on Ubuntu ?
3 – Configuring SSH Connections – Ubuntu firewall settings
When UFW was enabled, all incoming connections were blocked. This means we won’t be able to remotely connect to the server. Therefore, we need to establish rules that permit incoming connections via SSH or HTTP, enabling our server to respond and allowing us to manage it remotely.
To adjust the UFW firewall settings to allow incoming SSH connections, use the following UFW allow ssh command to update the rules:
sudo ufw allow ssh

UFW can allow or deny a service by name because it reads from /etc/services. To view the available services, use this command:
less /etc/services
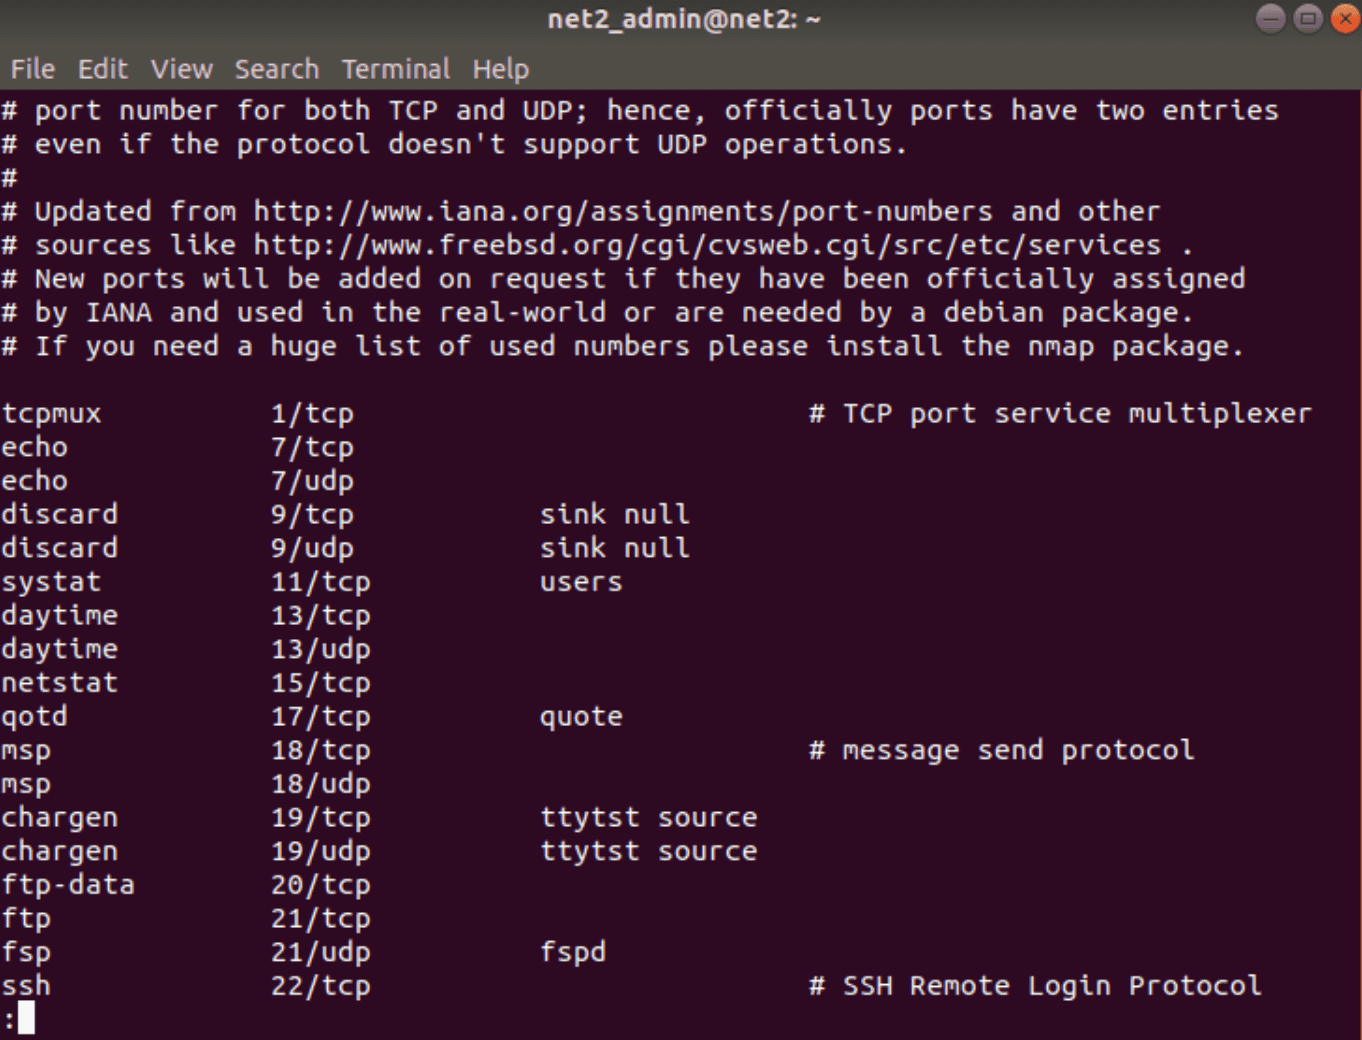
As shown in the output, the last entry representing the SSH daemon listens on port 22. This means that enabling SSH with the above command creates rules that permit all connections on port 22.
Read: How to use systemd to troubleshoot Linux problems
Interestingly, instead of specifying the connection or service name (i.e., ssh), we could indicate the port number with a command like sudo ufw allow 22.
If your SSH is configured to use a different port, you’ll need to specify that port. For example, if your SSH server listens on port 29, you can allow connections on that port with this command:
sudo ufw allow 29
Note: If you want to deny a rule, you can use a command like this:
UFW deny rule :
sudo ufw deny 80/tcp
UFW remove rule: And if you want to remove it, add the delete argument as follows:
sudo ufw delete deny 80/tcp
Read : Network configuration in Ubuntu
4 – Activating IPv6 with UFW
If your Ubuntu server has IPv6 enabled, it’s important to ensure that UFW is configured to support IPv6. This allows it to manage firewall rules for both IPv4 and IPv6. To do this, you’ll need to edit the UFW configuration file. Here’s how you can do it using nano:
sudo nano /etc/default/ufw
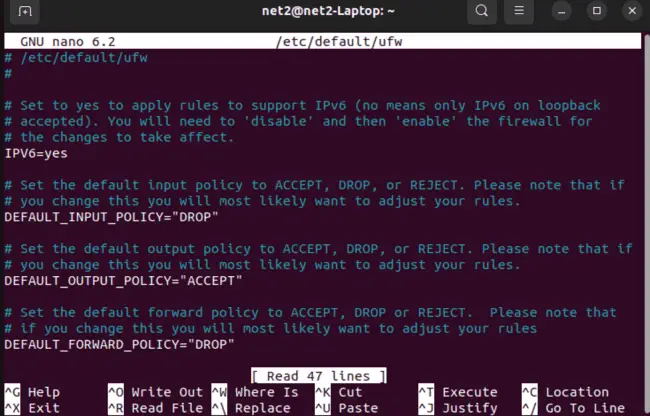
In the output, you should see that the “IPV6” value is set to “yes”.
If you made any changes, save and exit: press Ctrl-X to quit, then Y to save.
UFW restart procedure: Now, you’ll need to disable and restart UFW using the following commands:
sudo ufw disable
sudo ufw enable
Once enabled, UFW will be capable of managing both IPv4 and IPv6 firewall rules.
5 – Managing Other Connections and Ports
You should now be able to create rules that allow connections based on service or port. Depending on your server’s specific requirements, you may need to allow certain connections on certain ports for your server to respond correctly.
For some services, you can use the following commands:
To allow HTTP connections on port 80, use:
sudo ufw allow http
or
sudo ufw allow 80/tcp
To allow encrypted HTTPS connections on port 443, use:
sudo ufw allow https
or
sudo ufw allow 443
To allow File Transfer Protocol (FTP) on port 21, use:
sudo ufw allow ftp
or
sudo ufw allow 21/tcp
Port Ranges
UFW also allows access to port ranges instead of single ports. However, you must specify the protocol (TCP or UDP) that the rules should apply to. For example, to allow the range of ports from 6600 to 6610 for both TCP and UDP, run:
sudo ufw allow 6600:6610/tcp
sudo ufw allow 6600:6610/udp
Distinct IP Addresses
You can also specify IP addresses with UFW. For example, to enable connections from a specific IP address (e.g., 10.2.3.07), use:
sudo ufw allow from 10.2.3.07
To enable a specific port that an IP address can connect to, specify the IP followed by the port number. For example, to allow 10.2.9.18 to connect to port 22 (SSH), use:
sudo ufw allow from 10.2.9.18 to any port 22
Read: How to display Graphics card information on Ubuntu 22.04
Subnets
You can also allow a subnet of IP addresses (a netmask). For example, to allow all IP addresses from 10.2.9.0 to 10.2.9.255 (for subnet mask 255.255.255.0 in CIDR notation), use:
sudo ufw allow from 10.2.9.1/24
Similarly, you can specify the port that the subnet 10.2.9.1/24 is allowed to connect to (e.g., port 80):
sudo ufw allow from 10.2.9.1/24 to any port 80
Specific Network Interface
To enable access only on a specific network interface (e.g., eth1) for a specific port (e.g., port 3333), use ‘allow in on’ along with the name of the network interface:
sudo ufw allow in on eth2 to any port 3333
To find your network interfaces beforehand, use the command:
ip a
If you want your Ubuntu MongoDB server (port 27017) to listen only on the private network interface eth1, you can use:
sudo ufw allow in on eth1 to any port 27017
Denying connections
By default, UFW blocks all incoming connections for security reasons; only you (as root user or admin) can create rules to explicitly enable specific incoming connections.
If your server is receiving multiple unwanted incoming requests from a specific source, you may want to deny the corresponding IP address or subnet.
To deny specific connections, replace ‘allow’ with ‘deny’ in the above commands.
Read: Configuring static and dynamic IP Addresses in Ubuntu using Netplan
Rule Deletion
You have the option to remove rules using either their assigned rule numbers or by specifying the actual rule itself.
A – Deleting Rules by Number
First, list your firewall rules since rule numbers are displayed next to each rule:
sudo ufw status numbered
For example, to delete rule number 2 (that allows connections to port 22), run:
sudo ufw delete 2
A – Rule-Based Deletion
To execute the deletion of a rule, such as the one permitting SSH, the following steps should be taken:
Execute the following command:
sudo ufw delete allow ssh
Alternatively, instead of using the service name, the specific port can be targeted. For instance, to delete the rule allowing port 22, use:
sudo ufw delete allow 22
6 – Graphical User Interface for UFW
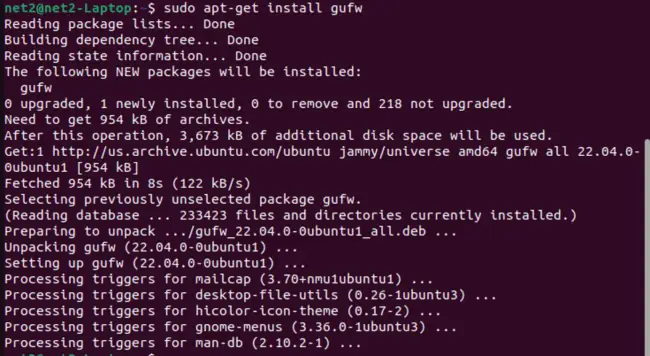
UFW is equipped with a graphical user interface (GUI) that is available in Ubuntu’s software repositories and can be installed. You can initiate the installation by invoking the following command.:
sudo apt-get install gufw
Ubuntu firewall configuration: The GUI for UFW, known as GUFW, can be accessed by entering the command gufw. Alternatively, it can be located in the Dash under the application name ‘Firewall Configuration’. GUFW is designed to be straightforward, user-friendly, and easy to navigate.
Read: Linux directories explained
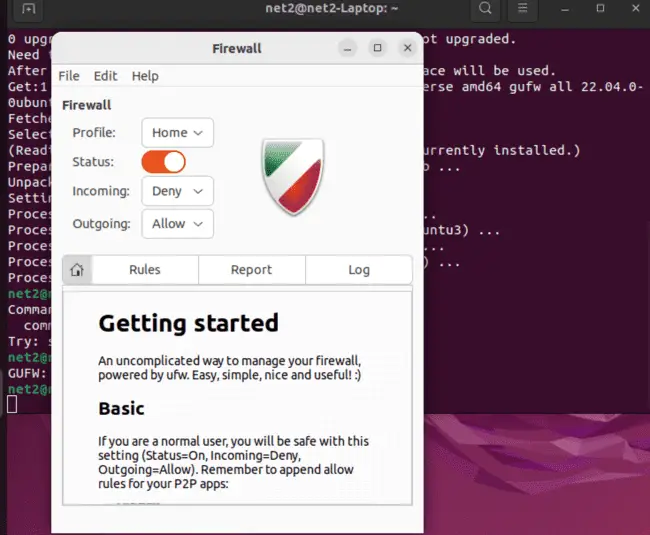
GUFW allows for the effortless management of connections, including ports or IP addresses. It provides control over the default policy for incoming or outgoing traffic and facilitates the addition of rules.
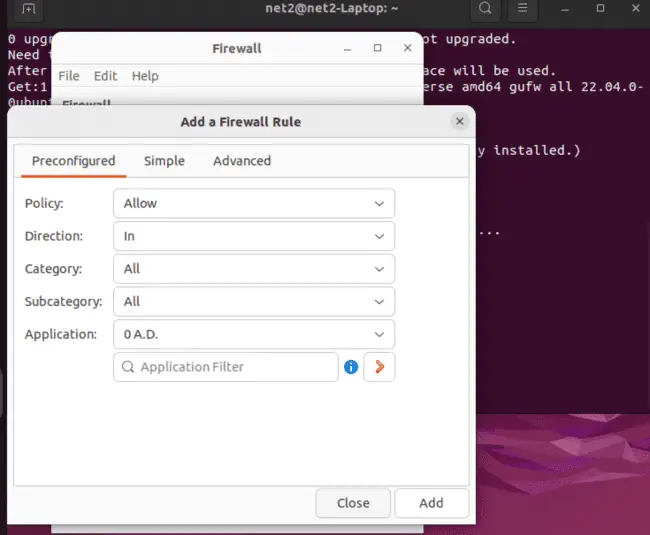
All of these tasks can be accomplished with ease in GUFW.
Conclusion
In this comprehensive guide, we’ve explored the ins and outs of configuring the UFW (Uncomplicated Firewall) on your Ubuntu system. Starting with the installation and activation of UFW, we’ve covered essential commands and practices to bolster your system’s security.
We delved into default rules, understanding how UFW strategically denies incoming connections while allowing outgoing ones, forming the bedrock of a robust firewall setup.
Application profiles proved invaluable for managing packages and their associated ports, providing a clear view of your system’s network requirements.
Enabling SSH connections and controlling specific ports or services ensures seamless remote management of your server, even with UFW’s stringent default settings.
For those embracing IPv6, we demonstrated the steps to enable IPv6 support within UFW, ensuring comprehensive firewall protection.
Our guide elucidated the art of crafting rules for various connections and ports, whether it be allowing specific services, defining port ranges, specifying IP addresses, or catering to intricate network setups.
We also introduced GUFW, the user-friendly graphical interface for UFW, simplifying the process of configuring and managing your firewall rules.
Lastly, we shed light on UFW’s logging capabilities, illustrating how to enable logs and decipher their content for enhanced system monitoring and security.
By mastering UFW, you’ve gained the expertise needed to safeguard your Ubuntu server, allowing you to tailor your firewall rules to meet your specific security requirements while ensuring seamless network communication. Remember, a well-configured UFW is your shield against unwanted intrusions and a key element in safeguarding your digital assets
For additional details, you can access ufw’s manual page by executing the man ufw command.
If you like the content, we would appreciate your support by buying us a coffee. Thank you so much for your visit and support.