Are you looking to run Ubuntu on Windows? This comprehensive guide will walk you through the process of installing Ubuntu OS in a Linux virtual machine using VMware on Windows. By following these steps, you’ll be able to enjoy the benefits of the Ubuntu Linux operating system without having to leave your Windows environment.
Benefits of Running Ubuntu in VMware on Windows
Before we delve into the installation process, let’s understand why you might want to run Ubuntu on a virtual machine on your Windows system. Here are some compelling reasons:
- Testing: You can test new software or configurations without risking the host operating system.
- Multiple Operating Systems: It allows you to run multiple operating systems on a single computer.
- Easy Setup: Compared to the traditional installation process on bare metal, setting up a virtual machine is often easier.
- Isolated System: With a virtual machine, you get an isolated system. This gives you the freedom to do anything you want without affecting the host operating system.
- Performance: Linux is usually a better performer as a virtual machine when compared to other operating systems.
- Backup and Cloning: Virtual machines can be backed up or cloned more easily than regular installation.
- Windows Driver Support: The VM inherits the advantages of Windows driver support with no setup required.
Read: How to install Ubuntu on a MAC using a virtual box
Step 1: Downloading the Necessary Software
Before we can install Ubuntu on Windows, you need to :
– Download VMware Workstation Player and
– Download Ubuntu iso file.
VMware Workstation Player
VMware Workstation Player is a free software that allows you to run virtual machines on your computer. You can download it from the official VMware website.
Ubuntu ISO File
The Ubuntu ISO file is a disk image that contains the Ubuntu operating system. You can download the latest version of the Ubuntu Linux distribution from the official Ubuntu website.
Step 2: Installing VMware Workstation Player
Once you’ve downloaded the VMware Workstation Player installer, follow these steps to install it on your Windows computer:
- To initiate the installation process, simply double-click on the installer file.
- Follow the prompts in the installation wizard.
- Accept the license agreement.
- Choose the installation location.
- Click on the “Install” button.
After the installation is complete, you can launch VMware Workstation Player from your Start menu.
Read: How to read a Mac formatted drive on a Windows PC
Step 3: Creating a New Virtual Machine for Ubuntu Linux operating system
Now that we have VMware Workstation Player installed, we can create a new Linux Ubuntu virtual machine.
 Here’s how:
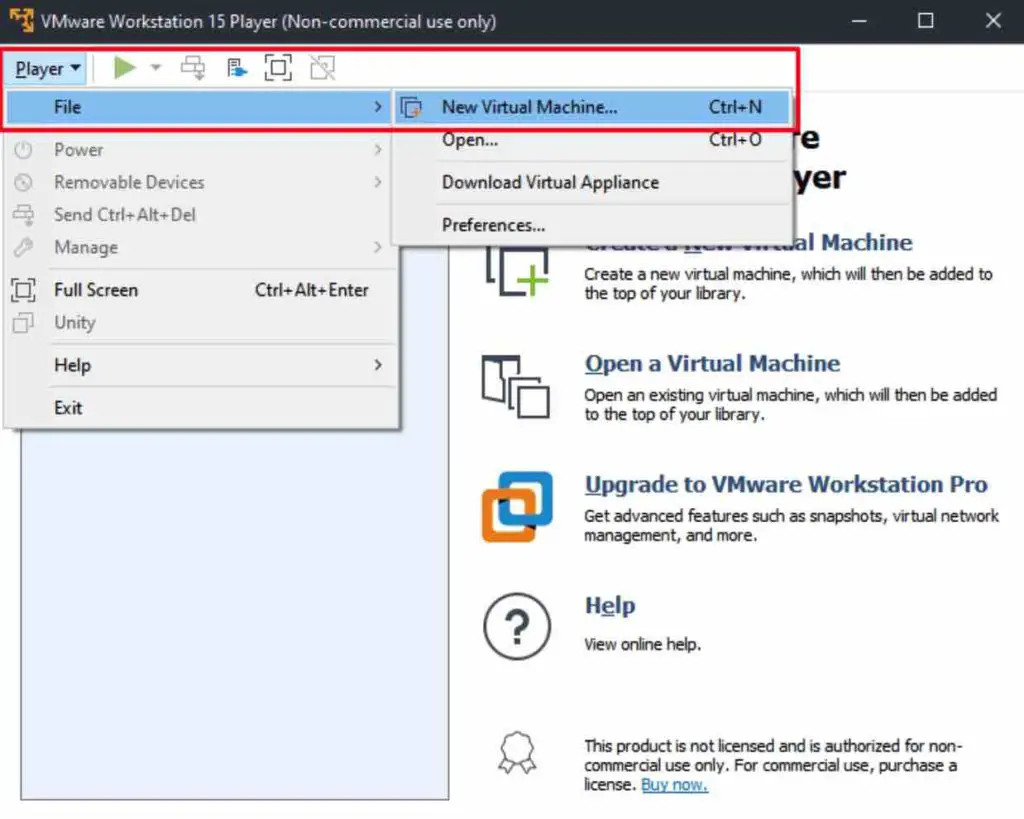
- Open VMware Workstation Player.
- Click on “Create a New Virtual Machine”.
- Choose the option “Installer disc image file (iso)” and navigate to the directory where you saved the Ubuntu ISO file.
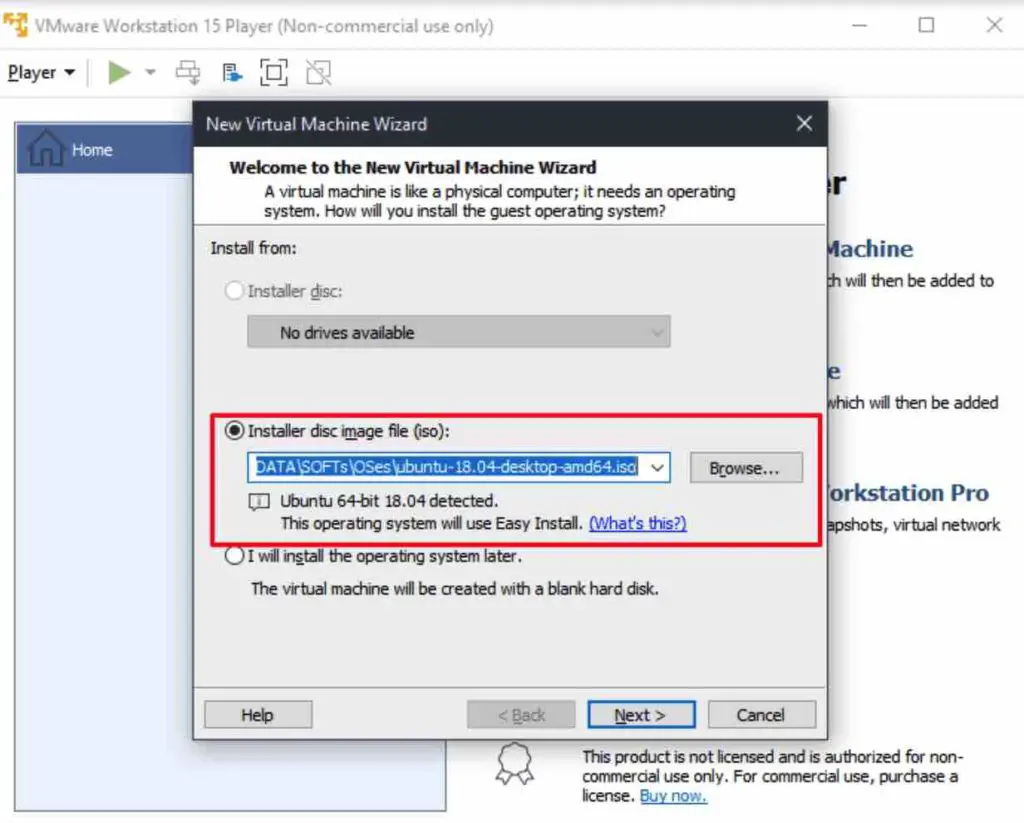
- Choose the version of Ubuntu you downloaded (We chose Ubuntu 18.04).
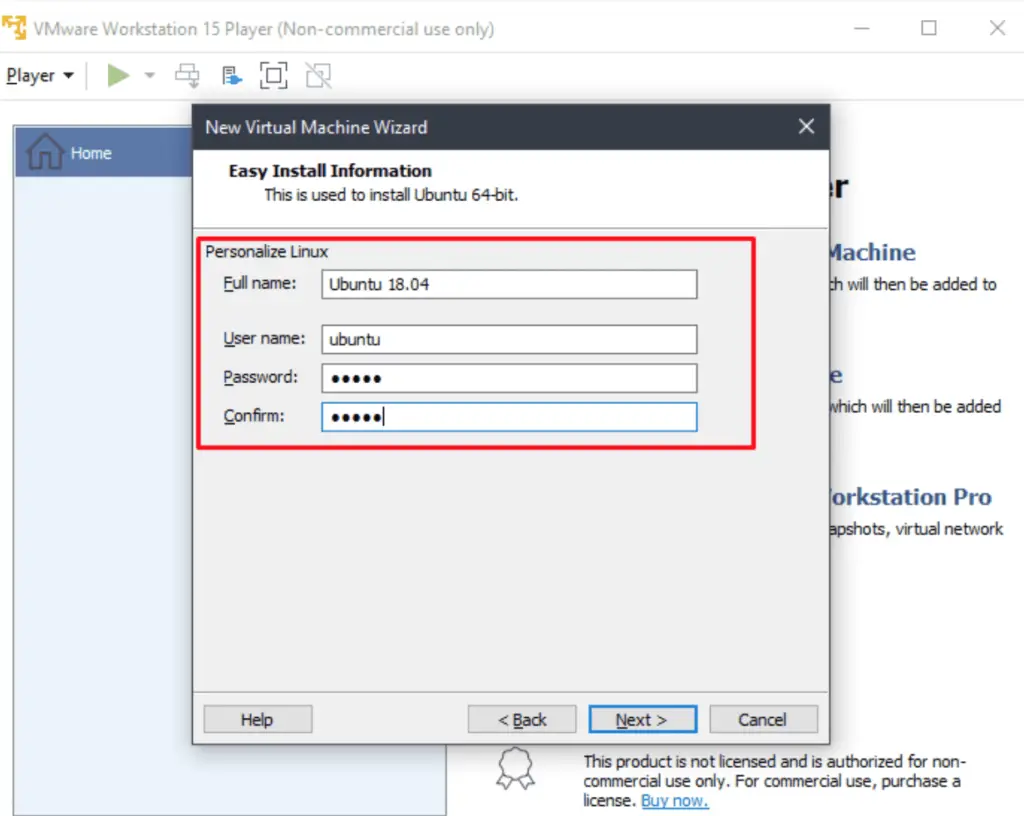
- The next step involves setting up an account for your Linux machine. You’ll need to enter your personal details, including your full name (which will serve as your hostname and appear on your Linux Distribution’s lock-screen), as well as your chosen username and password. It’s essential to select a username and password that are memorable to you, as you’ll use them to log into your system once the installation in VMware Workstation Player is complete.
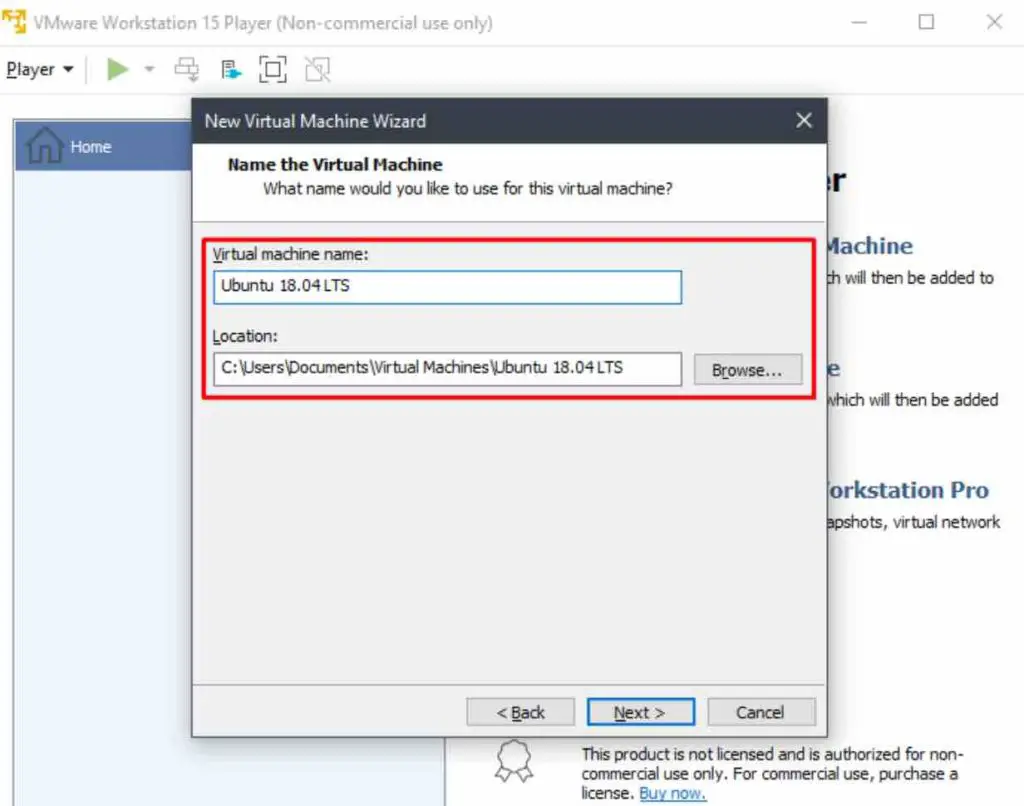
- Next, set the name and location of your virtual machine.
- Allocate the desired amount of memory and hard disk space ( the virtual machine’s maximum disk size ). Keep in mind that the specified maximum disk size is the upper limit allocated to the virtual machine. Initially, it may be lower than this limit, but it will gradually expand as you use the virtual machine, eventually reaching the maximum size.
Additionally, when faced with the choice between “Store virtual disk as a single file” and “Split virtual disk into multiple files,” it’s generally advisable to opt for the single-file option. This choice tends to offer faster performance compared to splitting the disk into multiple files, especially if you don’t anticipate frequently moving your virtual machine.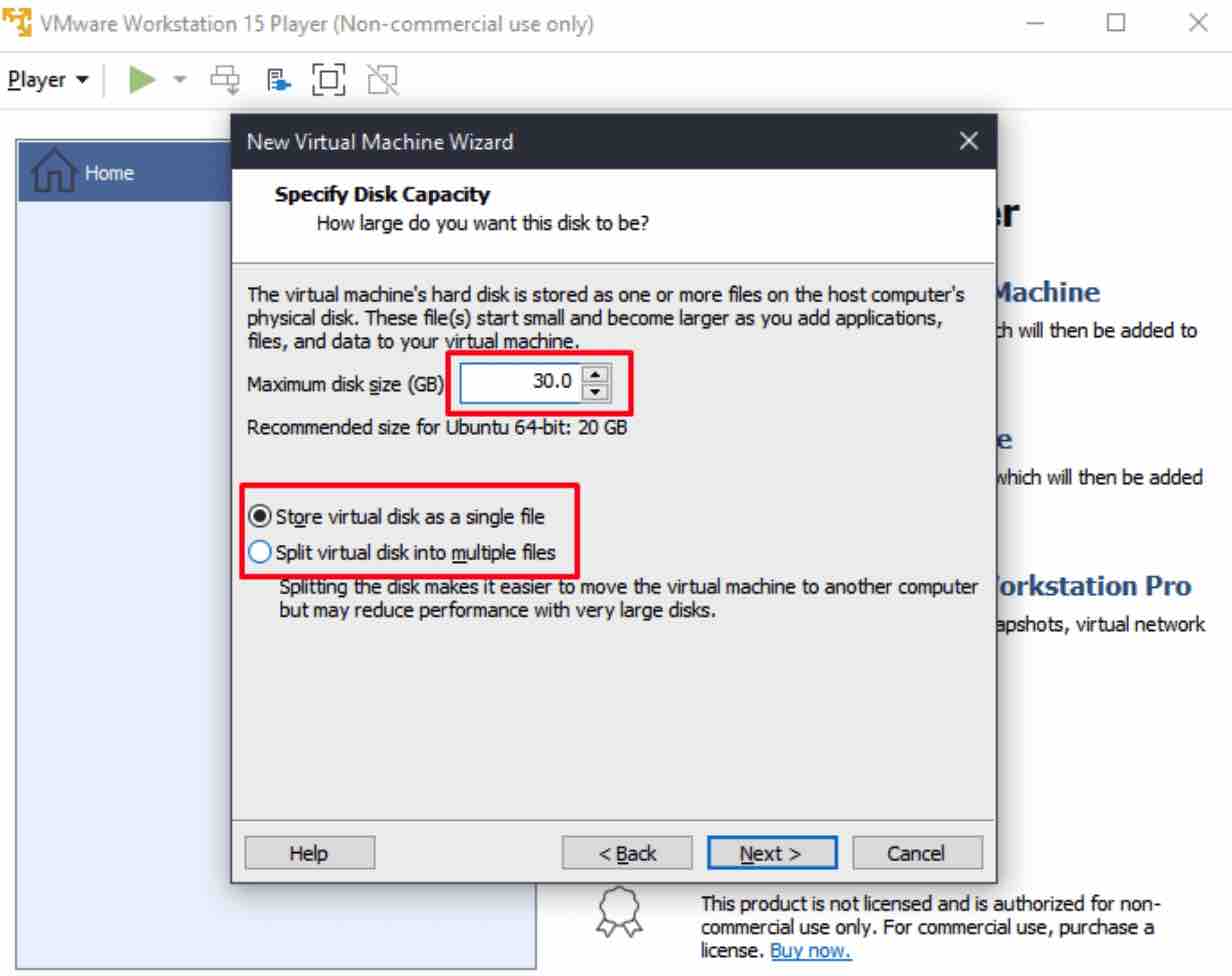
You have the option to tailor the virtual machine properties to your specific requirements by accessing the “Customize Hardware…” feature. However, for the sake of simplicity, I will proceed with the default settings.
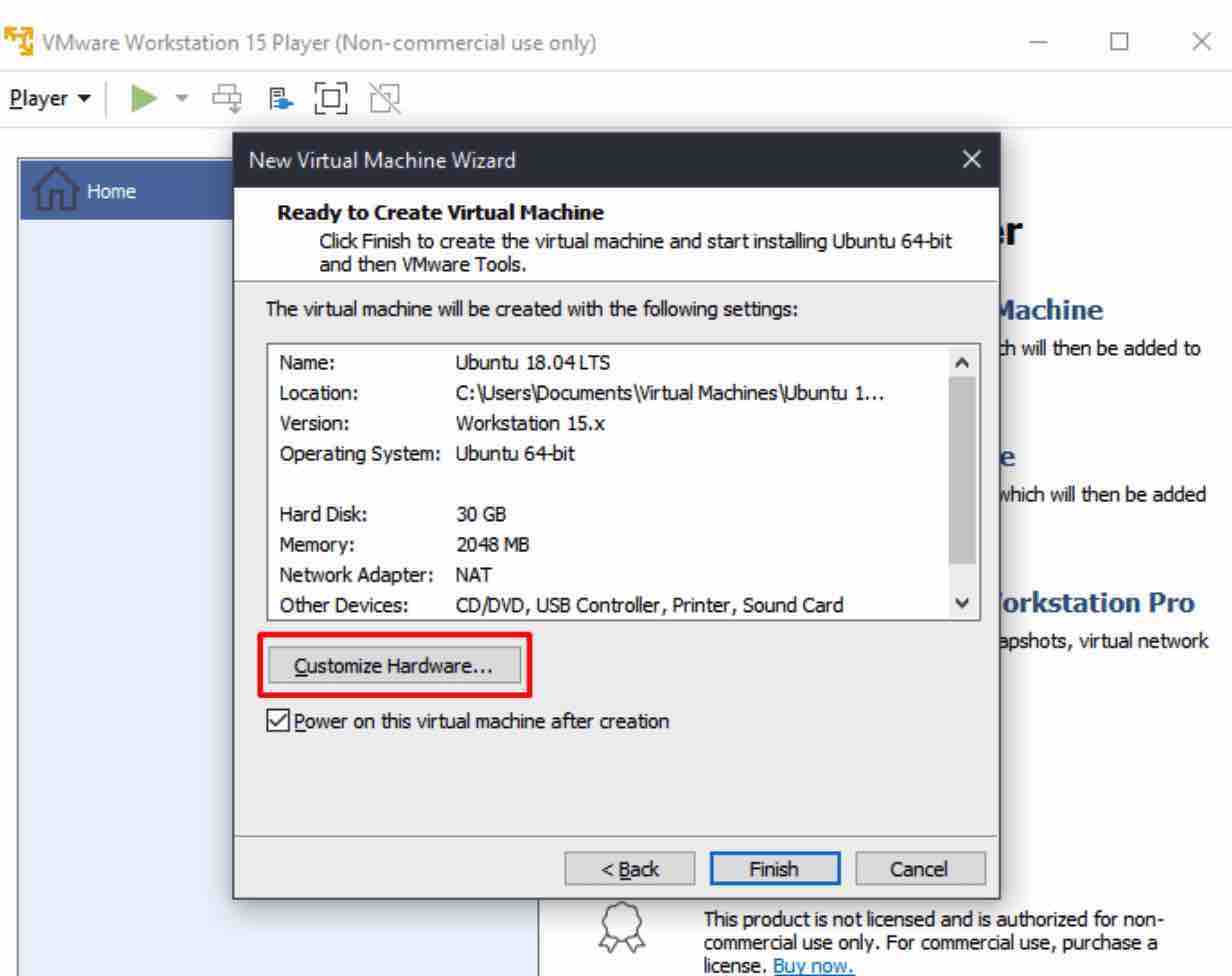
- Click on “Finish” to create the virtual machine.
- Once you’ve completed the preceding steps and selected “Finish,” VMware Workstation Player will initiate the newly generated virtual machine. Simultaneously, it will commence the Ubuntu installation employing the credentials supplied in step 5. Allow the installation process to reach completion.
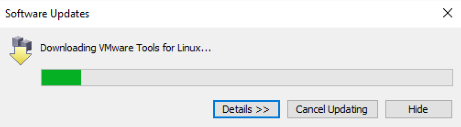
- Upon startup of the virtual machine, you will encounter a dialog box recommending the installation of the VMware Tools for Linux package. While not mandatory, it is part of the Easy Install process. It is advisable to proceed with this recommendation, so simply click “OK.”
Read: How to add guest features to your Virtualbox on Ubuntu 18.04
Step 4: Installing Ubuntu on the Virtual Machine
With the virtual machine created, we can now install Ubuntu on Windows. Here are the steps:
- Initiate the virtual machine by selecting it and clicking on the “Play virtual machine” option.
- The Ubuntu OS installation wizard will start. Follow the prompts to choose your language, location, and keyboard layout.
- When prompted to select the installation method for Ubuntu, opt for “Install Ubuntu.”
- Follow the prompts to set up your user account and password.
- Wait for the installation to complete, then restart the virtual machine.
Congratulations! You’ve successfully installed Ubuntu on Windows using VMware. You can now explore the latest Ubuntu Linux features and applications from within your Windows environment.
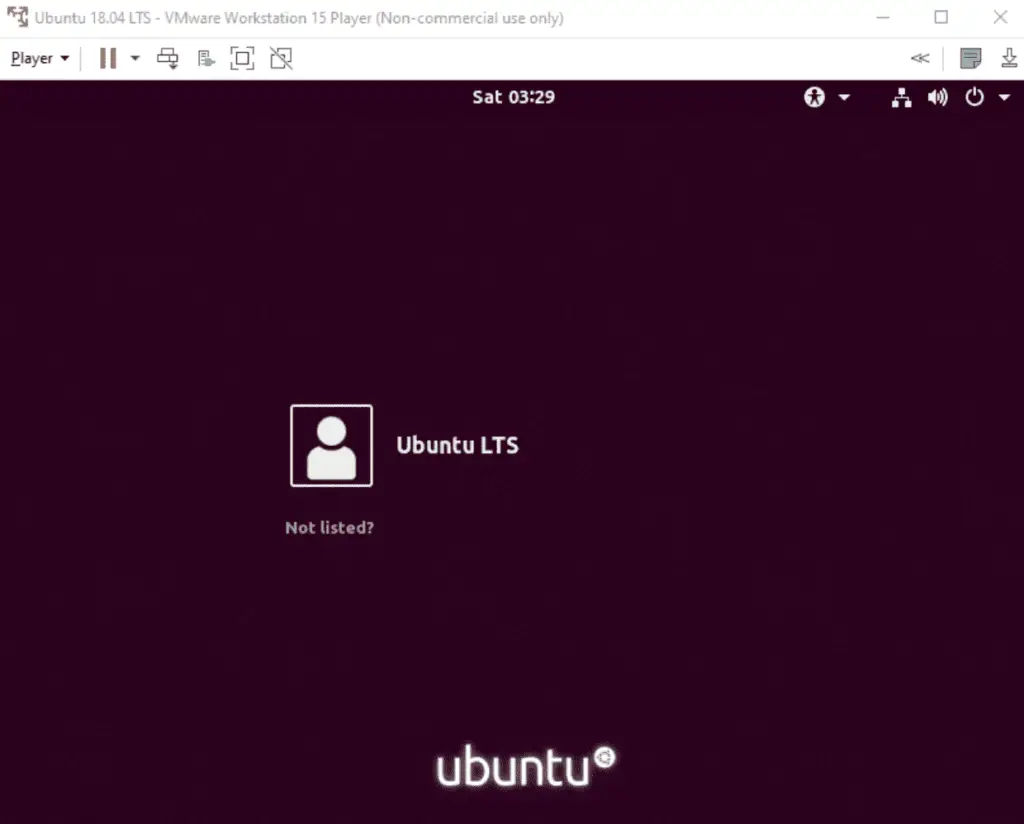
Select “Ubuntu LTS” and you will be prompted to enter your password (the one provided in the fifth step above). Once you input the correct password, you will gain access to your newly installed Ubuntu system.
Read: How to run Windows software on Linux
Update your Ubuntu system
Maintaining your operating system with regular updates is strongly recommended. Therefore, the initial step after installation should involve updating your Linux Distribution. Enter the following commands to perform a full update on your Ubuntu system.


Conclusion
Running Ubuntu in a Linux virtual machine on Windows is a great way to experience the power and flexibility of the Ubuntu Linux operating system without having to leave your familiar Windows environment. Whether you’re a developer, a student, or just a curious tech enthusiast, this setup offers a convenient and risk-free way to explore Linux on Windows.
If you like the content, we would appreciate your support by buying us a coffee. Thank you so much for your visit and support.