It is a fact : Windows 10 transfers more data to Microsoft than any Windows before. This already started with the Windows keylogger integrated in the Technical Preview and does not stop at Cortana.
When Microsoft first offered automatic updates with Windows XP, there was an outcry among users which led Microsoft to provide more transparency: Many of the ‘espionage’ functions that are only active in the standard settings can be switched off. It starts with the installation.
You don’t need a Microsoft account to use Windows 10. During installation it is possible to start Windows 10 only with a local account. If you want to keep the transfer of data to Microsoft as low as possible, you should go local. If necessary, a Microsoft account can also be “converted” back into a local account via the settings by disconnecting the connection to the Microsoft account.
Important : Do not accept the default privacy settings when installing Windows 10, but make sure to set all sliders to Off. This means that most of the sniffing features are not activated at all.
Read: How to lock your screen in Windows 10
In this article you will learn how to configure Windows to protect your privacy to the maximum both with the way it interacts with your local content and the ways in which it could track or collect your data online.
If you decide to prevent Windows from any type of access to your information, it is possible that some of its functions or services stop working. With this in mind, you will learn the reasons why you might want to deactivate each option , so that the decision is yours.
At the end of the day, options that do not seem so important can end up compromising your privacy. For example, the Windows search engine indexes locally on your PC all the information about what files are in it. In theory this does not expose your information to Microsoft’s eyes, but the company warns that other applications could access this index and know what files you have on your computer.
Read:How to speed up your Windows computer
In any case, the goal of this article is not to alarm you or incite you to deactivate everything, but to give you all the information so that you decide how far to expose your data.
Table of Contents
Control the data you send in your Feedback & Diagnostics section
Microsoft collects data from Windows for different reasons, such as diagnosing problems you may have. These are data submissions that you can turn off.
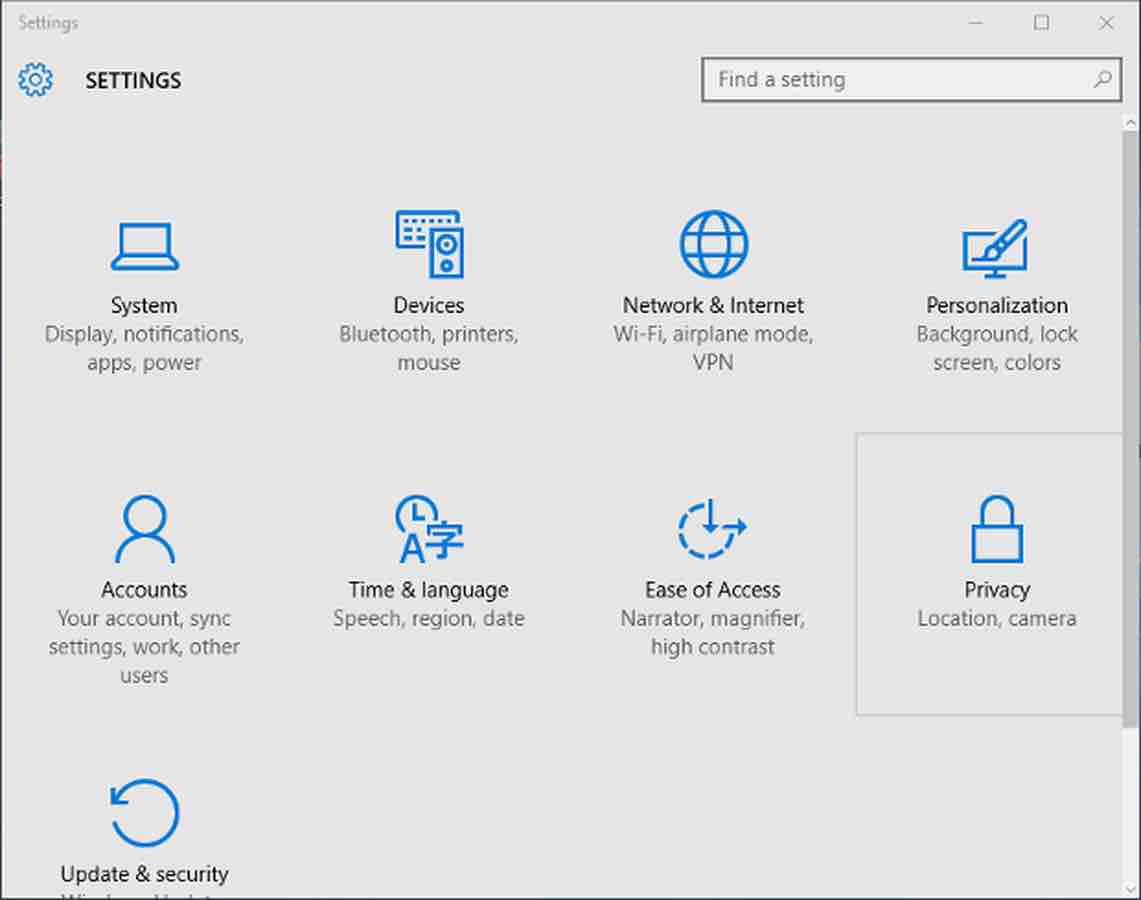
To do this, enter Windows Settings by clicking on the cogwheel icon in the start menu or notification center and click on the Privacy option that appears almost at the end.
Once inside the privacy menu, click on the option Feedback & diagnostics that you have on the left column (windows 10 diagnostics tool). When you enter the section, the first thing you will see on the right column is the possibility to choose between Basic or Full configuration when sending the data to Microsoft.
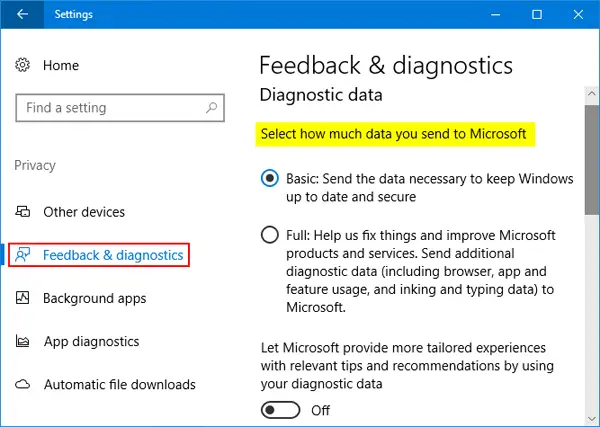
You can uncheck the one you want depending on the amount of data you want to transfer to the company.
- If you choose the Basic option : You will only send Microsoft the basic data of your computer, the configuration you have and the functionalities you use.
- If you choose the Full option : You will send Microsoft all the data in the Basic section , but also the ones related to how you use the applications or to which web pages you visit. More complete information on how you use the computer will also be sent.
Still within the Feedback & Diagnostics section , keep scrolling down for more options. Deactivate the ‘Tailored experiences’ option , since this enables Microsoft to use your diagnostics data to suggest recommendations for applications and personalized announcements.
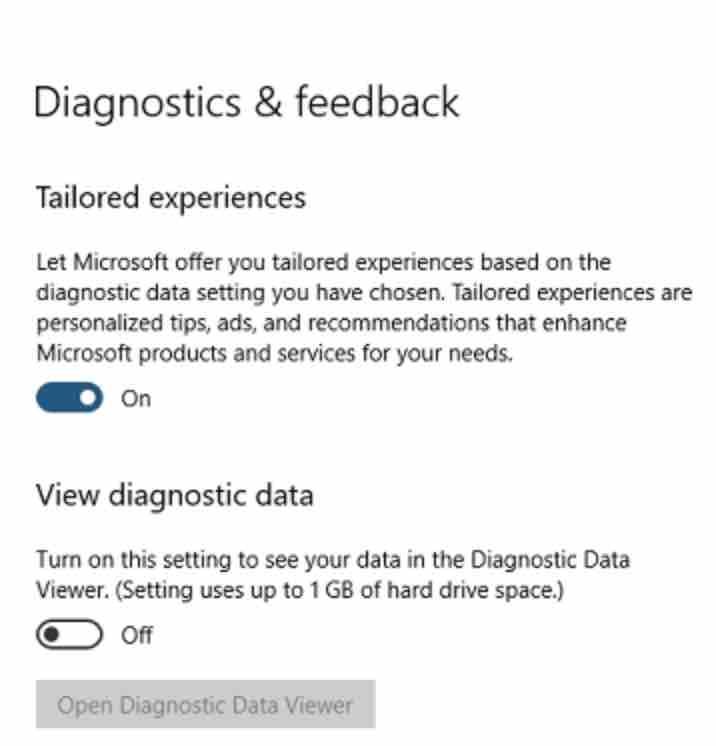
And finally you have the diagnostics data viewer section. Here, first of all, you will see the Diagnostic Data Viewer button, which is used to see the data you have sent to Microsoft about your use of Windows 10.
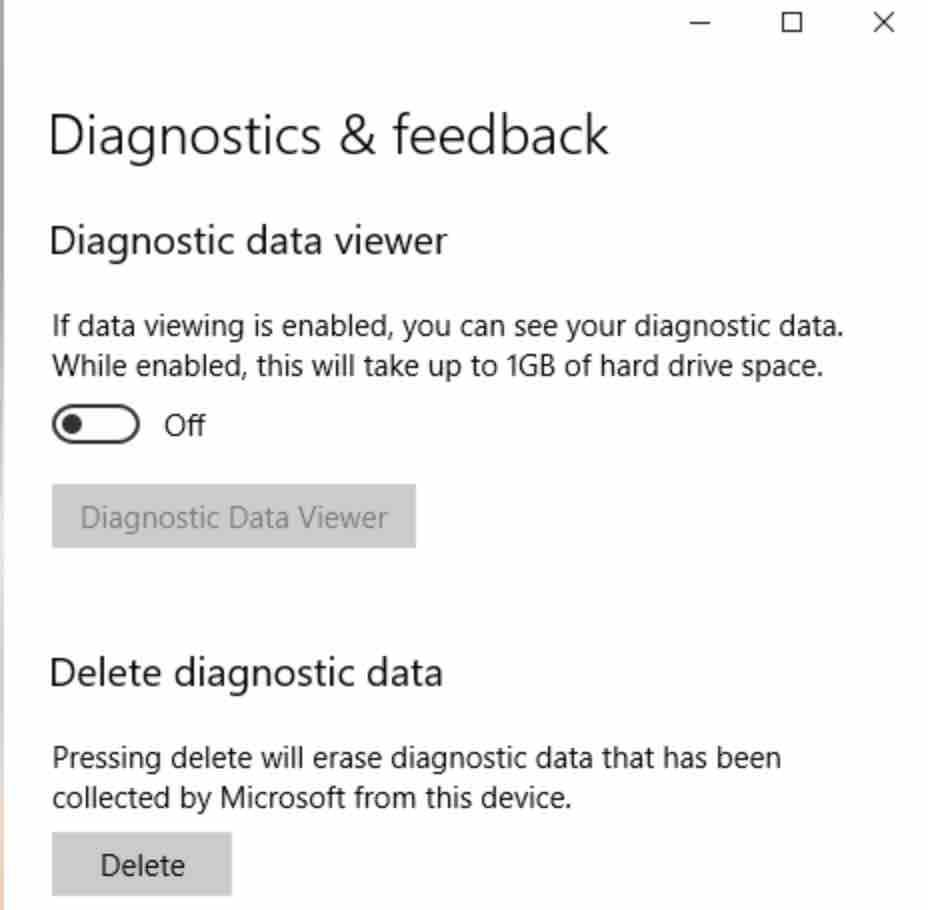
The Delete button underneath will delete diagnostic data from Microsoft servers .
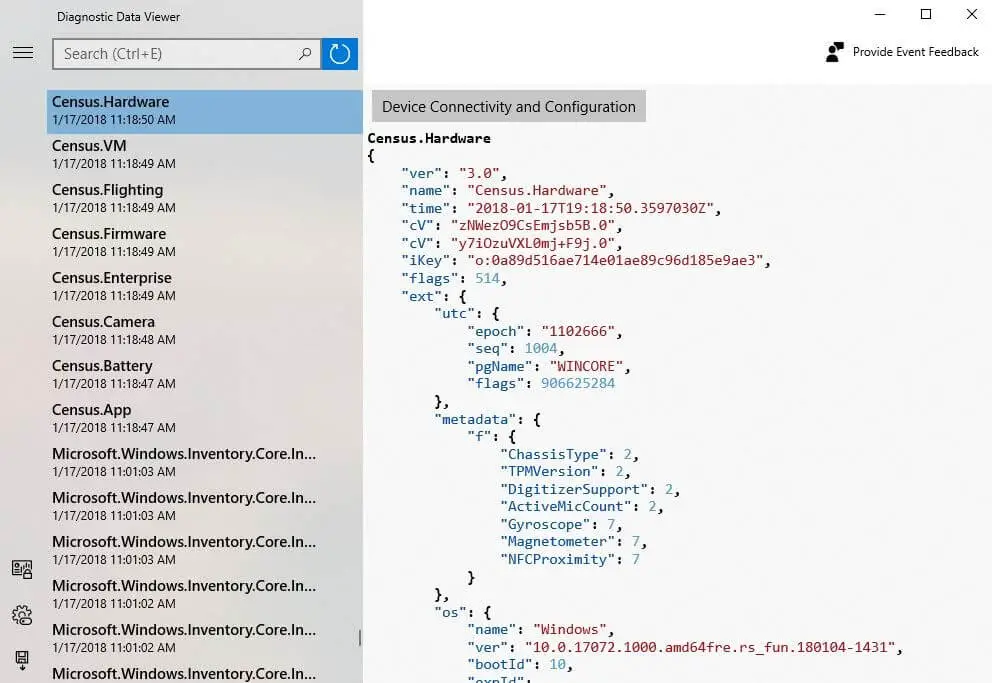
If you click on the Diagnostic Data Viewer button in order to see this data , Windows will make you download a specific tool. The amount of data you find here will depend on whether you are sharing the basic or full data .
Read: Windows tuning : Deactivating unnecessary services
This utility comes with the events list on the left and their details on the right.
Continue with the rest of windows 10 privacy settings
Windows 10 also collects a lot of other data to offer you different types of services, including everything you write or what you say to Cortana . To do this, re-enter Windows Settings by clicking on the gear icon in the start menu or notification center and click on the Privacy option that appears almost at the end (windows 10 privacy tool).
Then, on the left column, click on the General section.
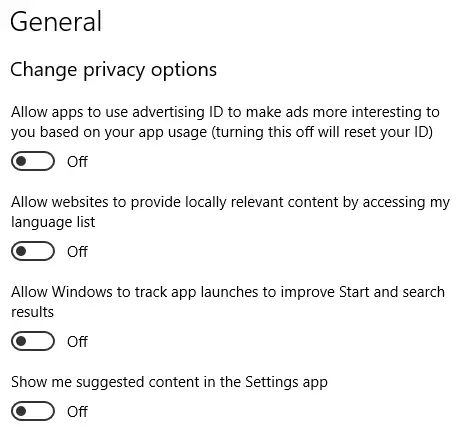
It will take you to a series of generic options about your privacy that you can deactivate to maximize it. Here is what each of them does.
- Applications that use your advertising ID : As a user, you have a unique identifier that Microsoft can share with other applications so that they know what type of advertising to show you. This is not only used to differentiate between users but it them to know your likes and interests.
- Content through your language list : The web pages you visit can access your list of languages configured in Windows to know which ones you use and show you content accordingly.
- Track app launches : Microsoft can tell what apps you’re running on your computer. This may be one of the aspects that can most violate your privacy and although it does so in exchange for showing you in the search results of the start menu the ones you use the most. It is recommended to deactivate it.
- Suggested content in Settings : Turn it off if you don’t want recommendations in Windows settings.
The second option in the left column is Speech .
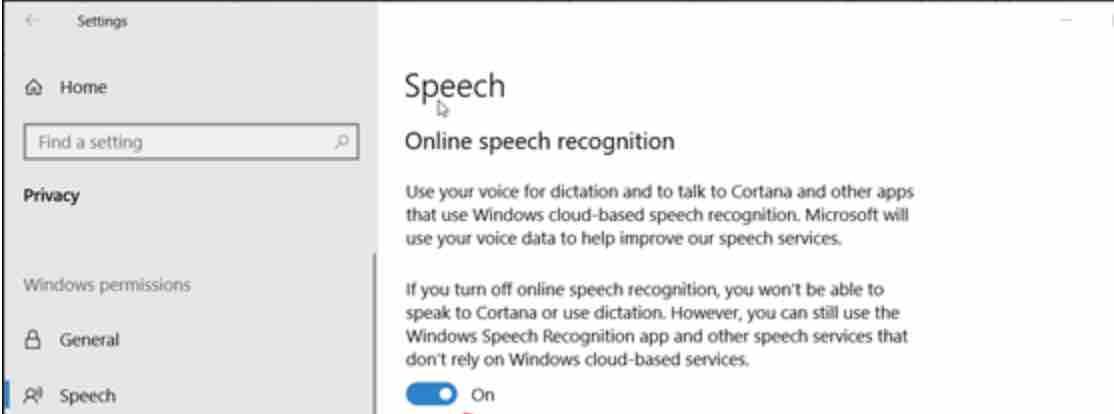
Here, you will be able to disable online speech recognition so that Windows doesn’t collect what you say to Cortana. Windows has its own virtual assistant and as with Alexa or Google Assistant, it collects everything you say. If you deactivate it, you will not send these recordings, although you will not be able to use the assistant, since it will not be able to recognize your voice.
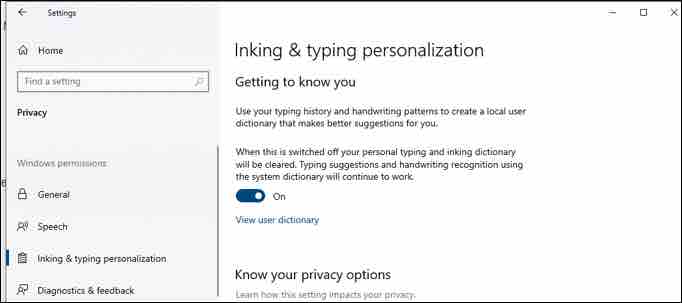
Windows also collects everything you type in, both on the keyboard and by hand if you use a digital pen in order to enrich your language dictionary. Microsoft promises that the data is stored locally and that at most they are uploaded to your OneDrive, but if you do not want to risk it, it is best to deactivate this option.
Read: How to fix the blue screen of death error in Windows 10
Windows 10 also collects a history of everything you do, .i.e. an activity history that it uses for the Windows Timeline function in order to help you continue your work on other devices from where you left off on your PC .
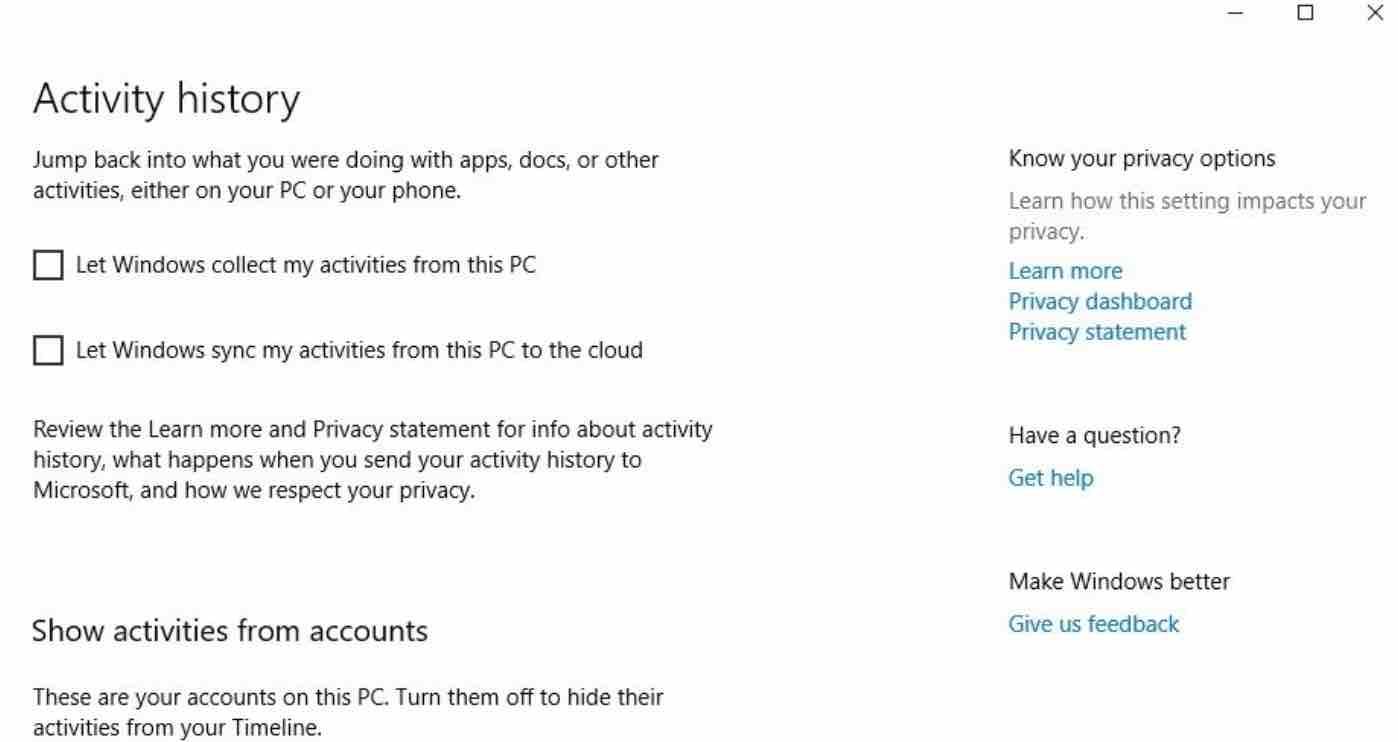
To avoid this, there are two things you can disable: the one that stores the history of the device in the computer or the one that is sent to Microsoft.
The most important to deactivate is the second, since it sends your activity history to Microsoft. You will be able to make these changes within the privacy settings, in the Activity History section which you can access by clicking on the corresponding option on the left column.
In this same category, but a little lower than the main options, you can disable local accounts so that Windows does not collect what you do with them.
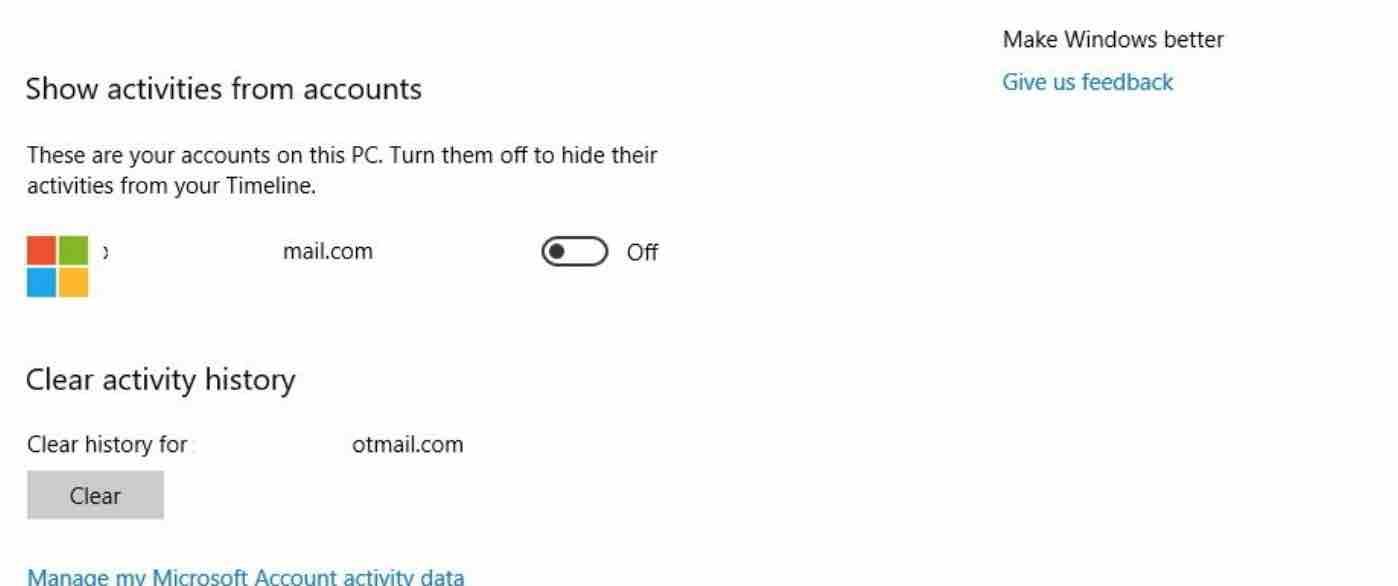
In addition, you can also click on the Clear button to delete all the history data that has already been collected.
Control what Cortana can collect
In the section above we have already seen some hints of how Cortana can also affect your privacy through speech recognition. But there is more, because you can also decide if you want Cortana to listen at all times to know when you invoke the Hey Cortana command and you can configure what data the wizard accesses as well as to disable Cortana altogether. To do this, in the Windows Configuration menu click on the Cortana option .
Once you enter Cortana’s options, click on the Talk to Cortana section on the left column to change how and when you can interact.
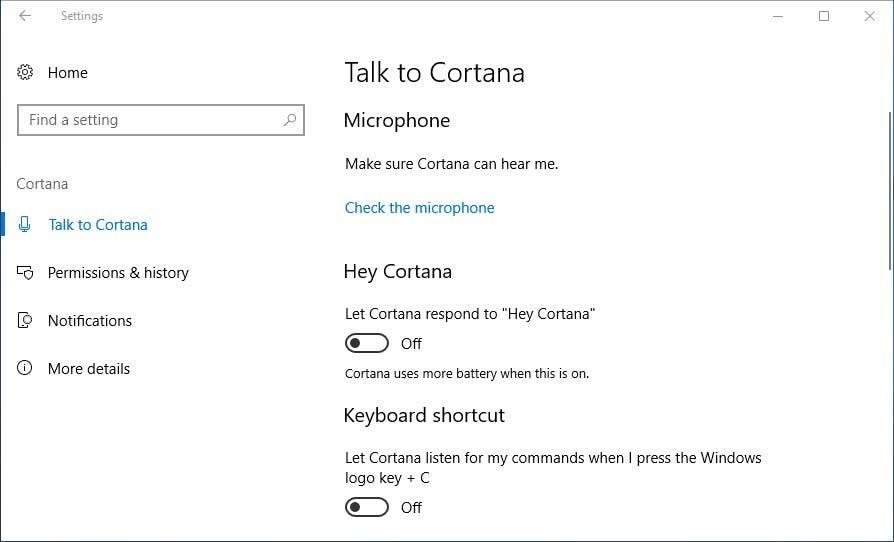
Here there are three options you can disable:
- Hey Cortana : Allows Cortana to answer when you call her – will make the assistant always hear what you say , which can not only have consequences on your privacy, but also uses more battery power if you are using a laptop.
- Keyboard shortcut : Enables Cortana to listen to your commands when you press the keys of ‘WindowsLogo’ + C . This option is not so important, but if you want to stop cortana from listening and minimize the use of the wizard, you may also want to remove it.
- Lock screen : Cortana can be used when your computer is locked. If you disable it, Cortana can only be used when your computer is unlocked.
Now click on the Permissions And History category on the left column within the Cortana options. You will access a new screen in which you will be offered three options.
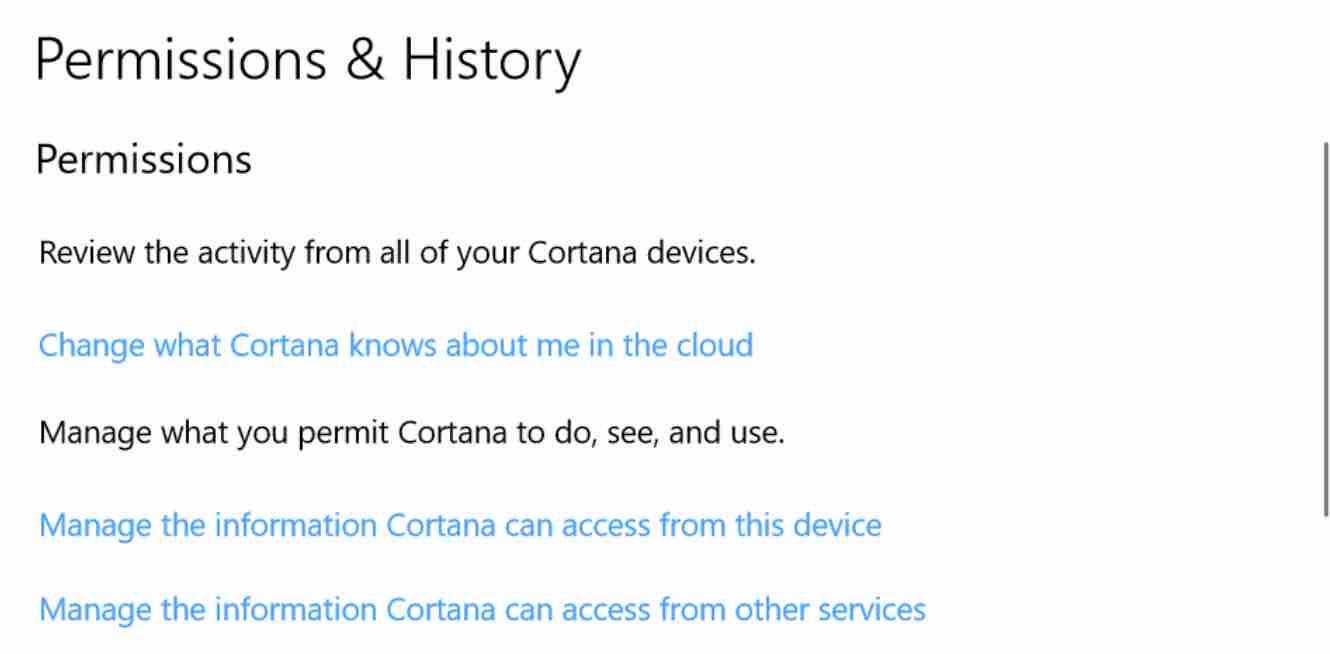
If you click on ‘Change what Cortana knows about me in the cloud’ , a Cortana window will open up informing you that the wizard will collect all the data for which you have access permissions. On this screen you can obtain a copy of the data that has been collected about you or permanently delete it with the Delete button , but if you do not deactivate the permissions, it will start collecting it again.
Read: Windows 10 doesn’t remember your WIFI password? Here is how to fix it.
If you click on ‘Manage the information that Cortana can access from this device’, you will configure the permissions that Windows 10 grants to Cortana.
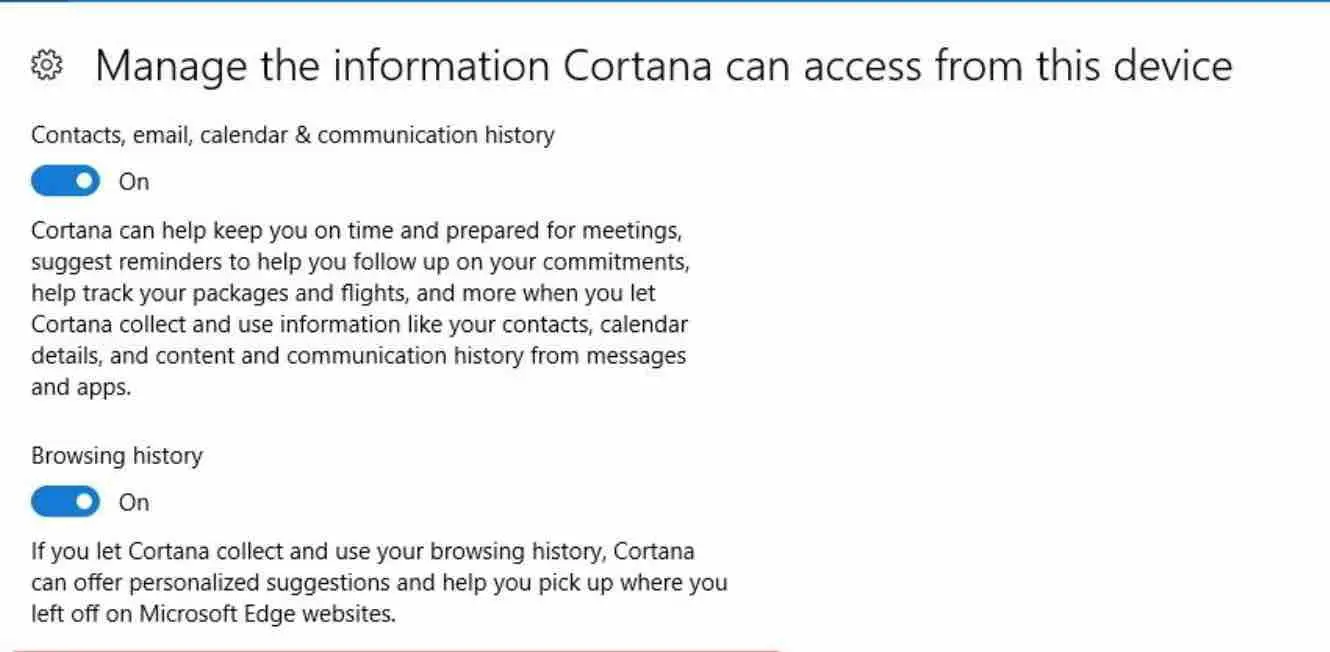
Here, simply deactivate what you do not want Cortana to collect about you such as the location, your contacts and emails, or your browsing history.
And if you click on ‘Manage the information that Cortana can access from other services’ , you will access the list of accounts linked to the assistant where you can get more information about yourself. To unlink any of them, just click on it to get advanced information and see the unlink button.
Control the search engine and your search history
Windows 10 has integrated together with the start menu but with an independent button, a search engine that serves to find things on the Internet and on your computer. We are going to approach this search engine on two fronts, first controlling the online content it accesses and Bing’s history and second controlling the local files it can access so that no results you may consider indiscreet appear. To start, click on the option Search within the Windows Settings .
Once you enter the Search settings , click on the Permissions and history section (1) that you have on the left column of the window.
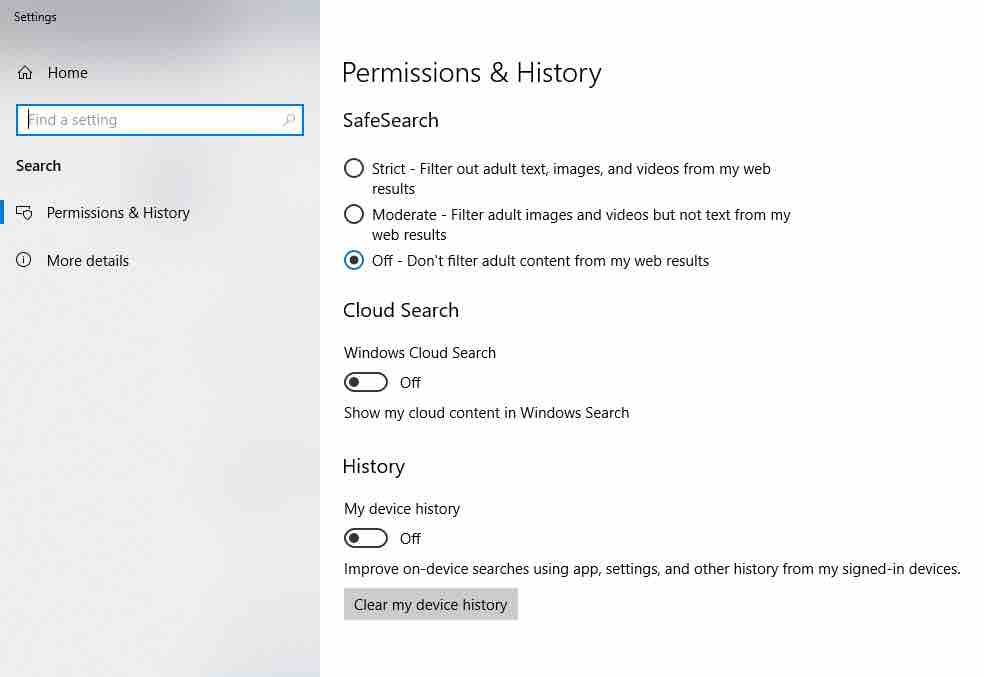
The first option that will appear is the Safe Search option . If you do not want the Windows search engine to filter content, click on Off, but if you think that it is good for the Windows algorithm to analyze your searches to see if there is adult content, then leave one of the other two options activated.
Still within the Permissions and history section , but further down, you will reach the Cloud Search section . Here you can decide if you want to disable the search engine from collecting your data in the Microsoft cloud . You will be able to deactivate the search of your emails, photos, documents and files, both in your conventional account and the specific emails of professional and educational accounts.
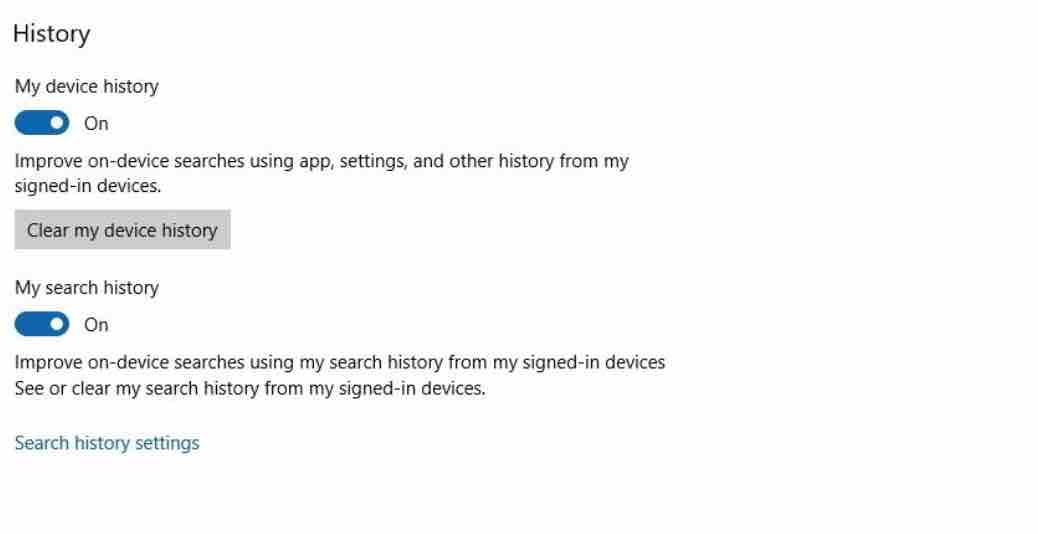
And at the end of the Permissions and History section you will find the last options, almost the most important. The first is to allow the search engine to access the history of devices that have logged in to your Microsoft account. This can be deactivated it so that it does not take them into account. Underneath, you will see a button to erase all your device history on Microsoft servers.
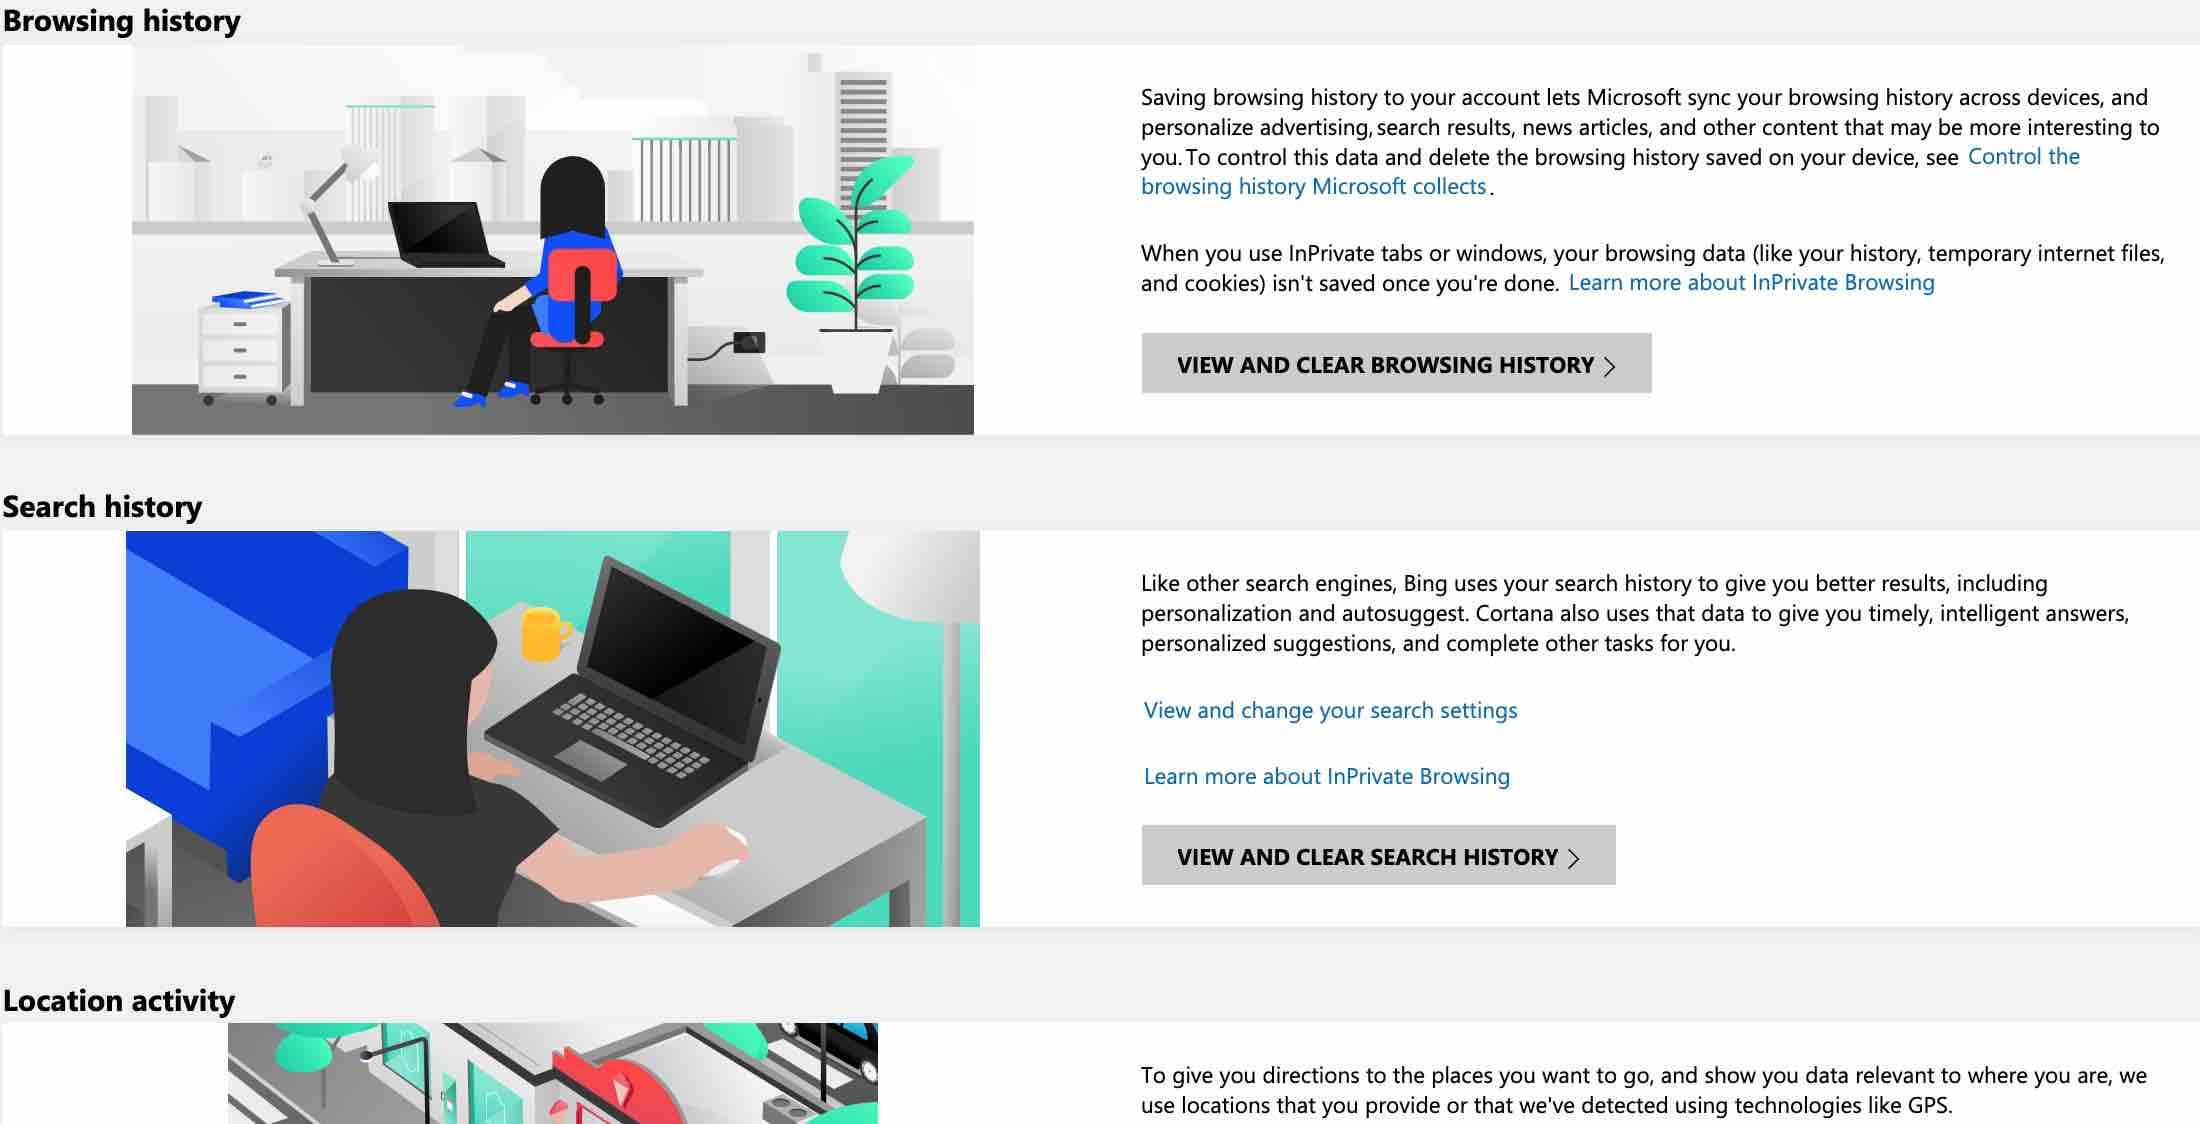
You will have the option to disable access to your search history which is used by Windows to access everything you have been looking for on Bing from all the devices where you were logged in with your Microsoft account. If you want to check out that history, click on the Search history settings link to open it in a browser.
If you click on Search History Settings , the history with everything you’ve searched for in Bing using devices with your Microsoft account will open in your browser. On this page you can check out your searches. You may want to click on the link View and clear search history to access the page from which to could delete everything you have searched for which is no longer on Microsoft’s servers.

Now click on ‘Searching Windows’ section on the left column, where you can configure which files the Windows search engine indexes. Here it should be noted that they are all indexed locally on your computer, but Microsoft warns that third-party applications could access this index , so it is also recommended to control what files Windows has access to.
For starters, when you enter the section ‘Searching Windows’ you will see a first category Indexing status where you are informed of how many elements are collected. Below you can choose two indexing methods in Find My Files . The recommended option here is the Classic one , because it only indexes your PC’s desktop and your user’s folders.
Further down , you will find the ‘Excluded Folders’ section . This is a whitelist. If you click on ‘‘Add an excluded folder’, button you can decide which other folders you don’t want the content to be indexed from. Use this to hide files with sensitive information from the search engine that you do not want others to find on your computer or other applications.
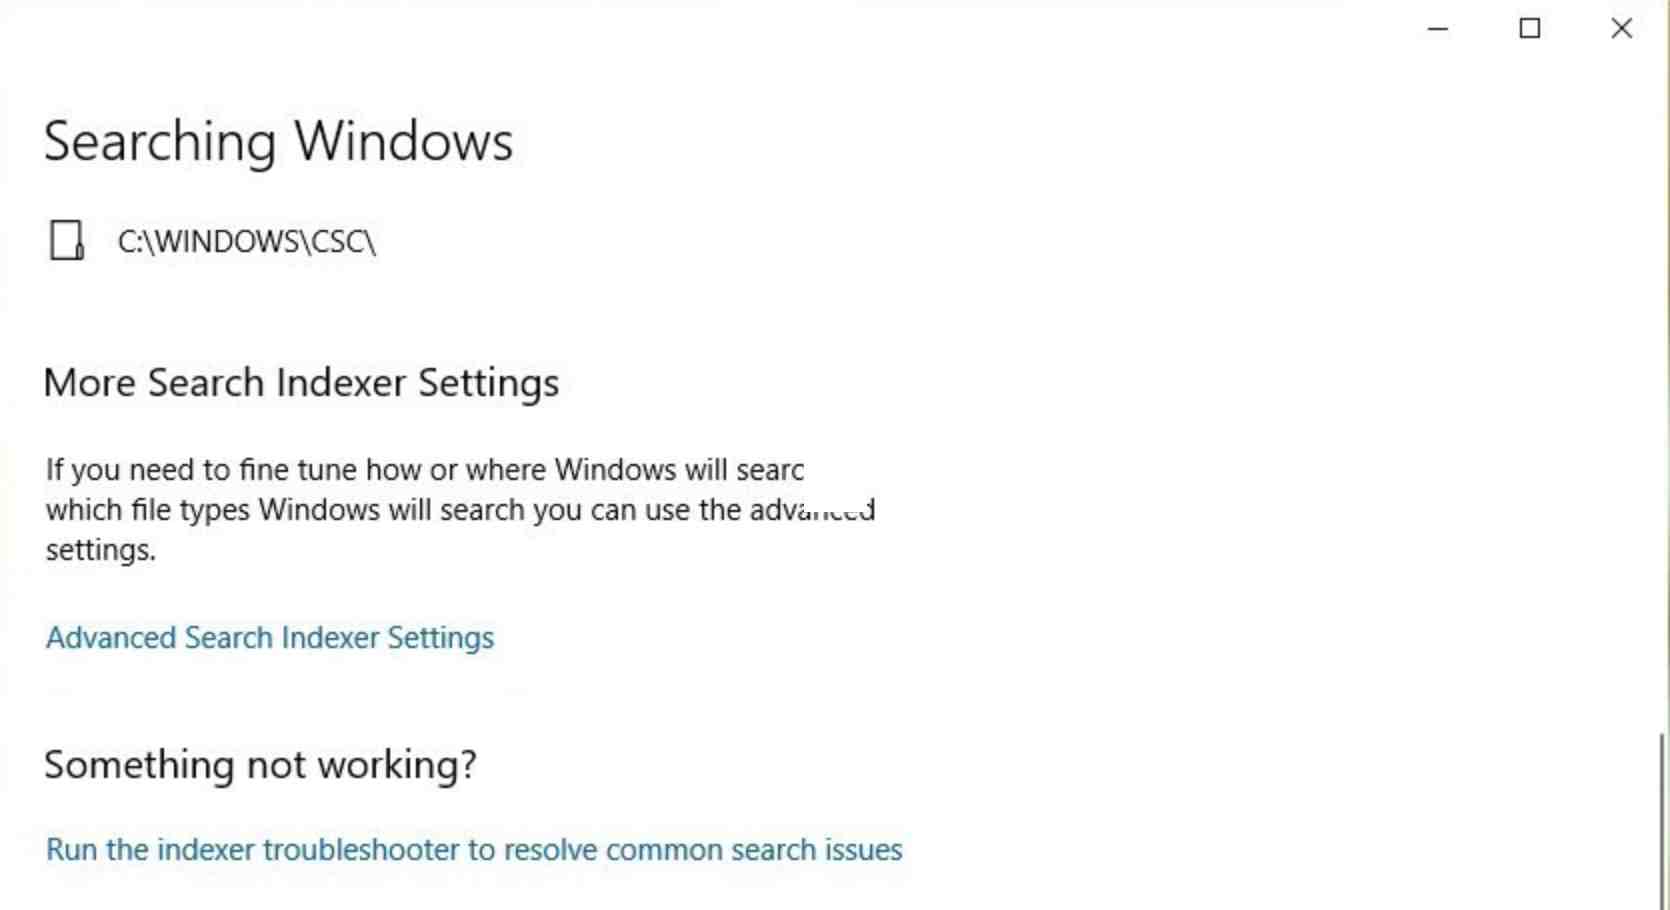
And if this is not enough, click on the ‘Advanced search indexer settings’ link . This will open up a window in which you can modify the folders where the content is indexed and if within this window you click on the Advanced Options , another one will be displayed where you can even decide the file types and formats that you do not want to index. . Don’t want the search engine to review your videos or text documents? This is the place to change it.
Read: How to fix bluetooth problems in Windows 10
Delete what Microsoft knows about you
Microsoft has a web page where it shows you all the data it has stored about you which you can view and delete. This data is collected from your PC, mobile phones using Windows services, the Edge browser or the Bing search engine. To access it, go to
account.microsoft.com/privacy .
Once inside, you will be able to see the types of data they collect along with an explanation of why they do it.
Each table with the types of data collected also has a link to the activity history, but to the specific section to manage that data.

When you click on My Activity tab , you will see the explore data page where you will be able to can see the different types of data.
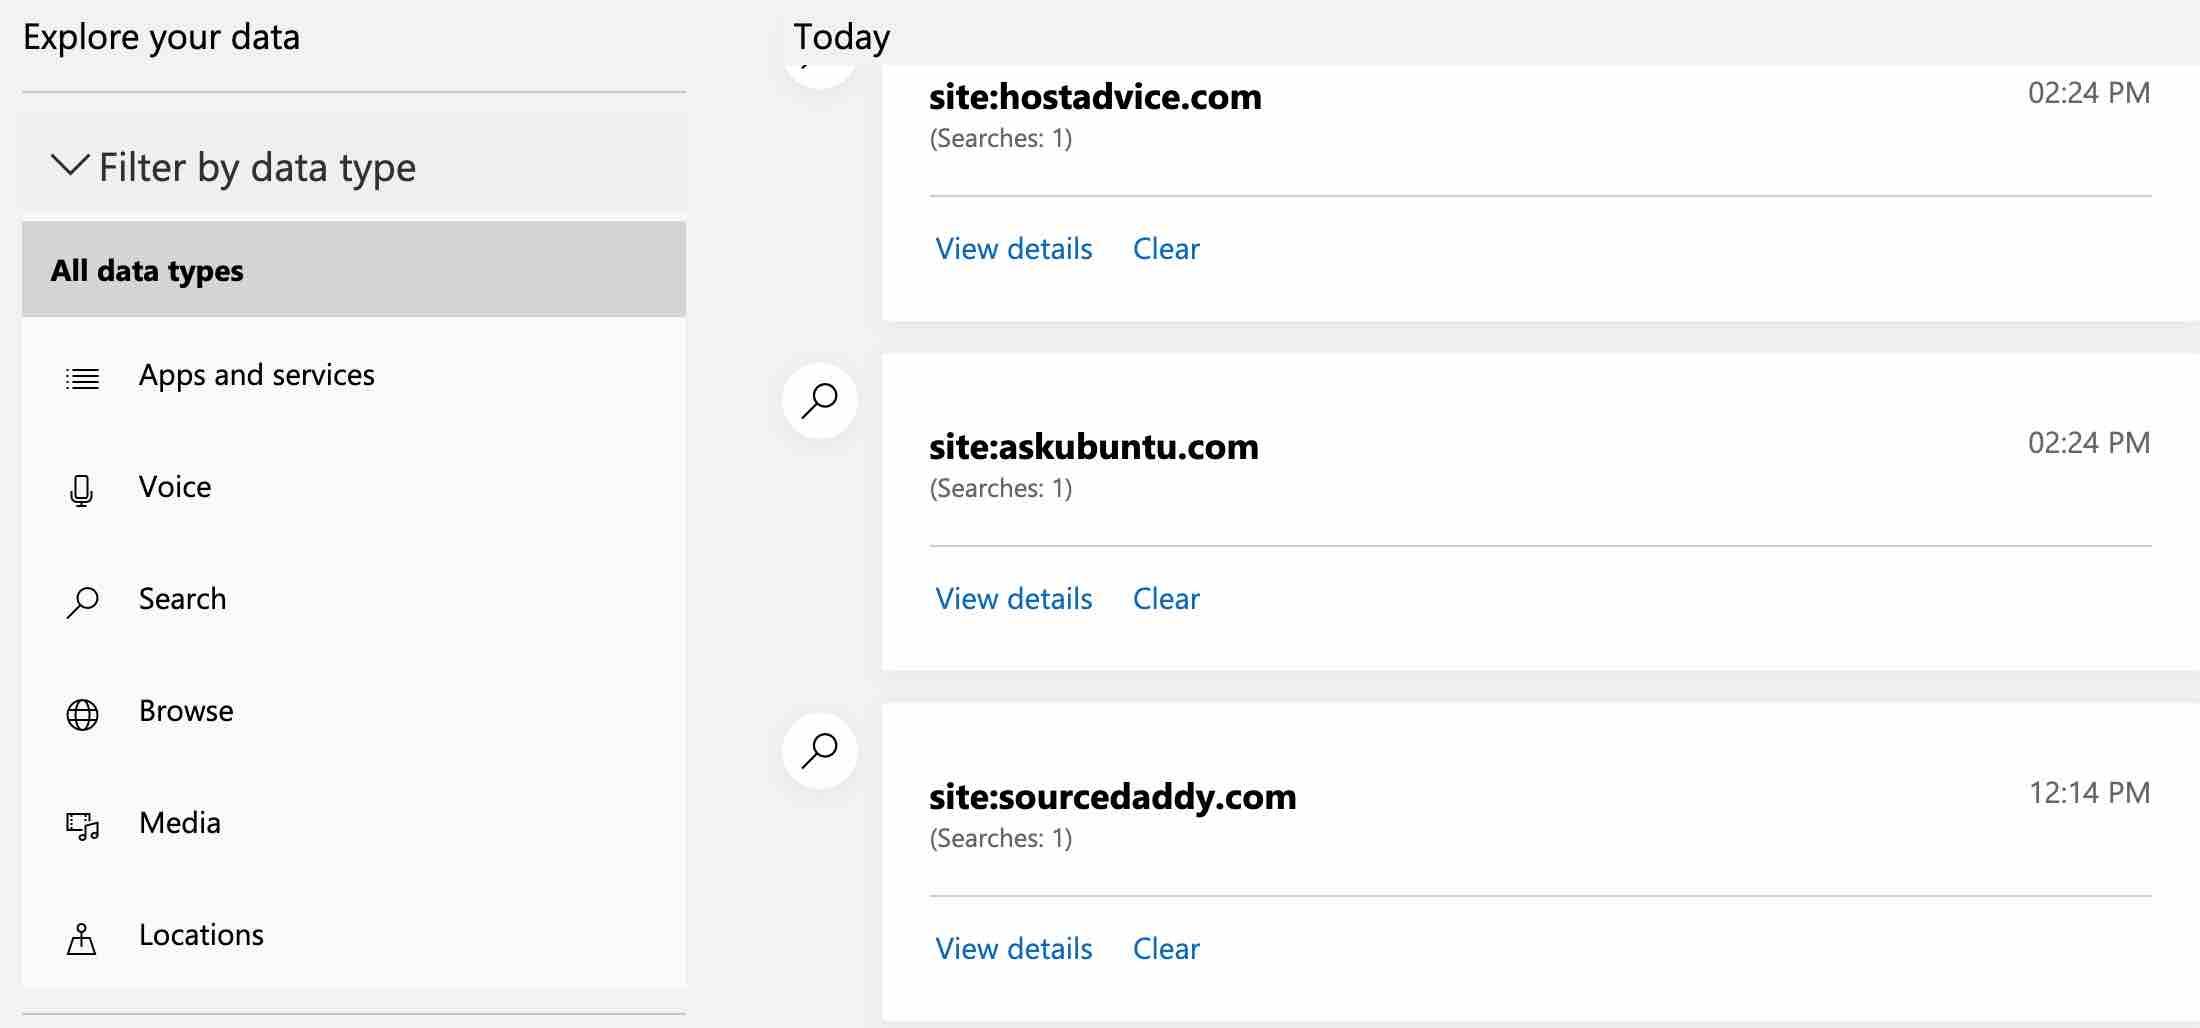
By default you will see all, but you can click on each of the types to view more details. Notice a Clear link which deletes the related section data.
If you enter a specific category you will see a Clear activity button at the top which is used to delete all the data that appears in the list underneath.
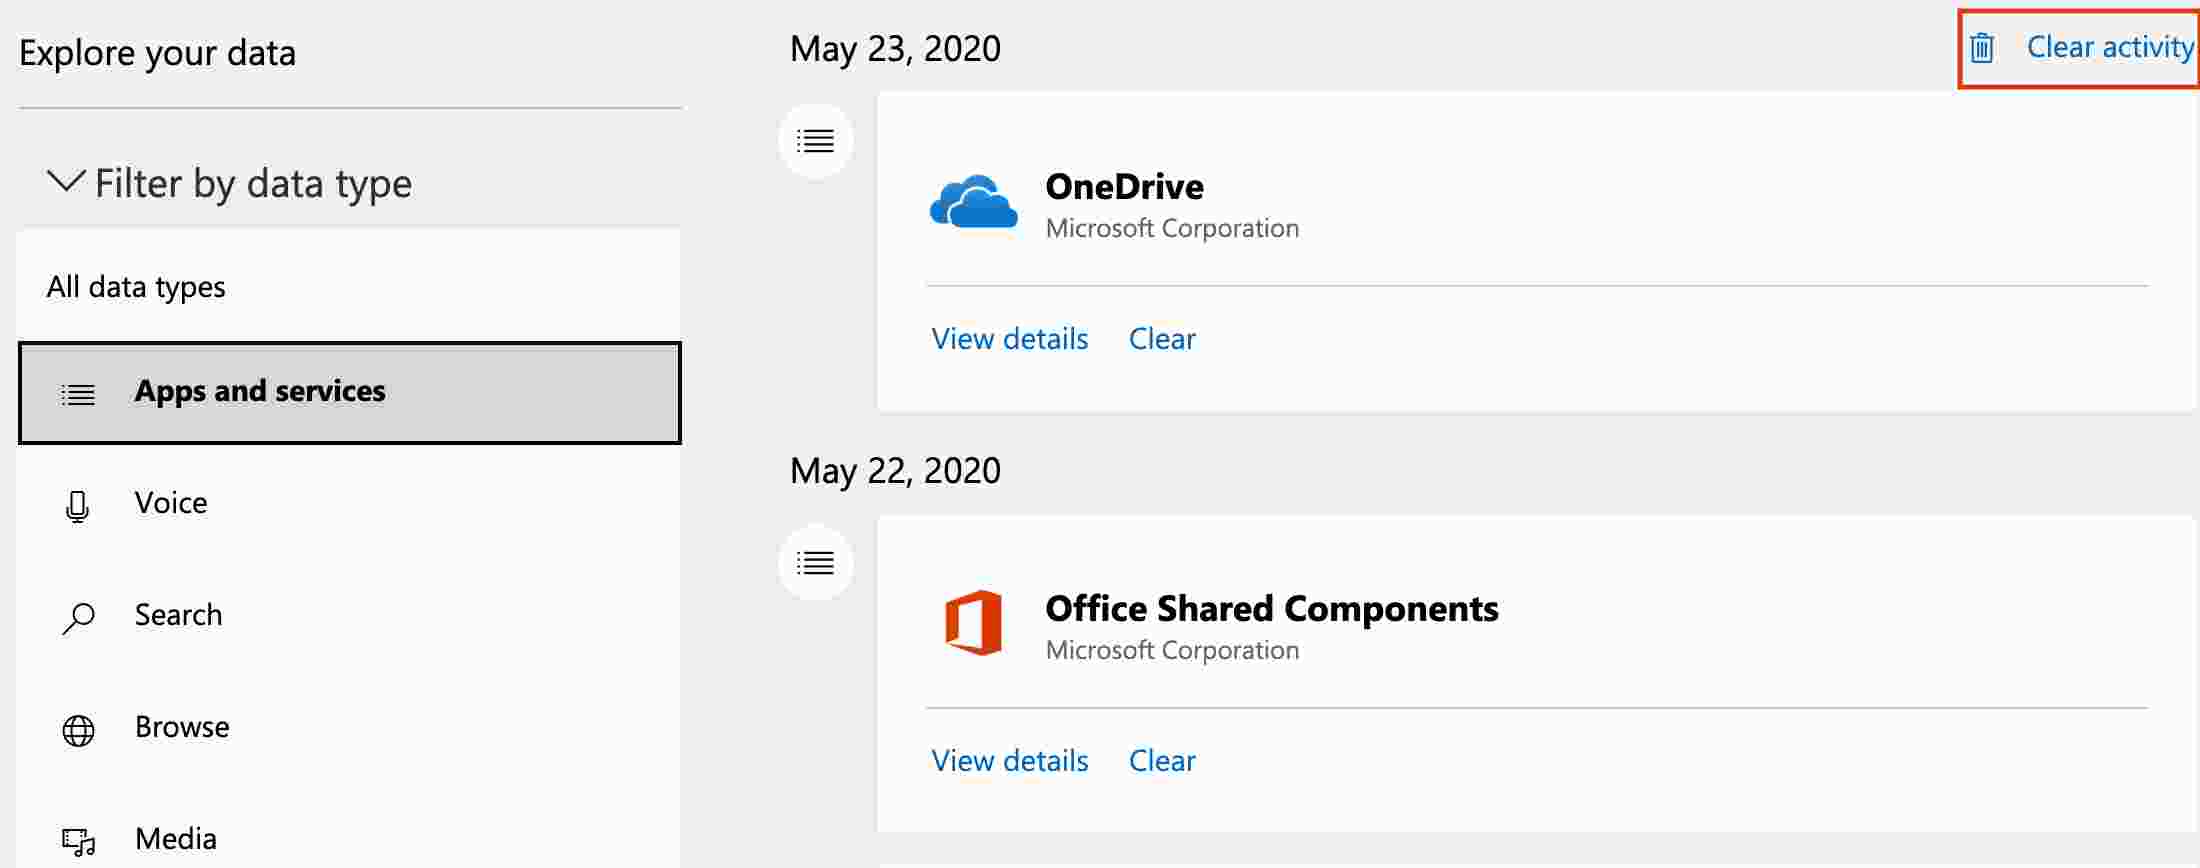
If you click on the button to clear all the data in the list, a window will show up in which you will be informed of how deleting that data may affect you. Under this notice, two buttons will appear to confirm whether you are sure you want to delete the chosen data set, and you only have to click on the Delete button to confirm its deletion.
Control what apps can access
Now we move on to deal with the permissions that you grant to the applications . Your computer may have different types of active data sources, such as GPS for location, camera, microphone or notifications that many applications would need to access in order to carry out its function.
We will explain below how to manage these permissions in order to limit the access to the data that your applications retrieve.
Re-enter Windows Settings by clicking on the gear icon in the start menu or notification center and click on the Privacy option that appears almost at the end.
Read: Benefits of using VPN while working at Home
We’ve used privacy settings earlier to manage generic Windows permissions. But now, you have to scroll down on the left column until you find the Permissions section of the application . The types of permissions for managed applications are the following:
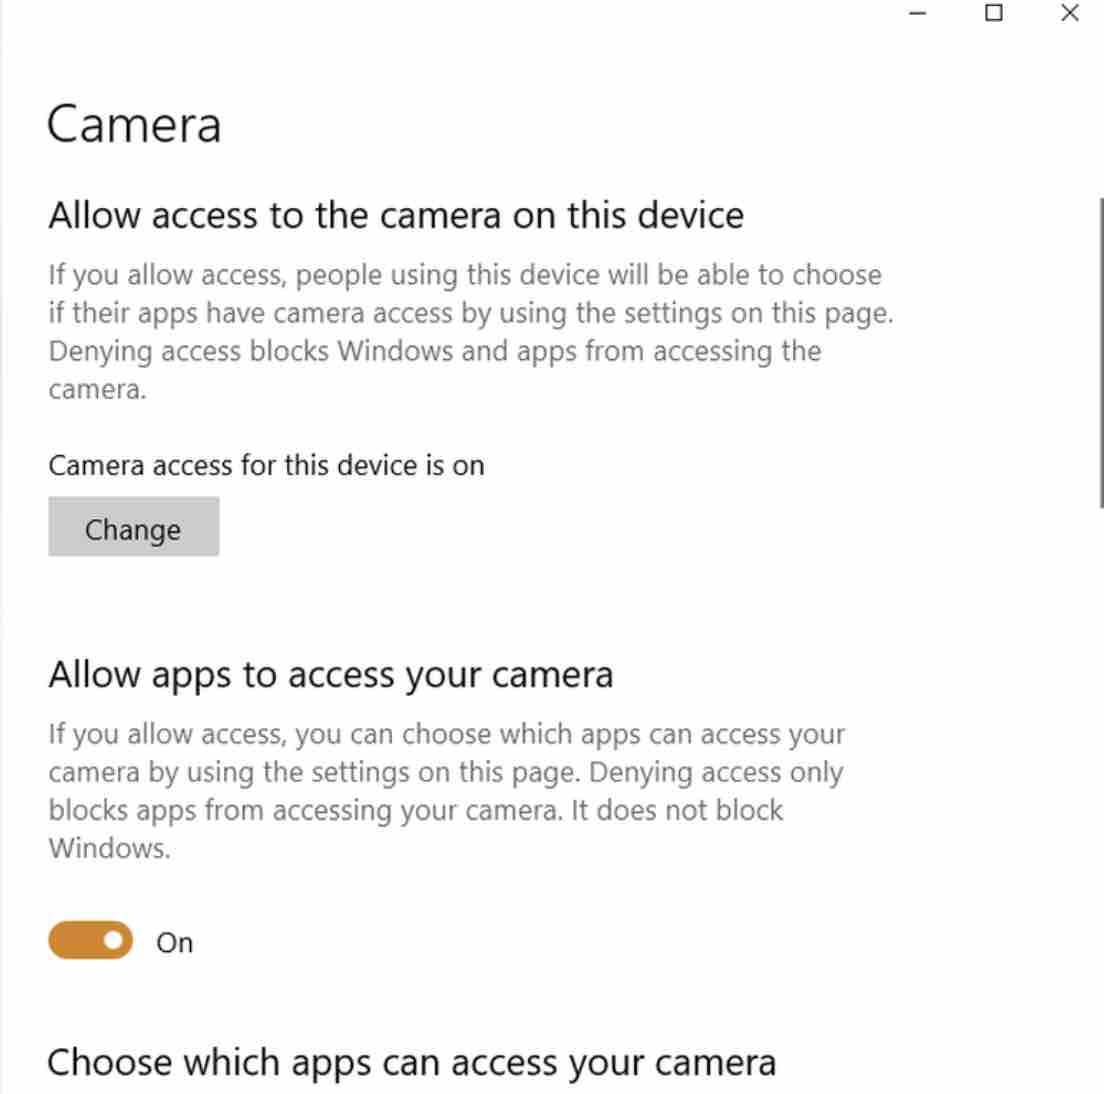
- Camera : Permission to access the camera connected to your computer, the native camera of your tablet or the webcam of your PC or laptop.
- Microphone : Permission to access the microphones connected to your device.
- Voice activation : Permission for applications to listen to dictation. Only available if microphone access permission is granted.
- Notifications : Permission to access notifications from Windows users.
- Account information : Permission to access your account data, such as your name, image and other related information (user account control windows 10).
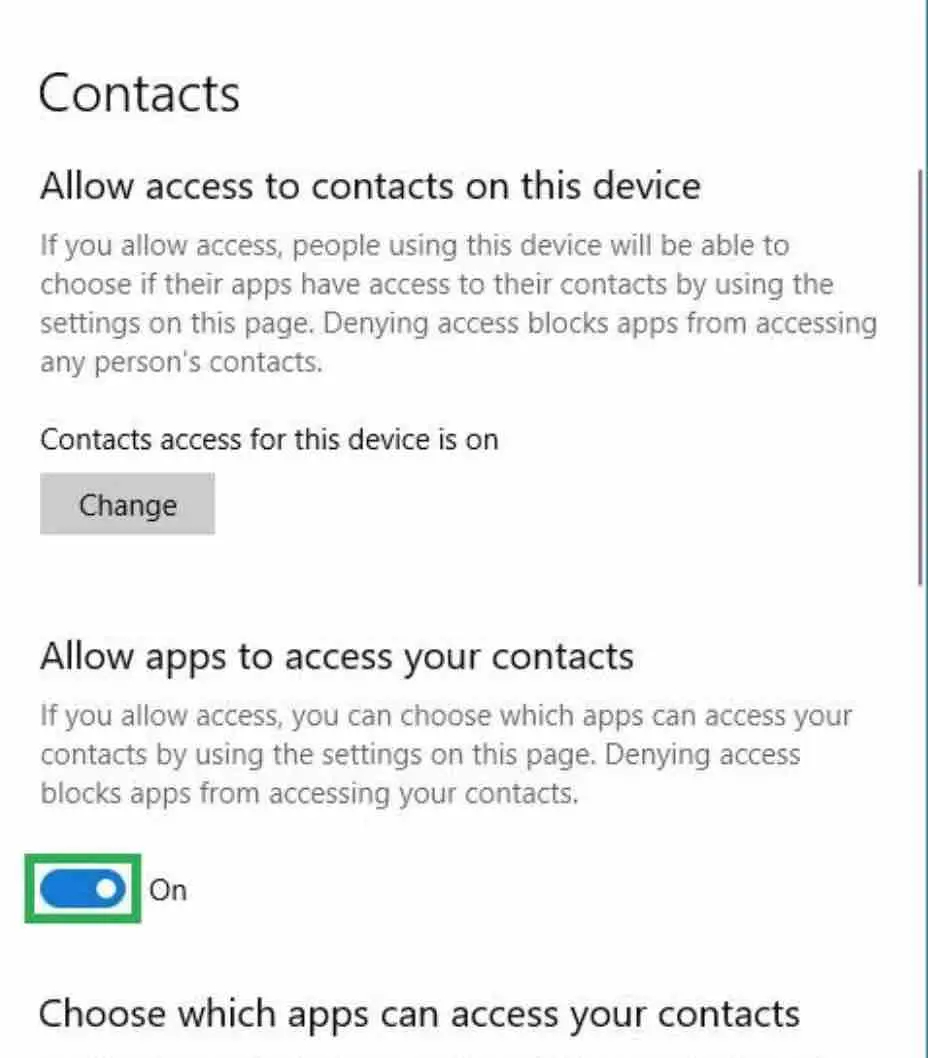
- Contacts : Permission to access the contacts you have configured in Windows 10, in the Contacts application linked to your Microsoft account.
- Calendar : Permission to access the calendars of your Microsoft account, and all the information they contain.
- Phone calls : Permission to allow applications to make phone calls with your computer.
- Call History : Permission to allow applications to view the history of all calls related to the phone linked to your equipment.
- Email : Permission to access the email that you have linked to your account.
- Tasks : Permission to access the information of the tasks that you have configured in your Microsoft account to obtain both their information and to add others.
- Messages : Permission to allow applications to read and send SMS or MMS messages through the mobile that you have linked to the device.
- Radio signals : Permission to control which applications can access the radio signals received by the equipment, such as Bluetooth to receive or send data.
- Other devices : Permission to share and synchronize information with wireless devices so you don’t have to explicitly pair them to your computer or tablet.
- Background apps: Permission for apps to run in the background.
- Application Diagnostics : Permission for applications to access diagnostics data from other installed applications.
- Automated file downloads : Permission for storage applications to automatically download files to your computer.
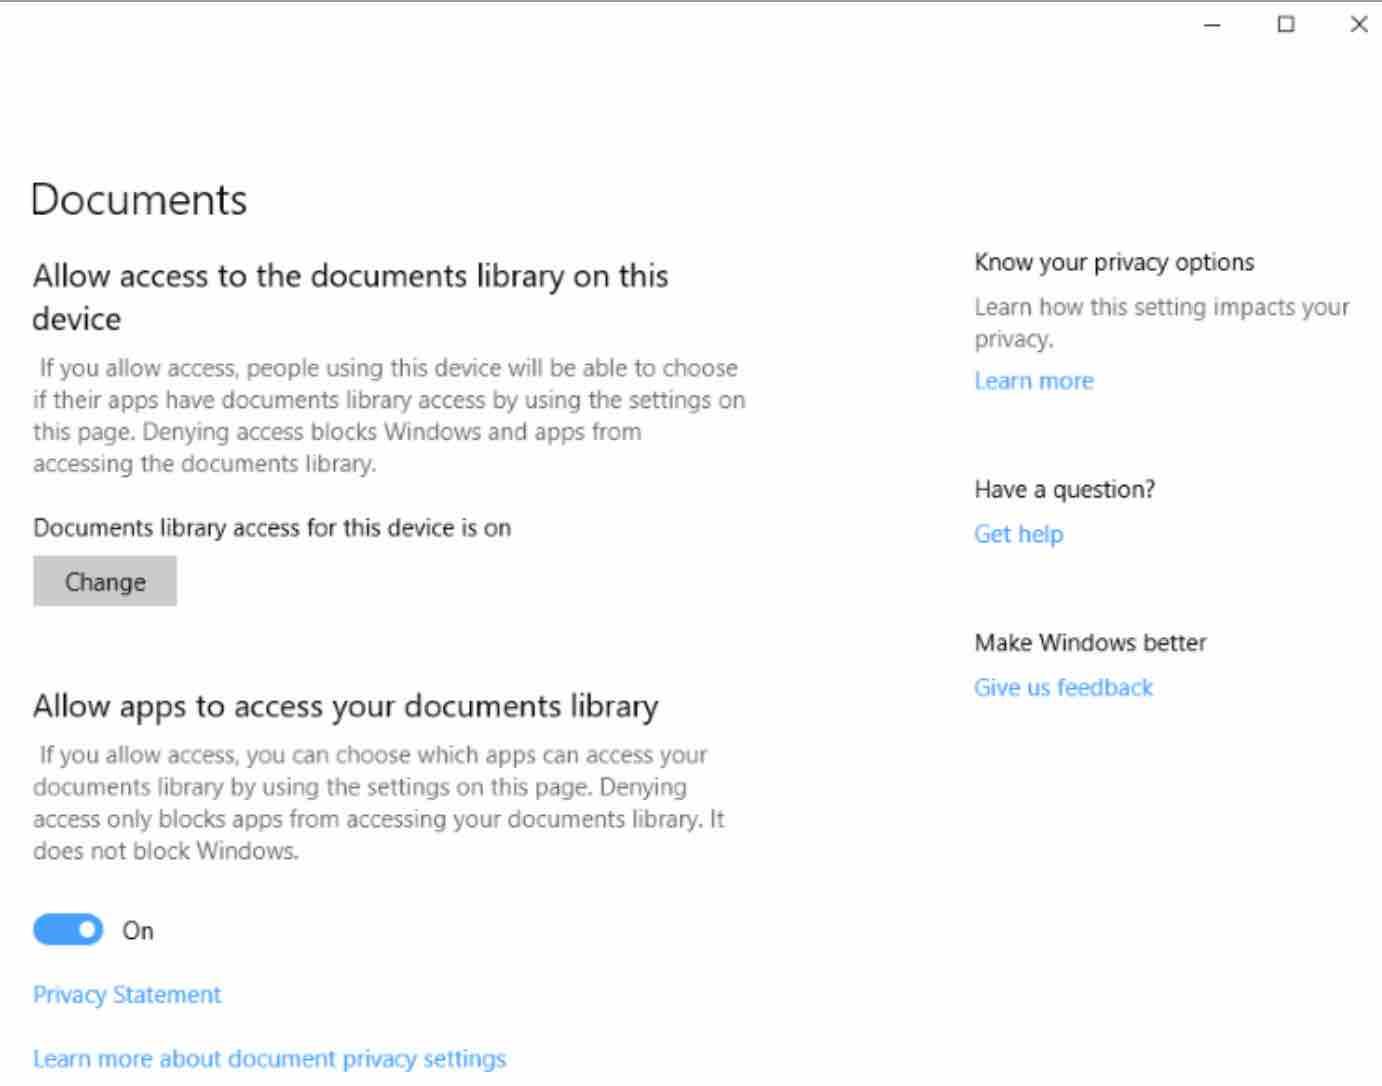
- Documents : Permission to access the document library on your computer.
- Images : Permission to access the image library on your computer.
- Videos : Permission to access the video library on your computer.
- File system : Permission to access all files on your computer, including documents, images and other documents including all files in the linked OneDrive account.
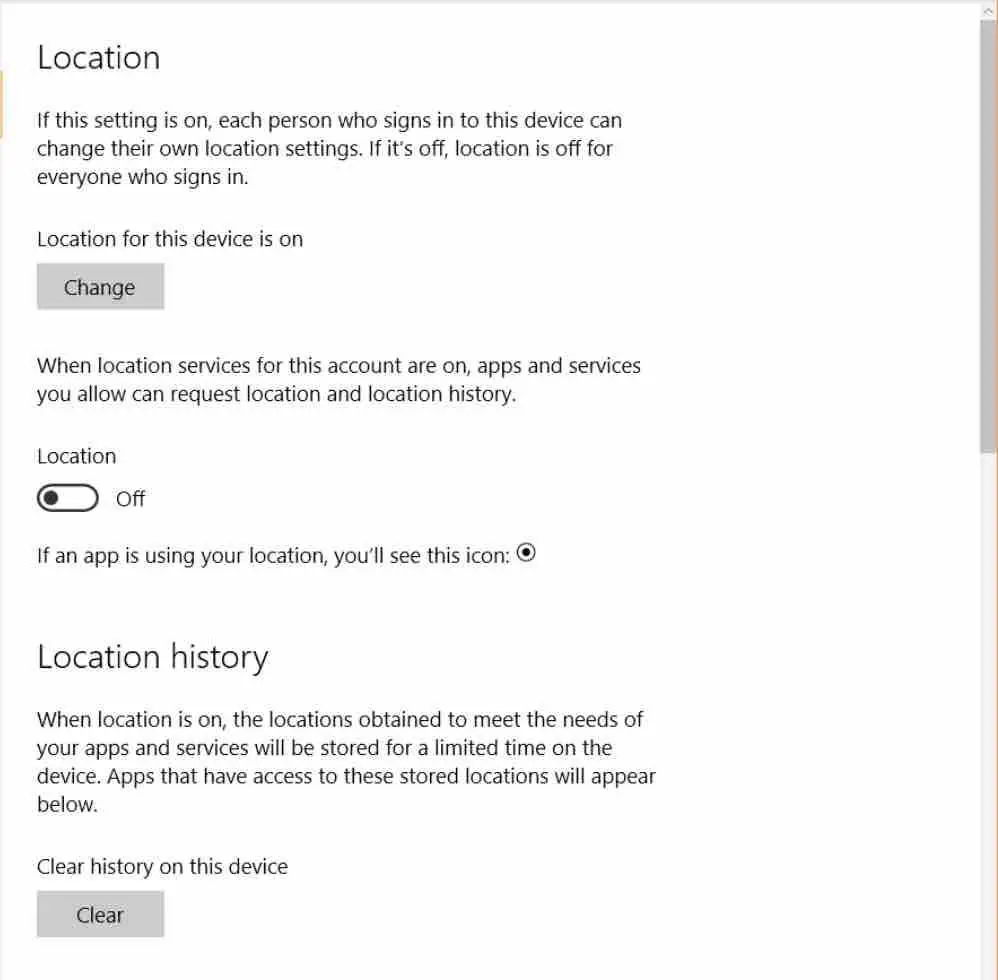
When you click on any of these types of permissions, you will enter a page where each one has the same options. The first is to disable the access of your own computer to this type of information .
Read: Best Android emulators for Windows 10
By default it is always activated, but you can deactivate it by clicking on the Change button . If even your computer cannot access information such as the location or the microphone, then you will not be able to manage the permissions of the apps because none will have access.
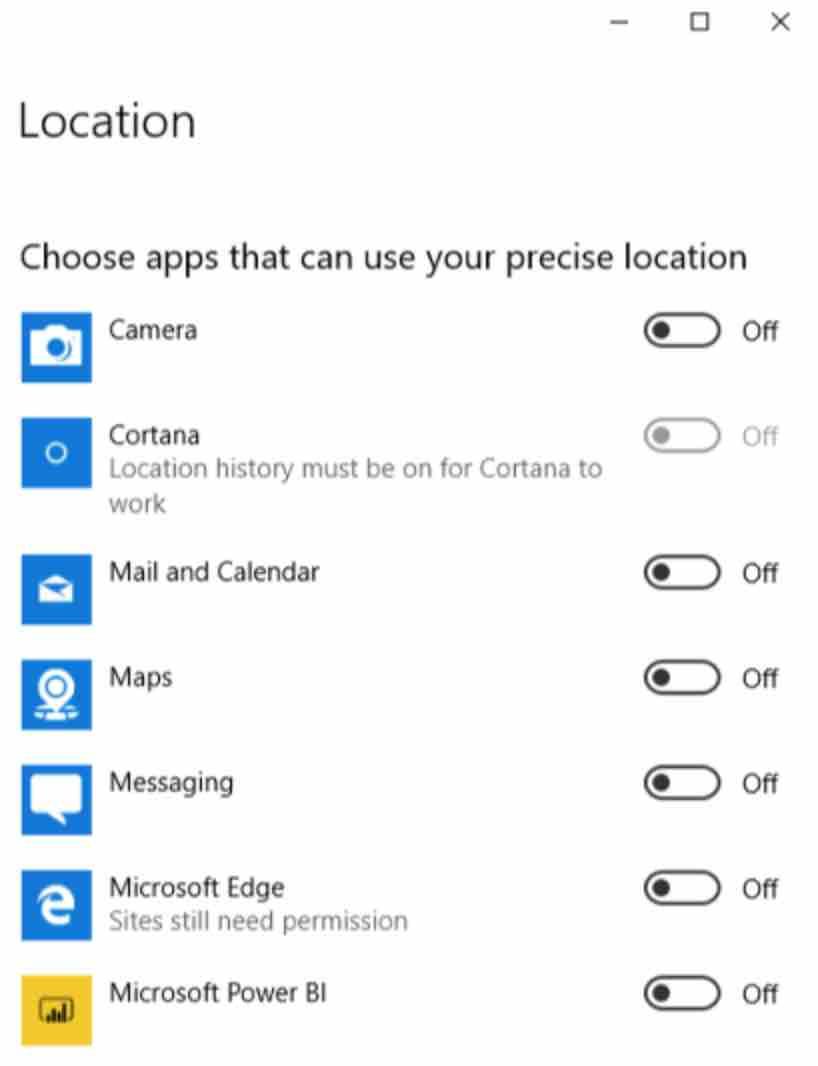
Below, you can configure which applications have access to the specified location in case the latter has been enabled here :
And therefore, you will have the list with the applications that can request each of the permissions , where you will be able to activate the permission or deactivate it individually.
In cases where it is a permission from which a history can be made, Windows will give you the possibility to delete the history.
Set up a proxy or VPN
If you want to maximize your privacy when connecting to the Internet , there are two aspects that can help you: a VPN and a proxy . VPN networks help hide your real IP address when you connect to the Internet and can even pretend that you are connected from another site.
Meanwhile, the proxy receives the access requests from your PC and camouflages them by sending them to another server.
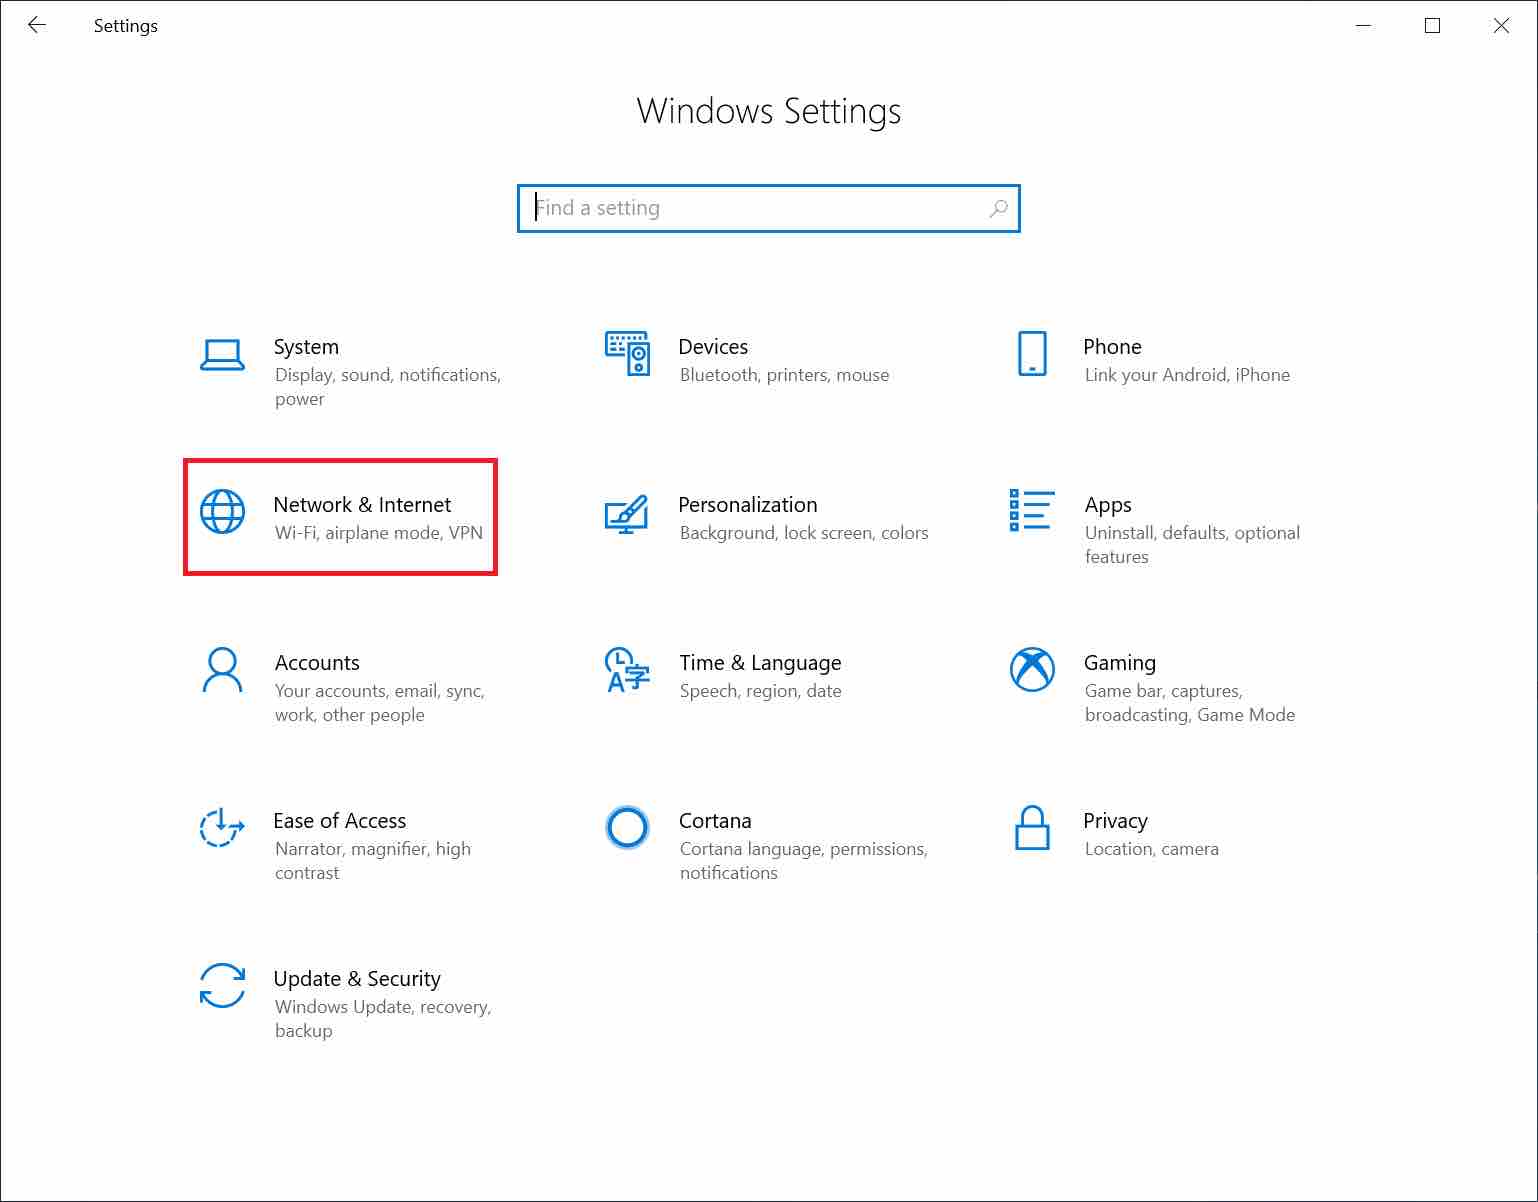
If you configure this locally you won’t have to do it in every browser , something that can save you time and maximize your privacy. To get started, open Windows Settings by clicking on the cogwheel icon in the start menu or notification center, and click on the Network and Internet option as shown above.
Once inside the Network and Internet options , click on the VPN section on the left column .
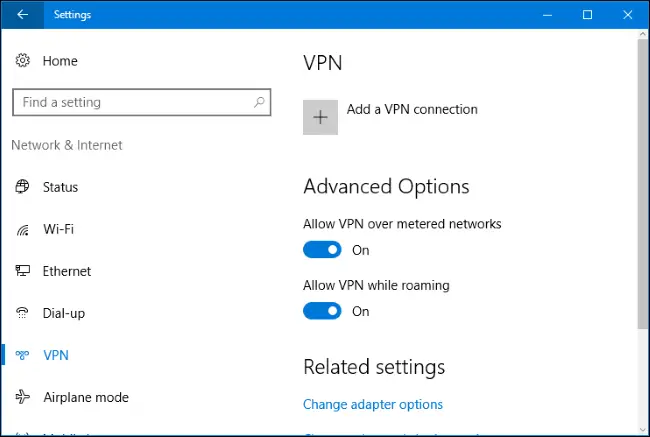
You will enter a menu where you will have the option to add one and give it certain permissions.
If you scroll all the way down on the left column , you will find the Proxy section .
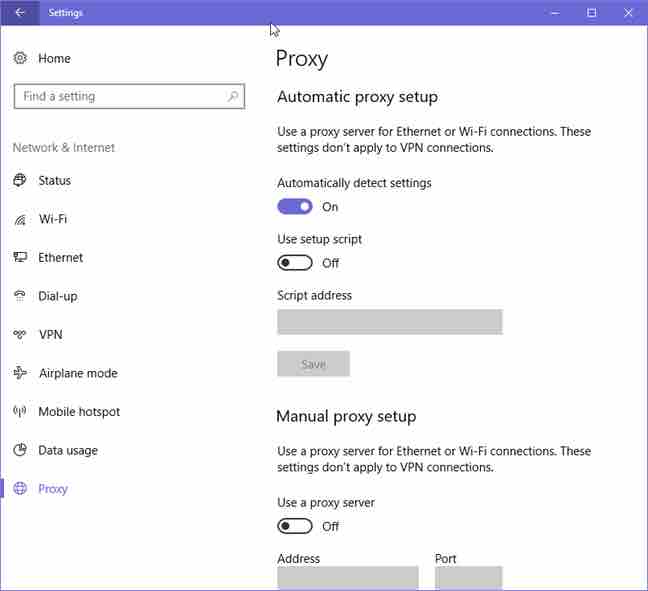
Here you can either configure an automatic detection of proxies or you can do so manually.
Beyond Windows, things to consider
With all these steps and tips , you can make Windows collect the least information about you. In addition, it is also important to be careful with the applications that you install . Not only because of the permissions that can be given, we have already explained how to manage them, but because some could do more than they tell you and include some type of system that tracks what you do.
Take a good look at the description of each one to get rid of doubts and prefer to download apps that are open source you can because of their greater transparency towards the users.
If you like the content, we would appreciate your support by buying us a coffee. Thank you so much for your visit and support.